Business Flow
General information
The Business Flow feature facilities system customization, and it is used to show a particular form for a specific user role at a certain
step of the workflow (i.e. state of an activity). A Manager and Operator role, for instance, might see different forms by implementing a
workflow scheme and using a business flow.
Overall, working with a Business Flow requires the following steps:
- Create a workflow scheme.
- Set of forms which will be displayed depending on the state of the workflow process and the user role.
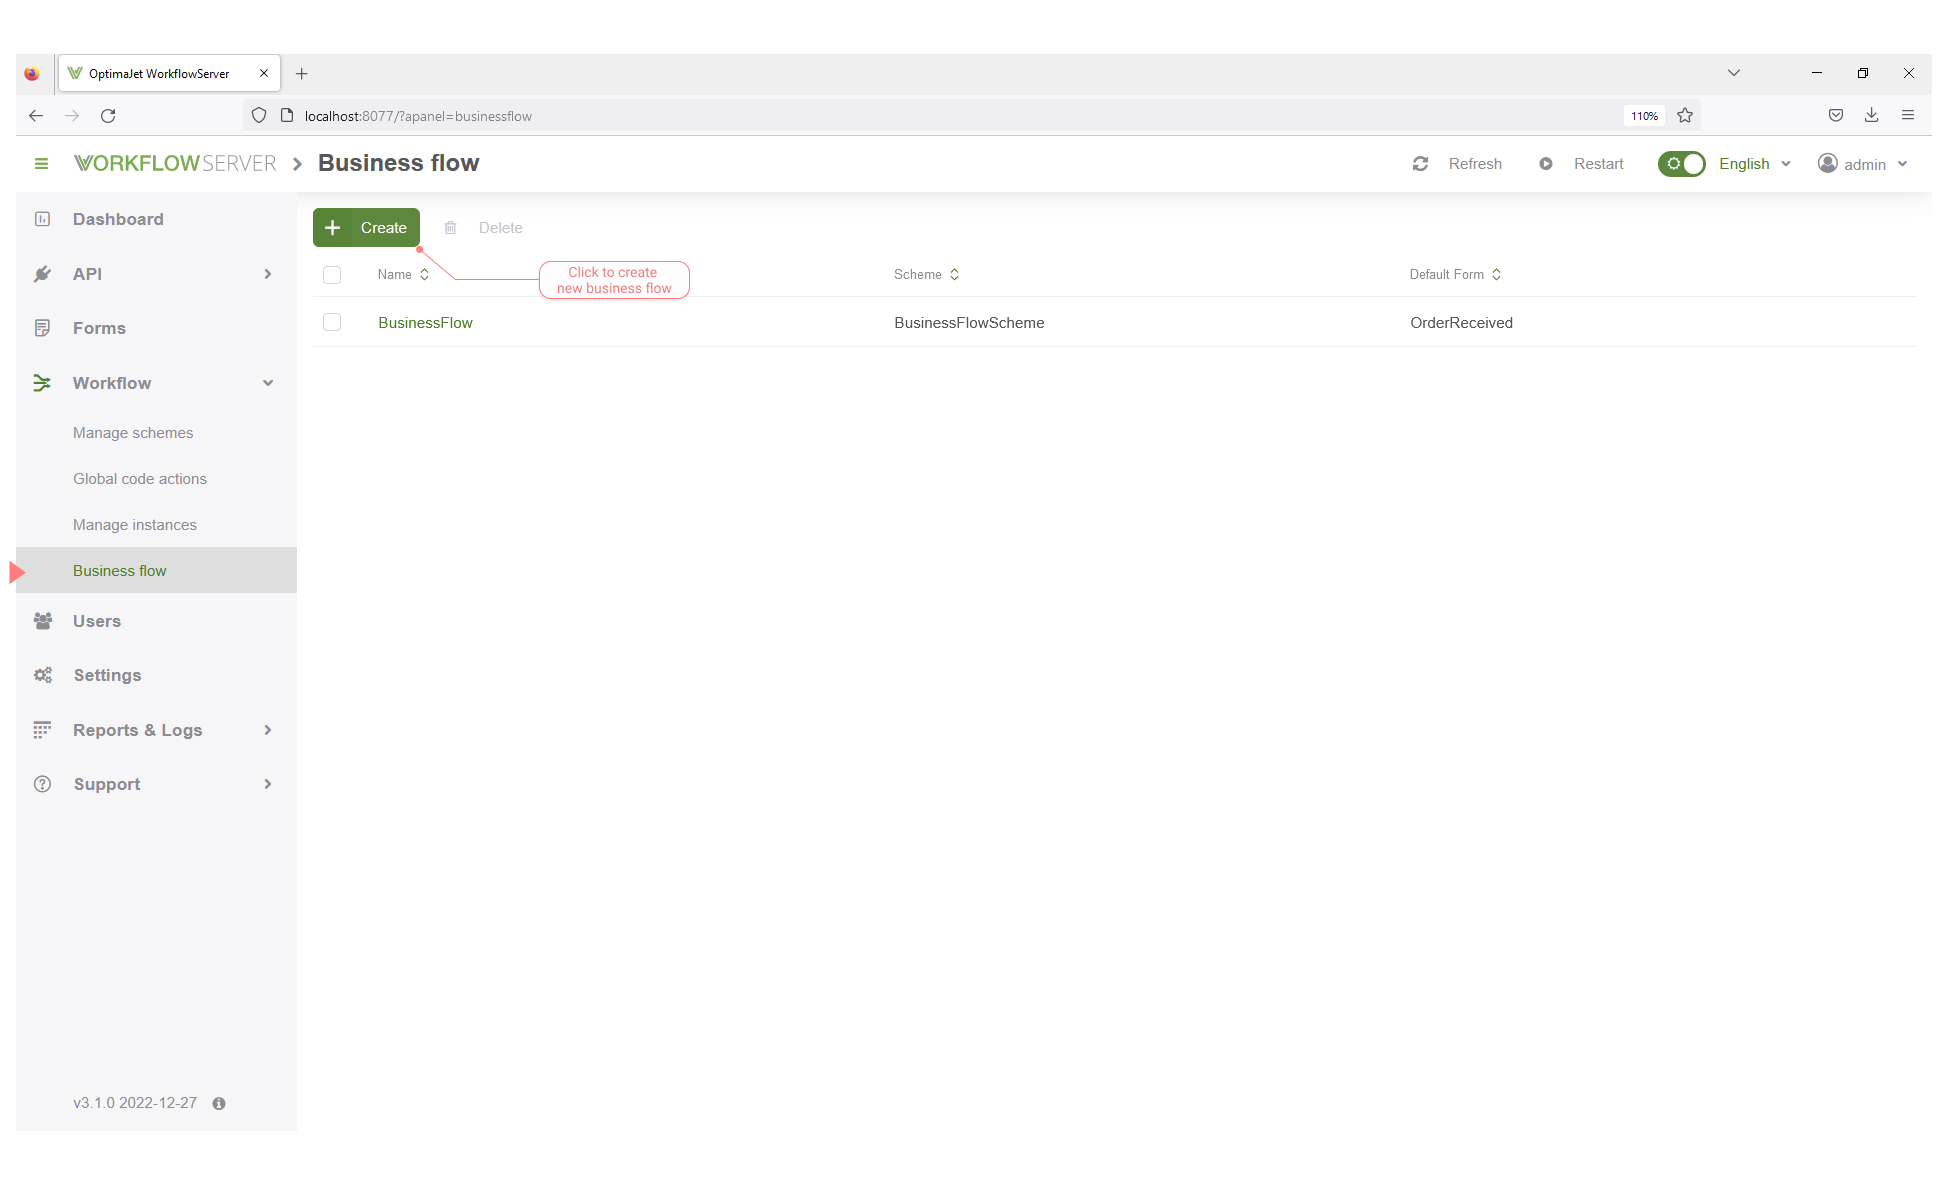
Workflow Server (WFS) provides an end user interface to create business flows easily. It is available in WFS Panel through Workflow -> Business flow.

Keep in mind that a Business flow should be associated to a Process Scheme. Moreover, you can create as many flows as needed.
Shipping Process Case
In this section is presented an example that describes a simple Shipping Process which considers the following activities: OrderReceived,
CheckingStock, Shipping and OrderCompleted.
This example attempts to demonstrate how to create and work with Business Flow functionality in Workflow Server by customizing the way the data (the forms) is displayed to users depending on the state of the workflow process and the user role.
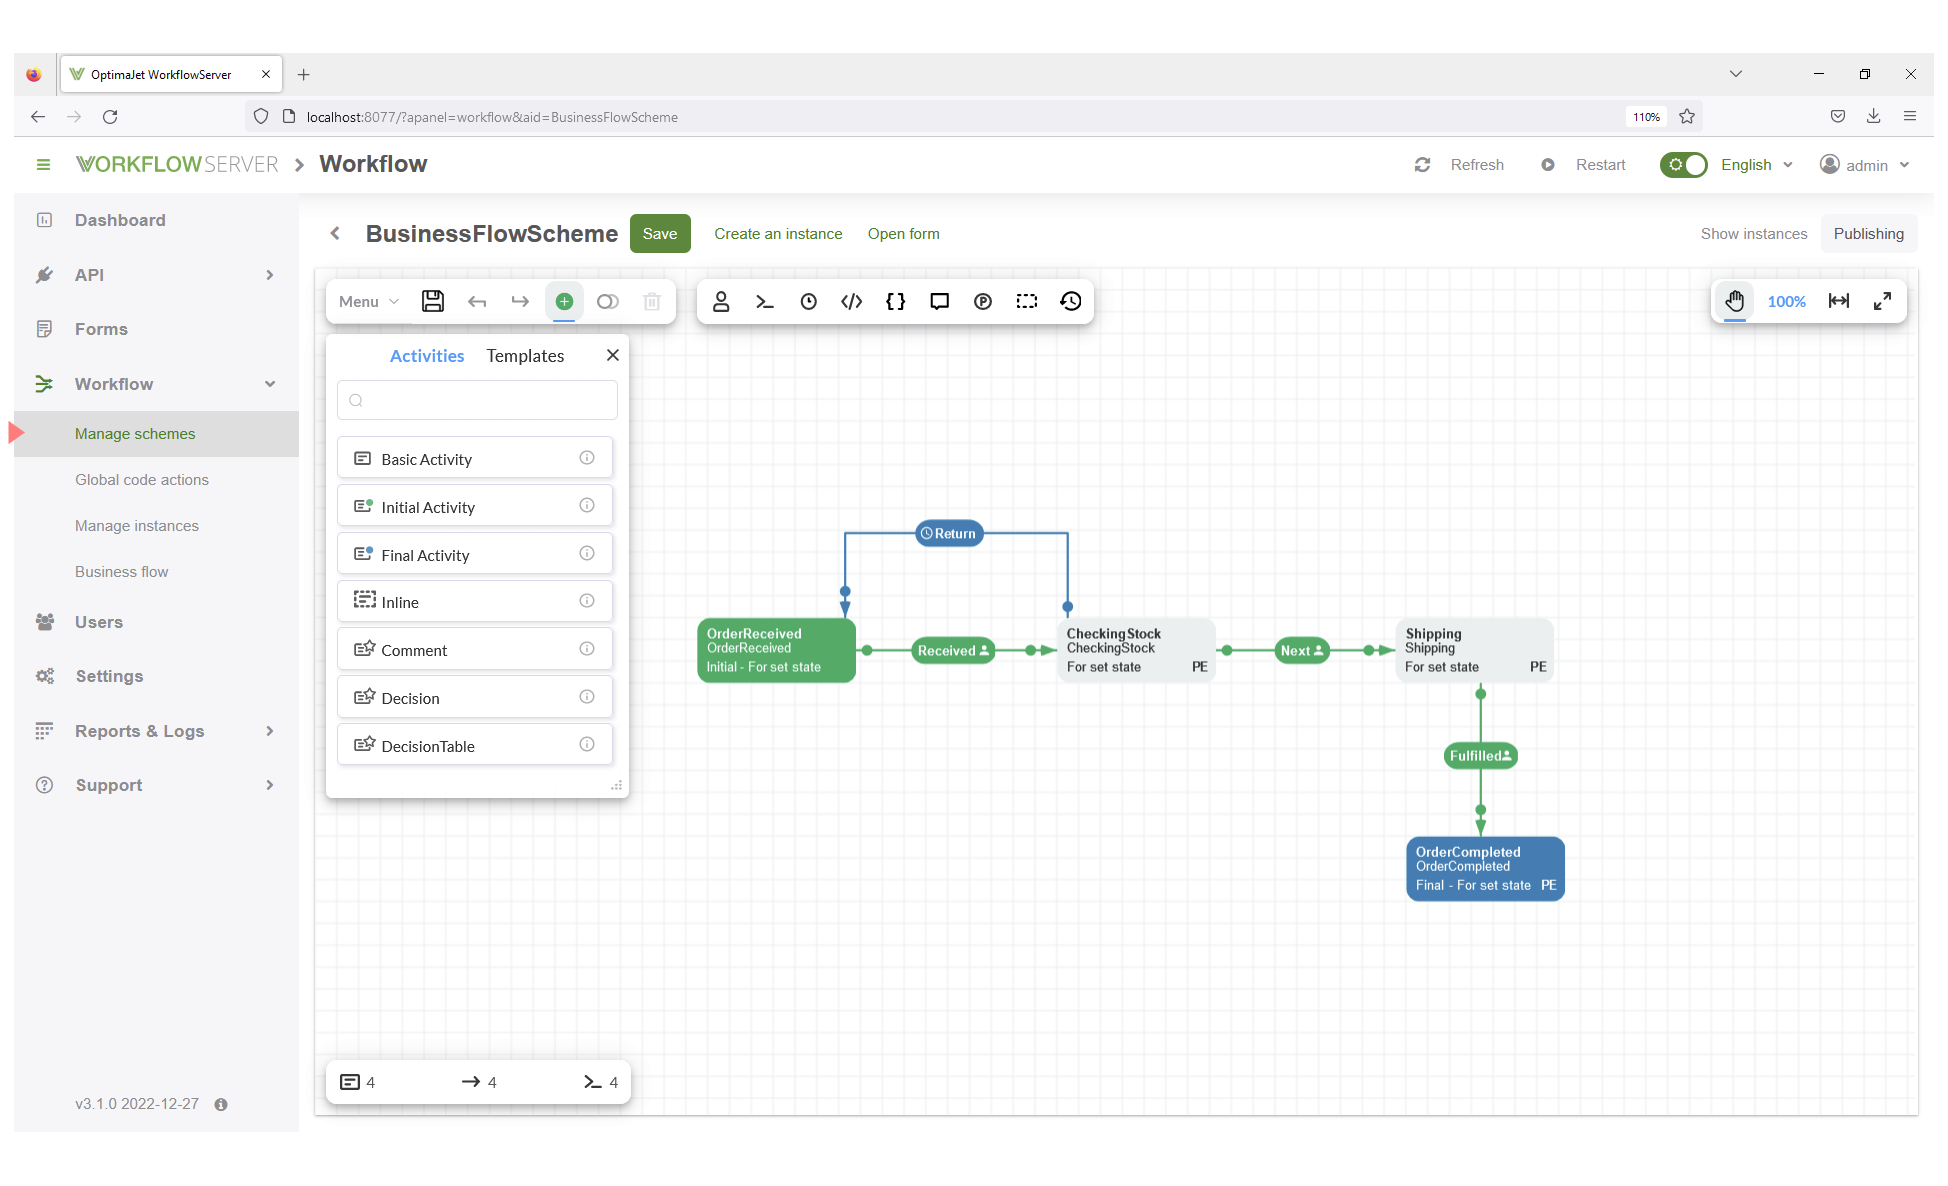
The states CheckingStock and Shipping are selected for mapping purposes in order to display the specified Form for the defined
Business Flow: BusinessFlow.
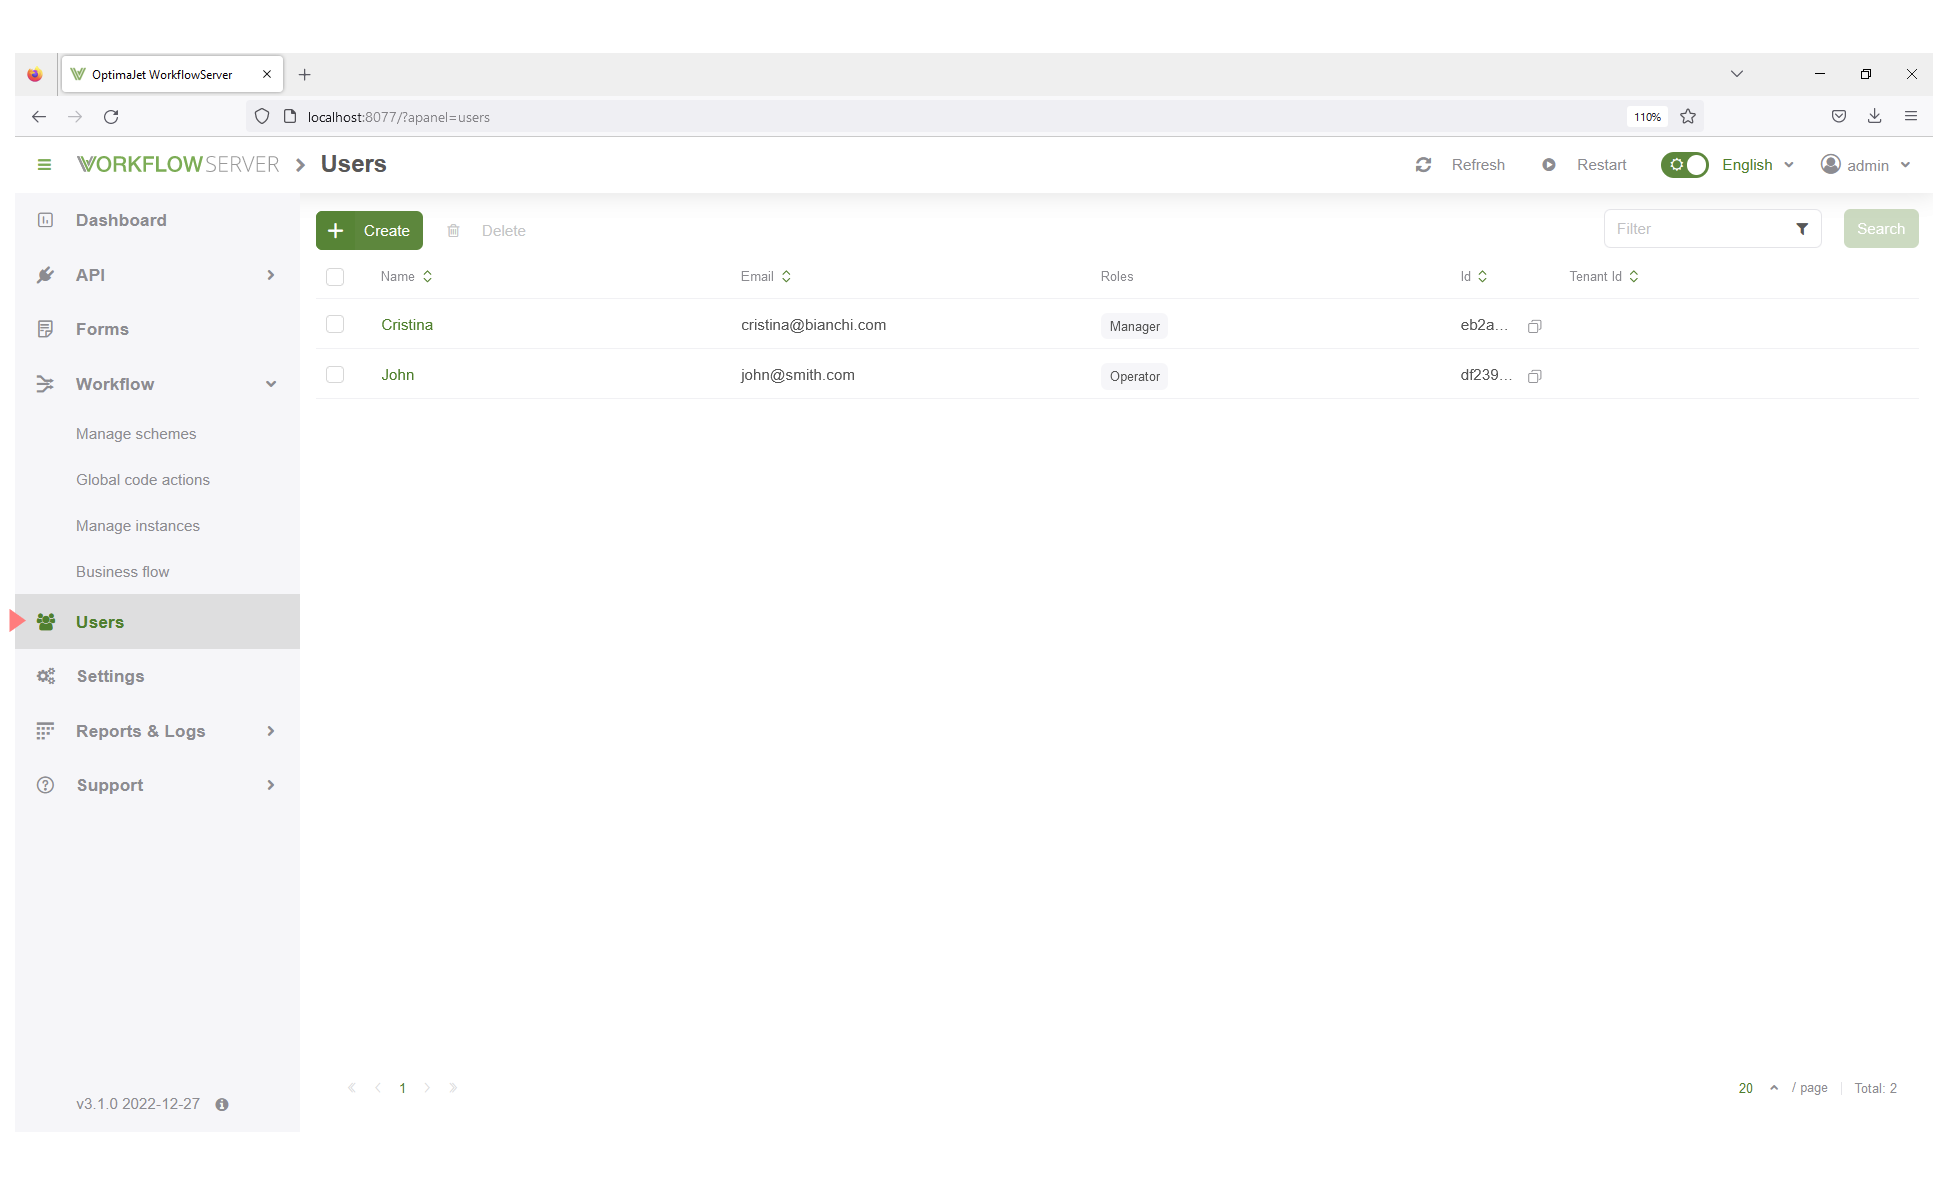
In addition, the roles: Manager and Operator, and two user accounts to log in: john.user and cristina.user, are considered. Each
user should see the Form according the mapping options that are set in the BusinessFlow which includes a particular state in the workflow.
For instance, the user who has Manager role in the state CheckingStock will get access to the form CheckingStock. On the other hand,
the user with Operator role should open the form Shipping when the state Shipping is reached along the workflow process execution.
Forms Creation
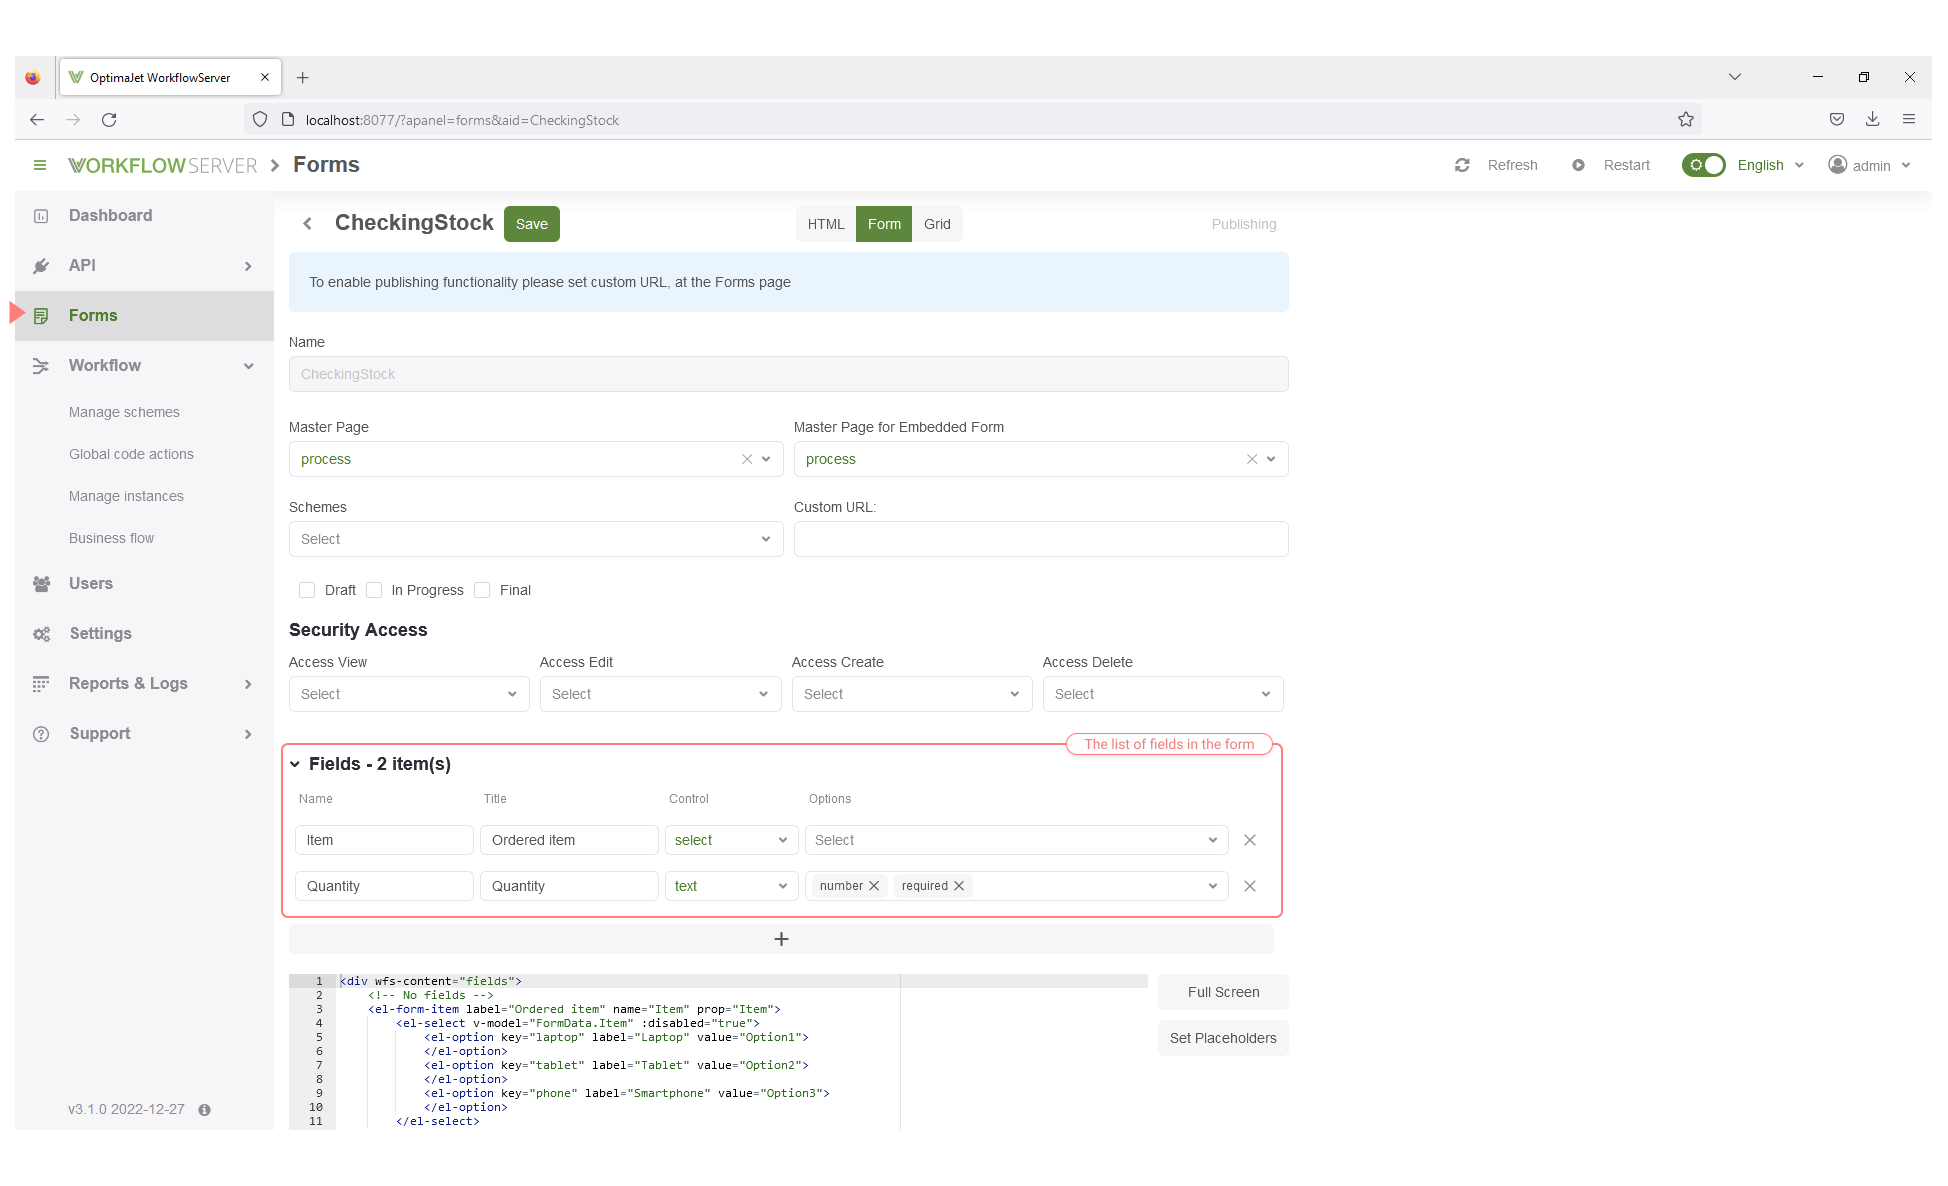
The Forms can be created through the Panel Admin in the section -> Forms. Below a simple example Form called CheckingStock which is
used in CheckingStock state.
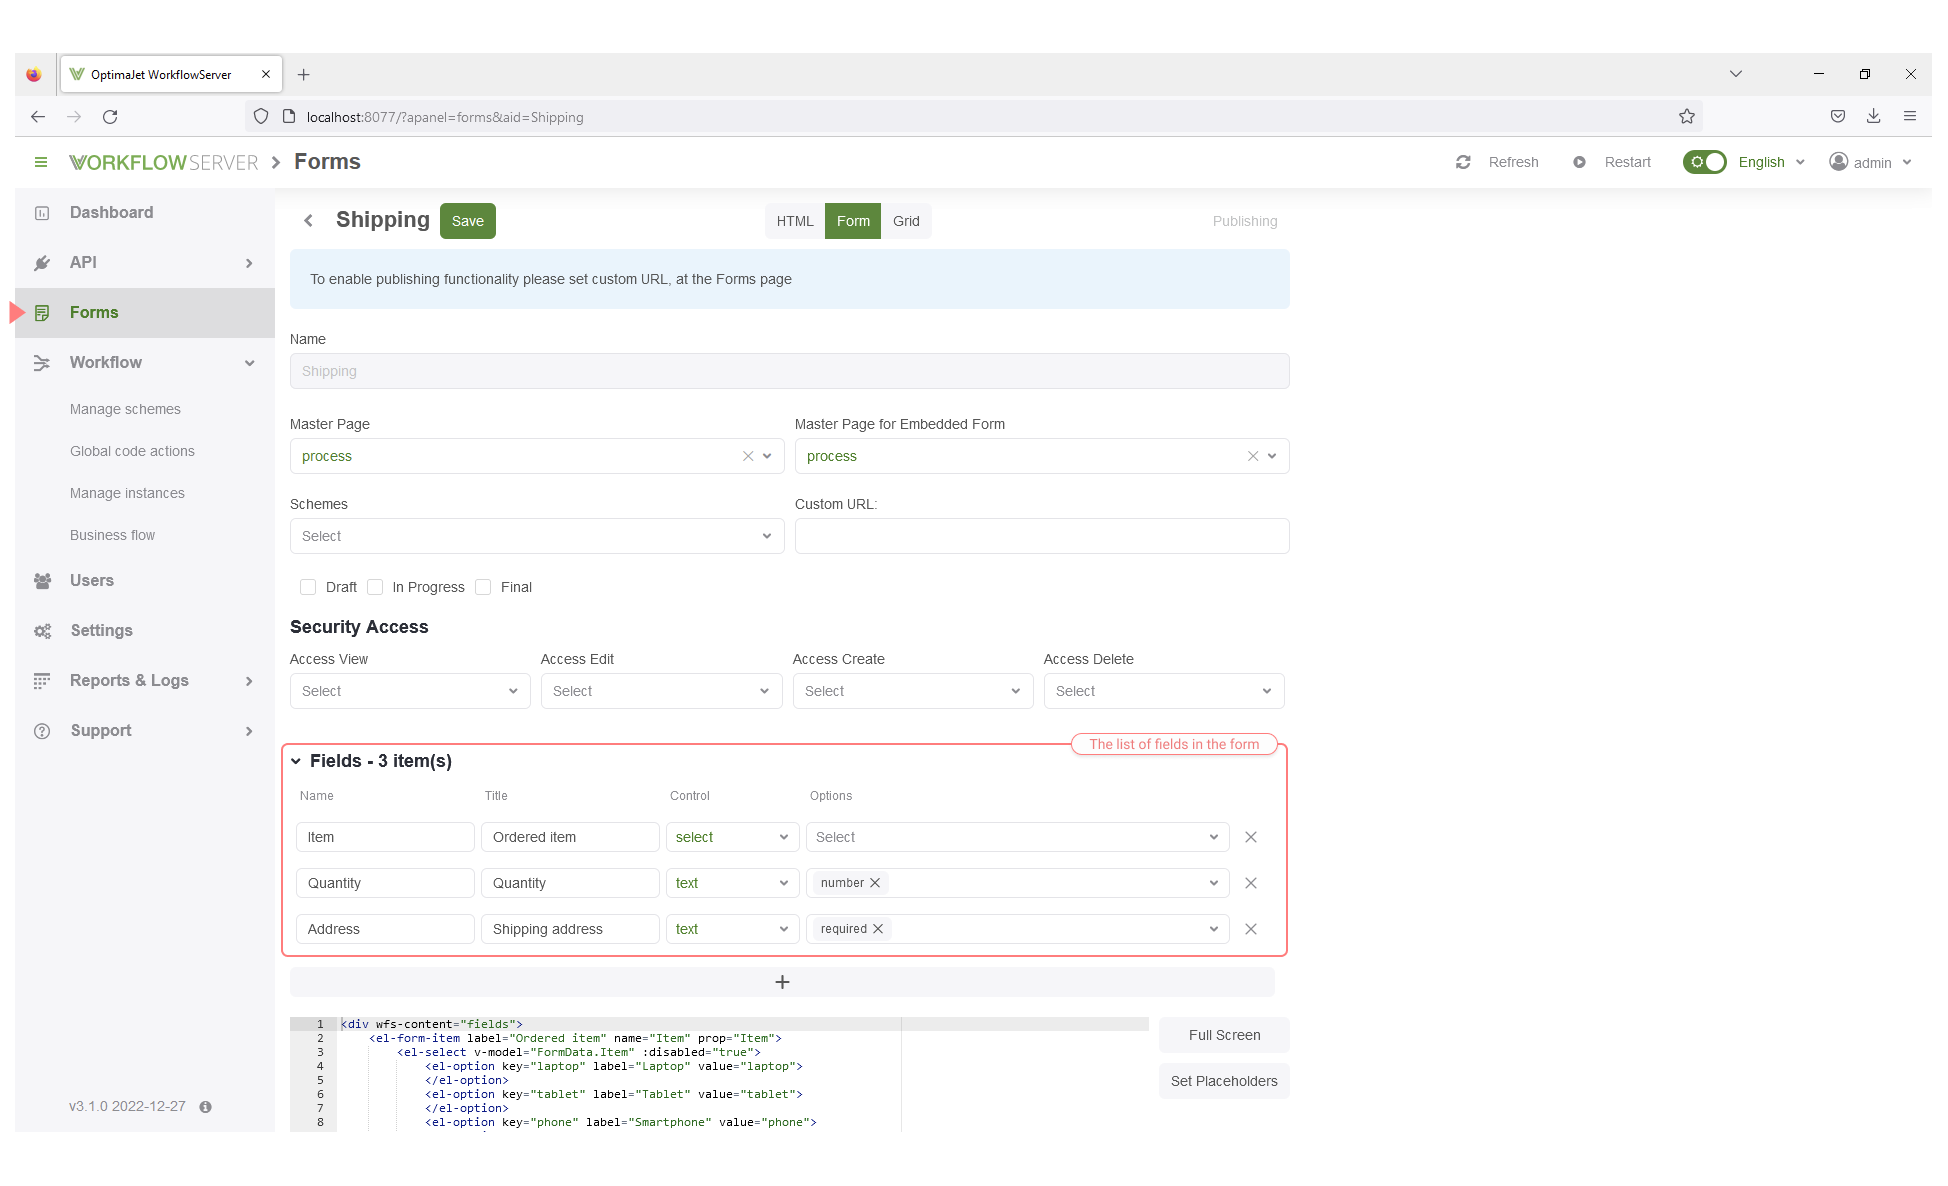
Besides, the Form Shipping that is accessed in Shipping state, and also in OrderCompleted state.
The list of fields in the form editing interface should be specified to be added to the page source. After setting, the code is included
in Set Placeholders as follows:
<div wfs-content="fields">
    <el-form-item label="Ordered item" name="Item" prop="Item">
        <el-select v-model="FormData.Item" :disabled="true">
            <el-option key="laptop" label="Laptop" value="laptop">
            </el-option>
            <el-option key="tablet" label="Tablet" value="tablet">
            </el-option>
            <el-option key="phone" label="Smartphone" value="phone">
            </el-option>
        </el-select>
    </el-form-item>
    <el-form-item label="Quantity" name="Quantity" prop="Quantity"
                  :rules="[WorkflowServer.Rules.number]">
        <el-input v-model="FormData.Quantity" :readonly="true">
        </el-input>
    </el-form-item>
    <el-form-item label="Shipping address" name="Address" prop="Address"
                  :rules="[WorkflowServer.Rules.required]">
        <el-input v-model="FormData.Address" :readonly="isreadonly()">
        </el-input>
    </el-form-item>
</div>
Detailed information regarding Forms creation can be read in this section
Business Flow Creation
Furthermore, in the section Business flow, the new Flow can be added by clicking on 'Create' button.
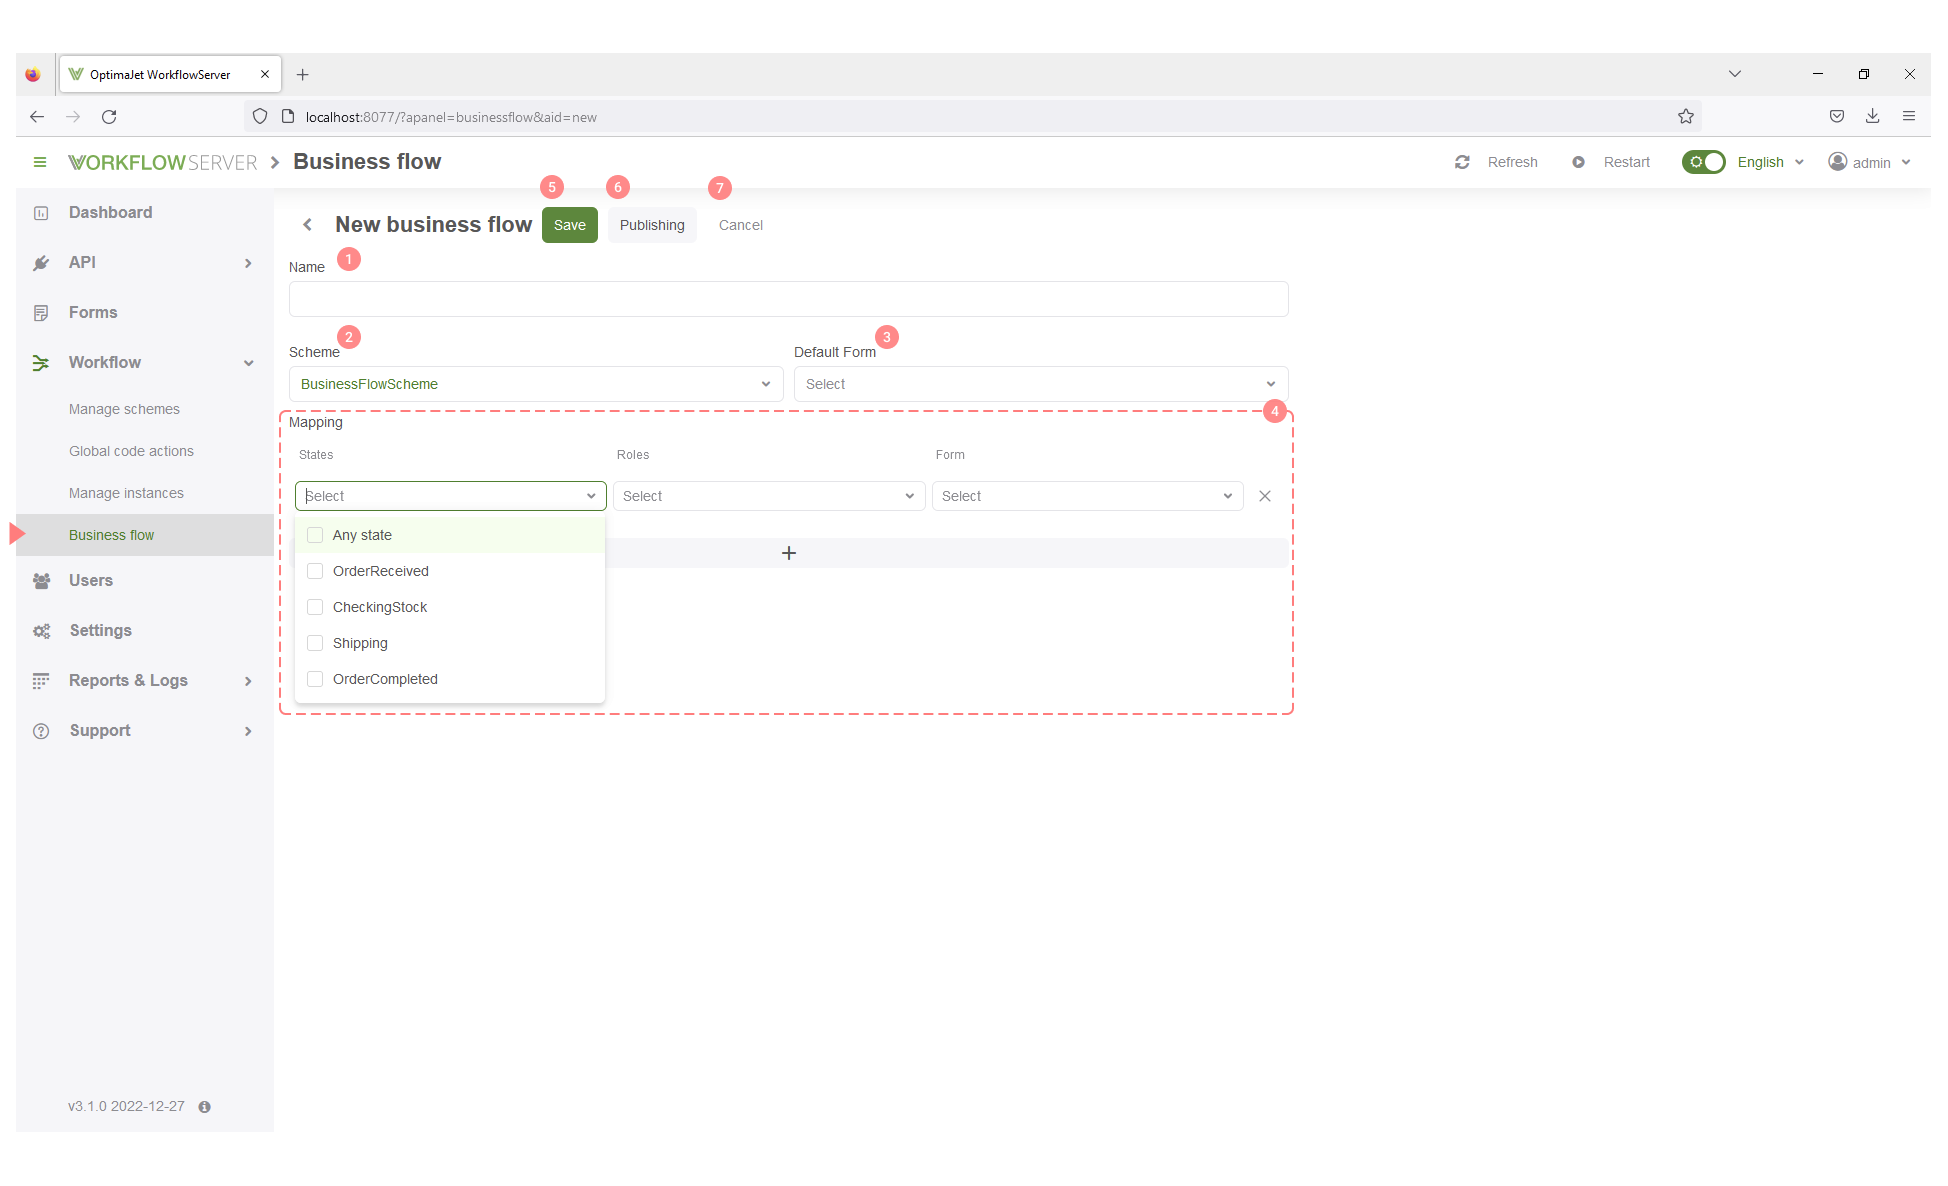
The settings to create a Business flow should be indicated. The following options are available:
- Name - A name that can be assigned to the business flow.
- Scheme - The process scheme associated to the business flow.
- Default Form - This form might be also linked to the flow. If the form is not suitable by combining a process state and the current role, then the Default Form is displayed.
- Mapping section - you can add how many elements as are needed by clicking in '+'', and it includes States, Roles and Forms. A group of items be also selected.
- Save - The save button to keep the performed changes.
- Publishing - The business flow might be linked or embedded fully to be displayed in a web page. The procedure is similar to Adding Embedded Form. When clicking the 'Publishing' button, you should simply copy the code and embed it into your page.
- Cancel - It is used to discard the changes.
After setting up the mentioned options, the new Flow is added. The specific form to be displayed should be selected in mapping section, the
preferred process state and the user role. The options defined for the BusinessFlow are indicated as follows:
-
The
CheckingStockform is shown for the current roleManagerin this process state.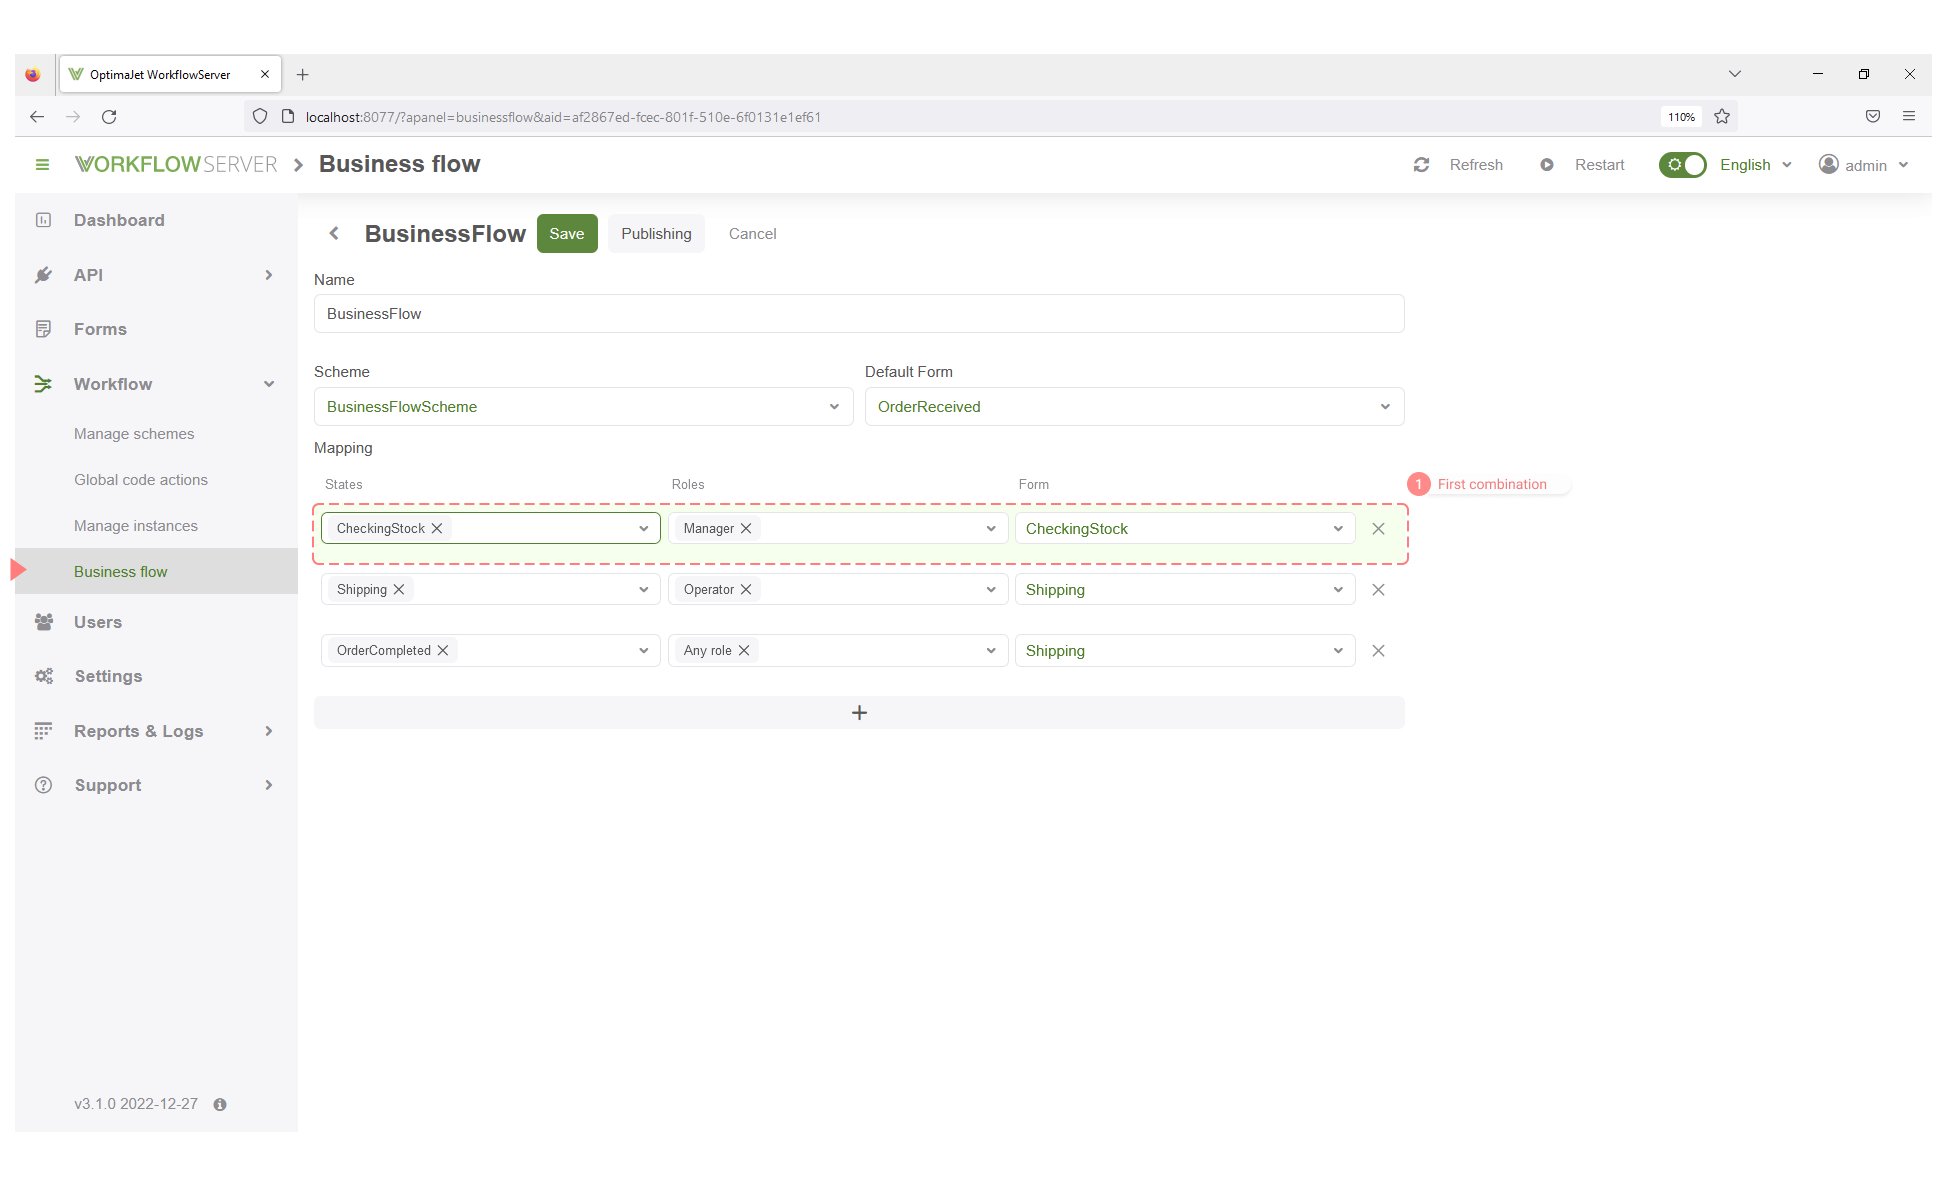
-
The
Shippingform is displayed for the current roleOperatorin this process state.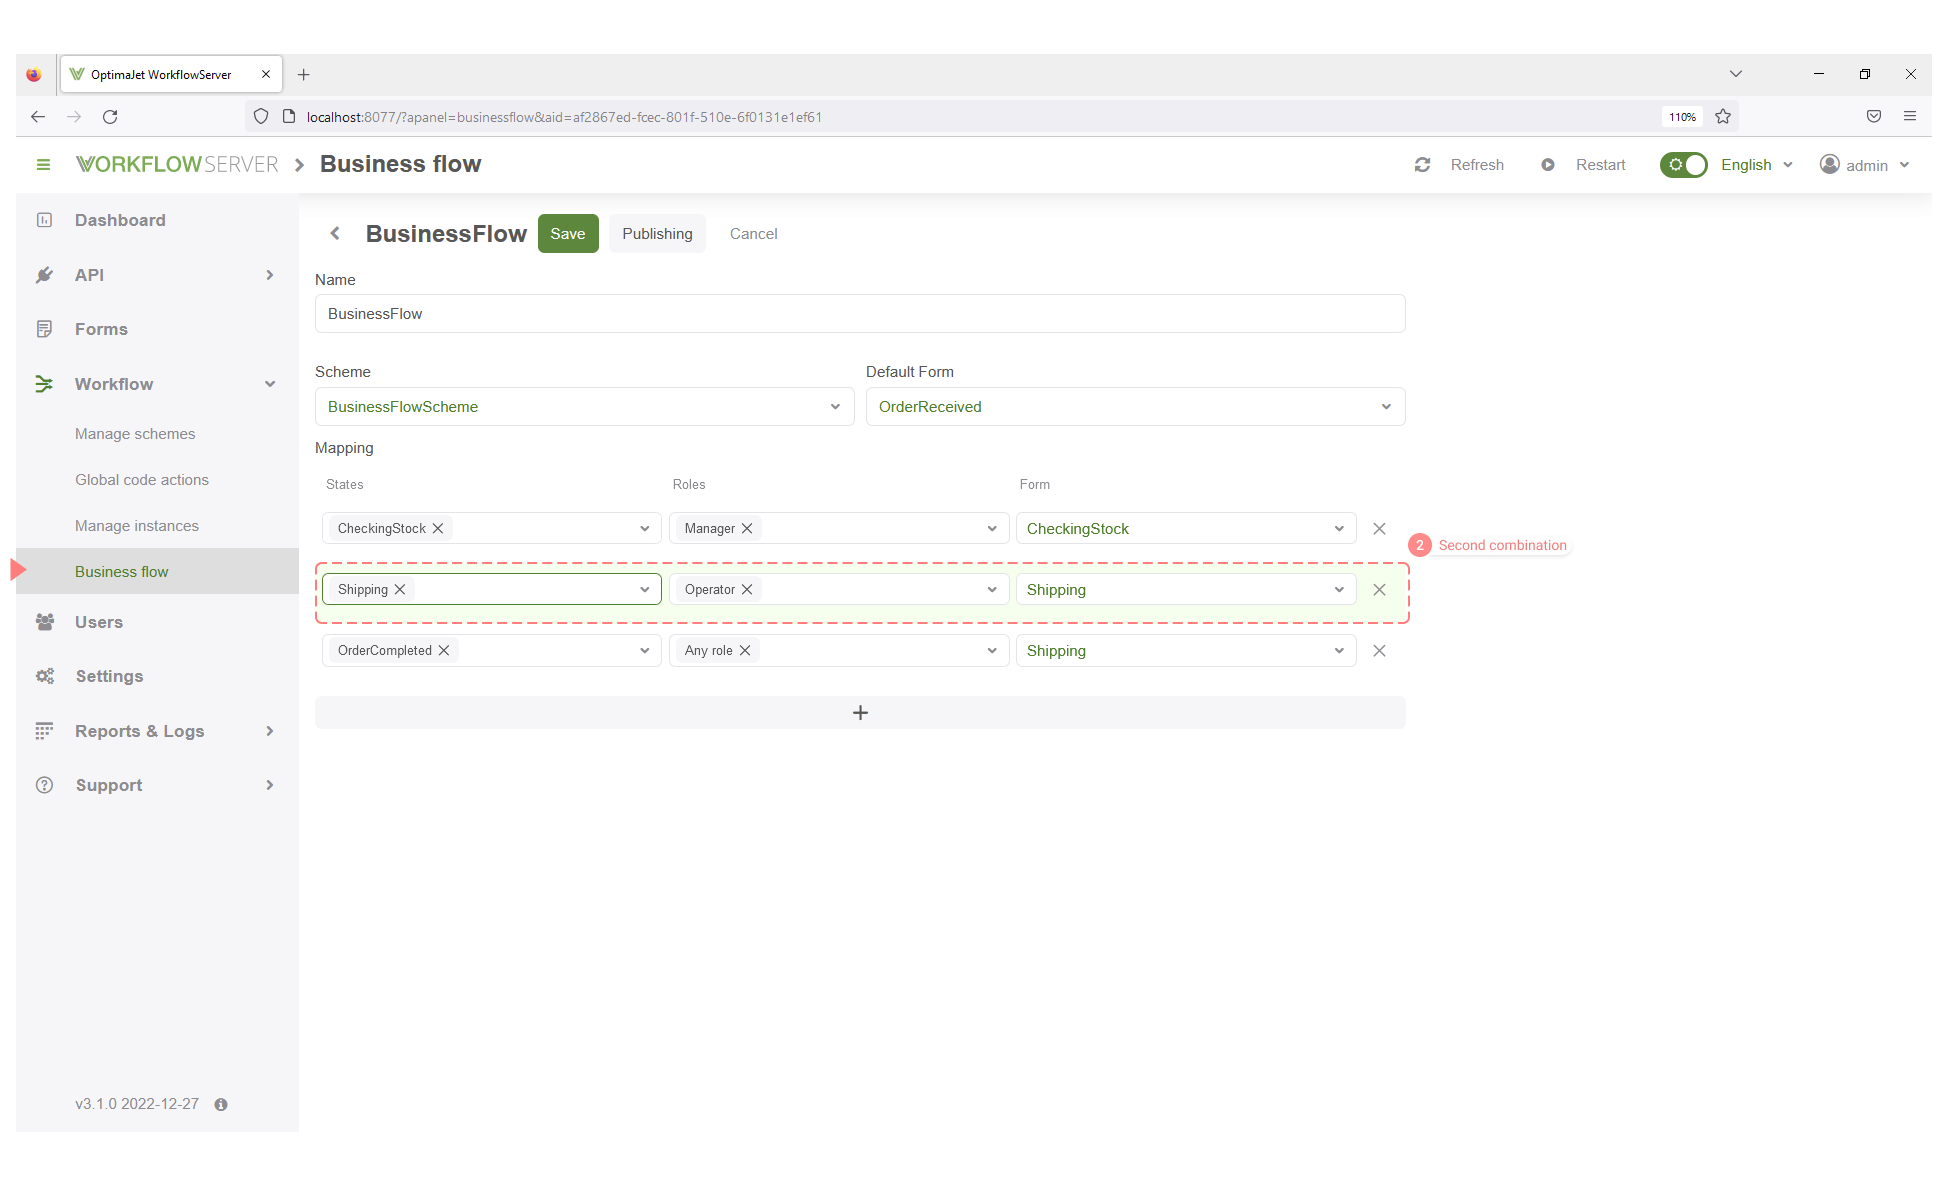
-
The
Shippingform is also displayed forAny rolewhen last process stateOrderCompletedis reached.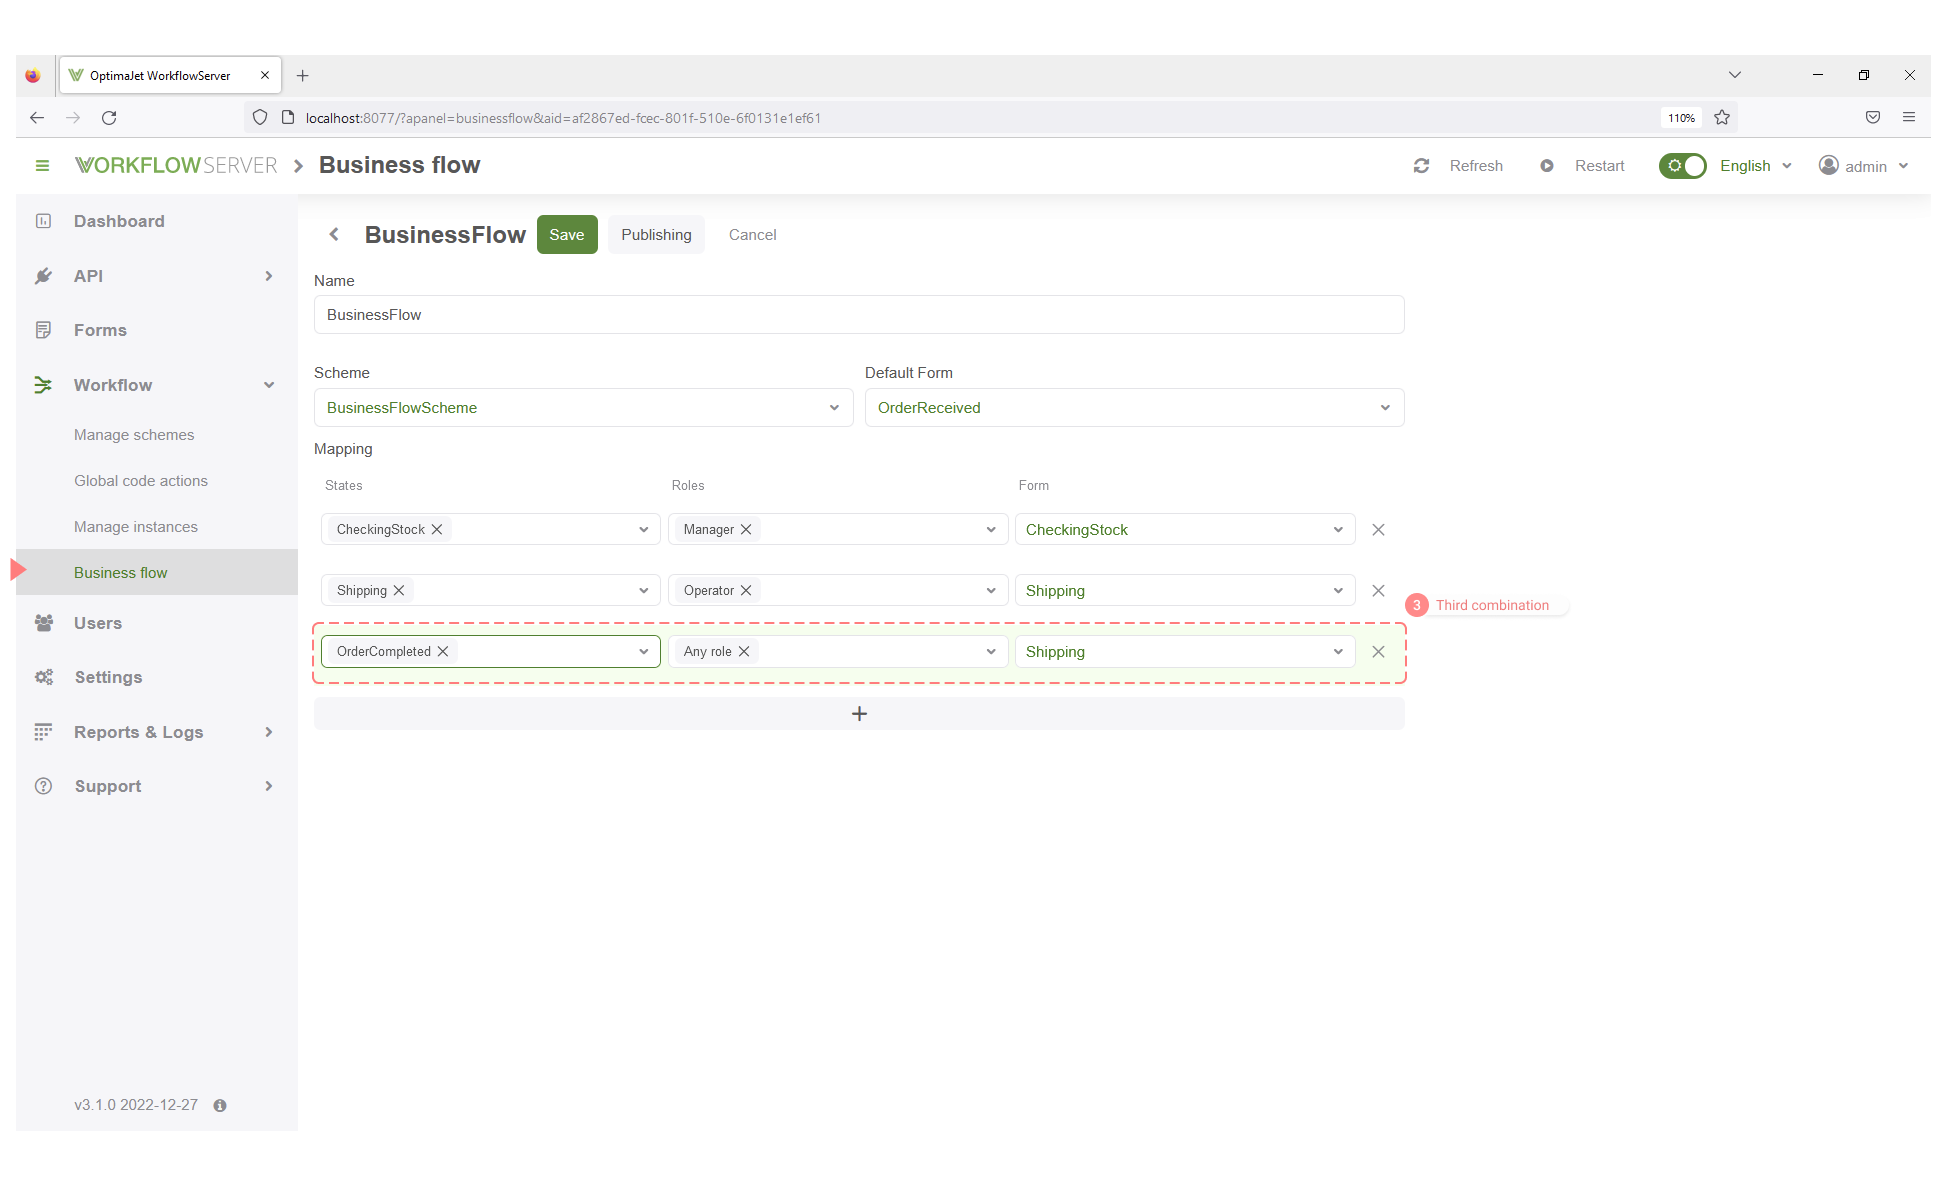
Running a Business Flow
Once a Business flow is created, it can be enabled by considering the following methods:
- Using the 'Start' button on the Dashboard page.
- Accessing through the section Forms and starting the Form Manager.
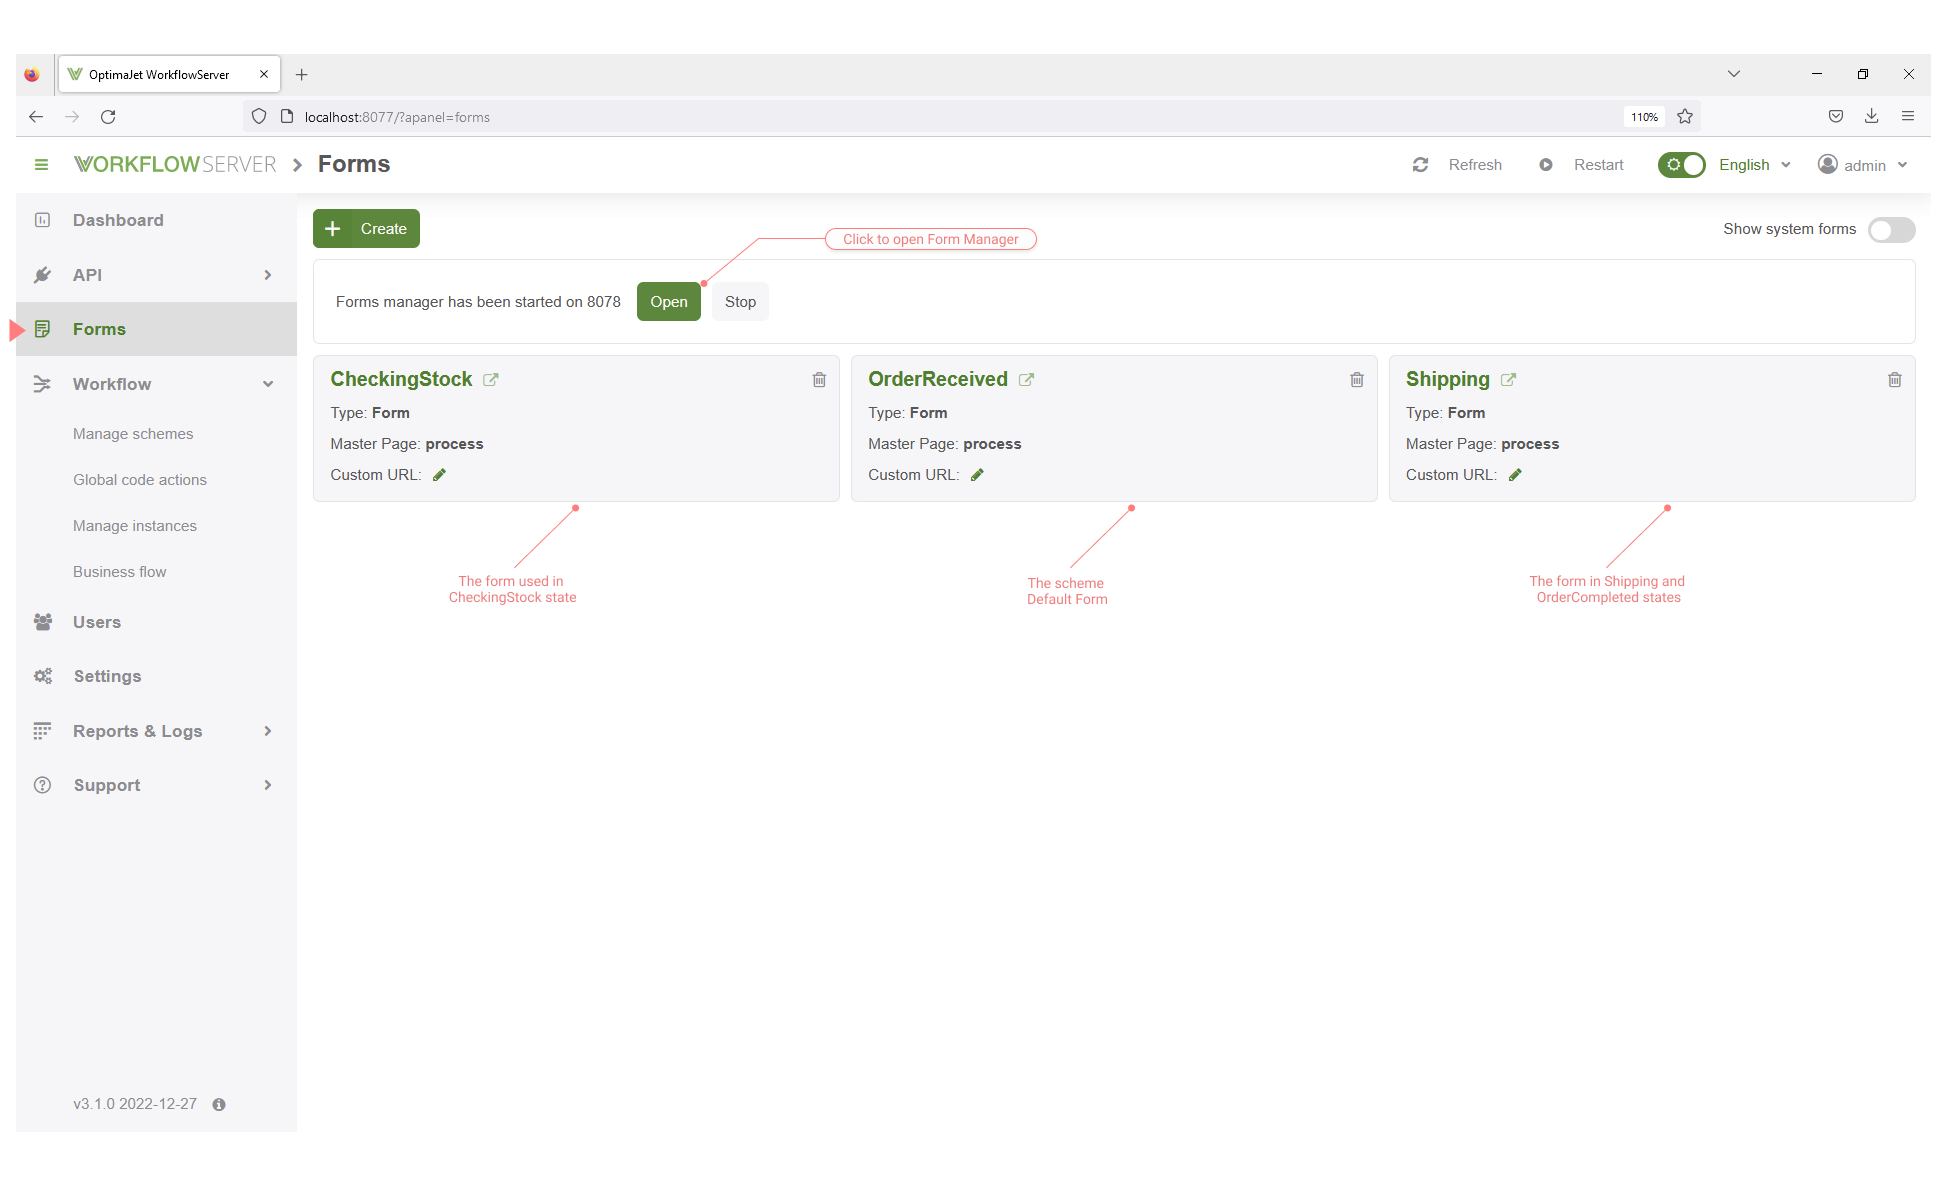
The 'Start' button should allow to open the Form Manager. The service starts at port 8078. The default port is specified in the *
DefaultFrontendPort* parameter of the config.json file.
When the Form manager is opened, you will see:
- The Workflow Schemes that are available.
- The created Business Flow also.
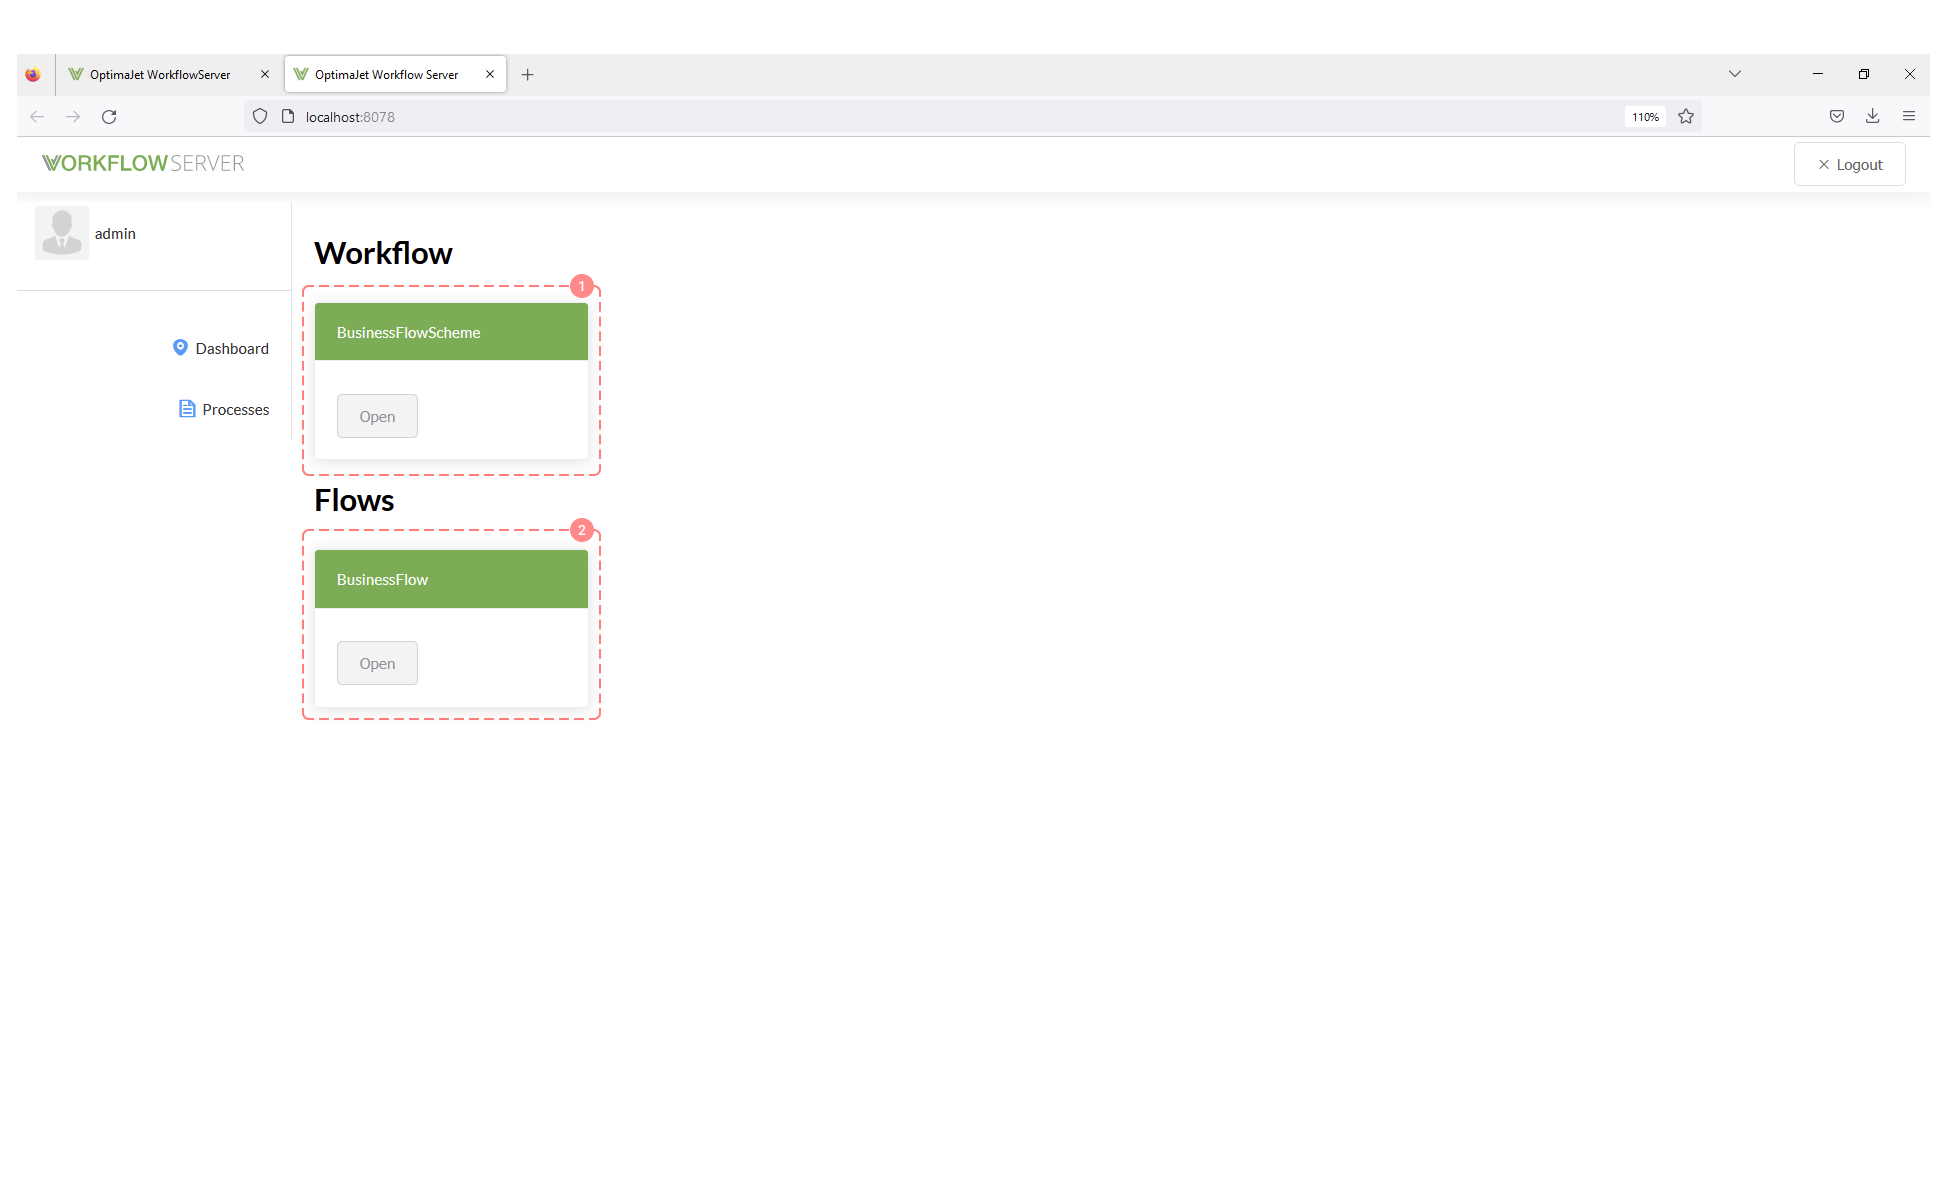
If the Auto Start flag that defines the principles of the process creation, was not set in the linked process scheme, then in Form Manager
you can open the created Business Flow Scheme by clicking on button Open. Next, as the process is not started yet, it will be required
to start the Workflow by clicking on first command button Received.
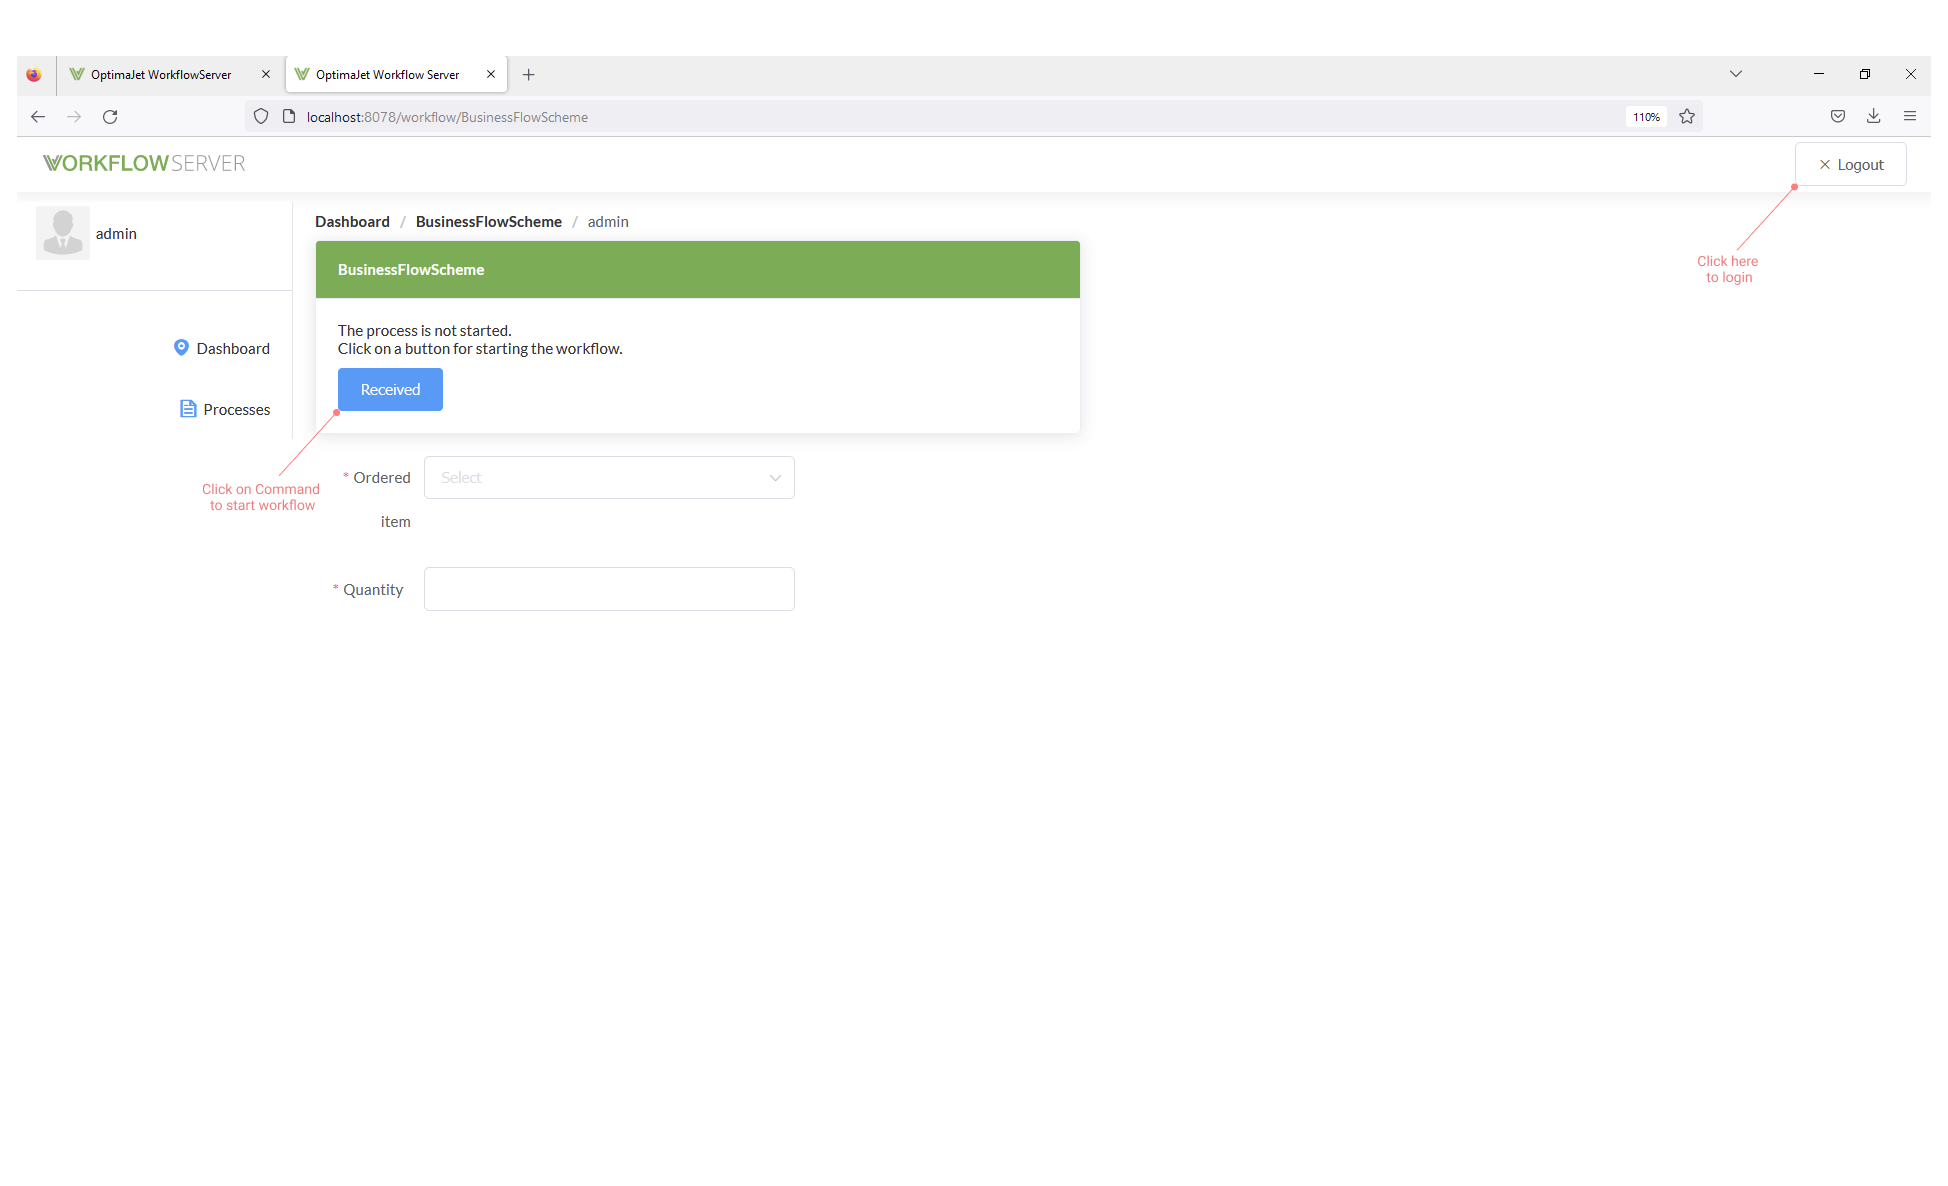
Once the command Received is executed and the CheckingStock state is reached, the specific user might log in directly through the Form
Manager user interface by clicking on 'Logout' button.
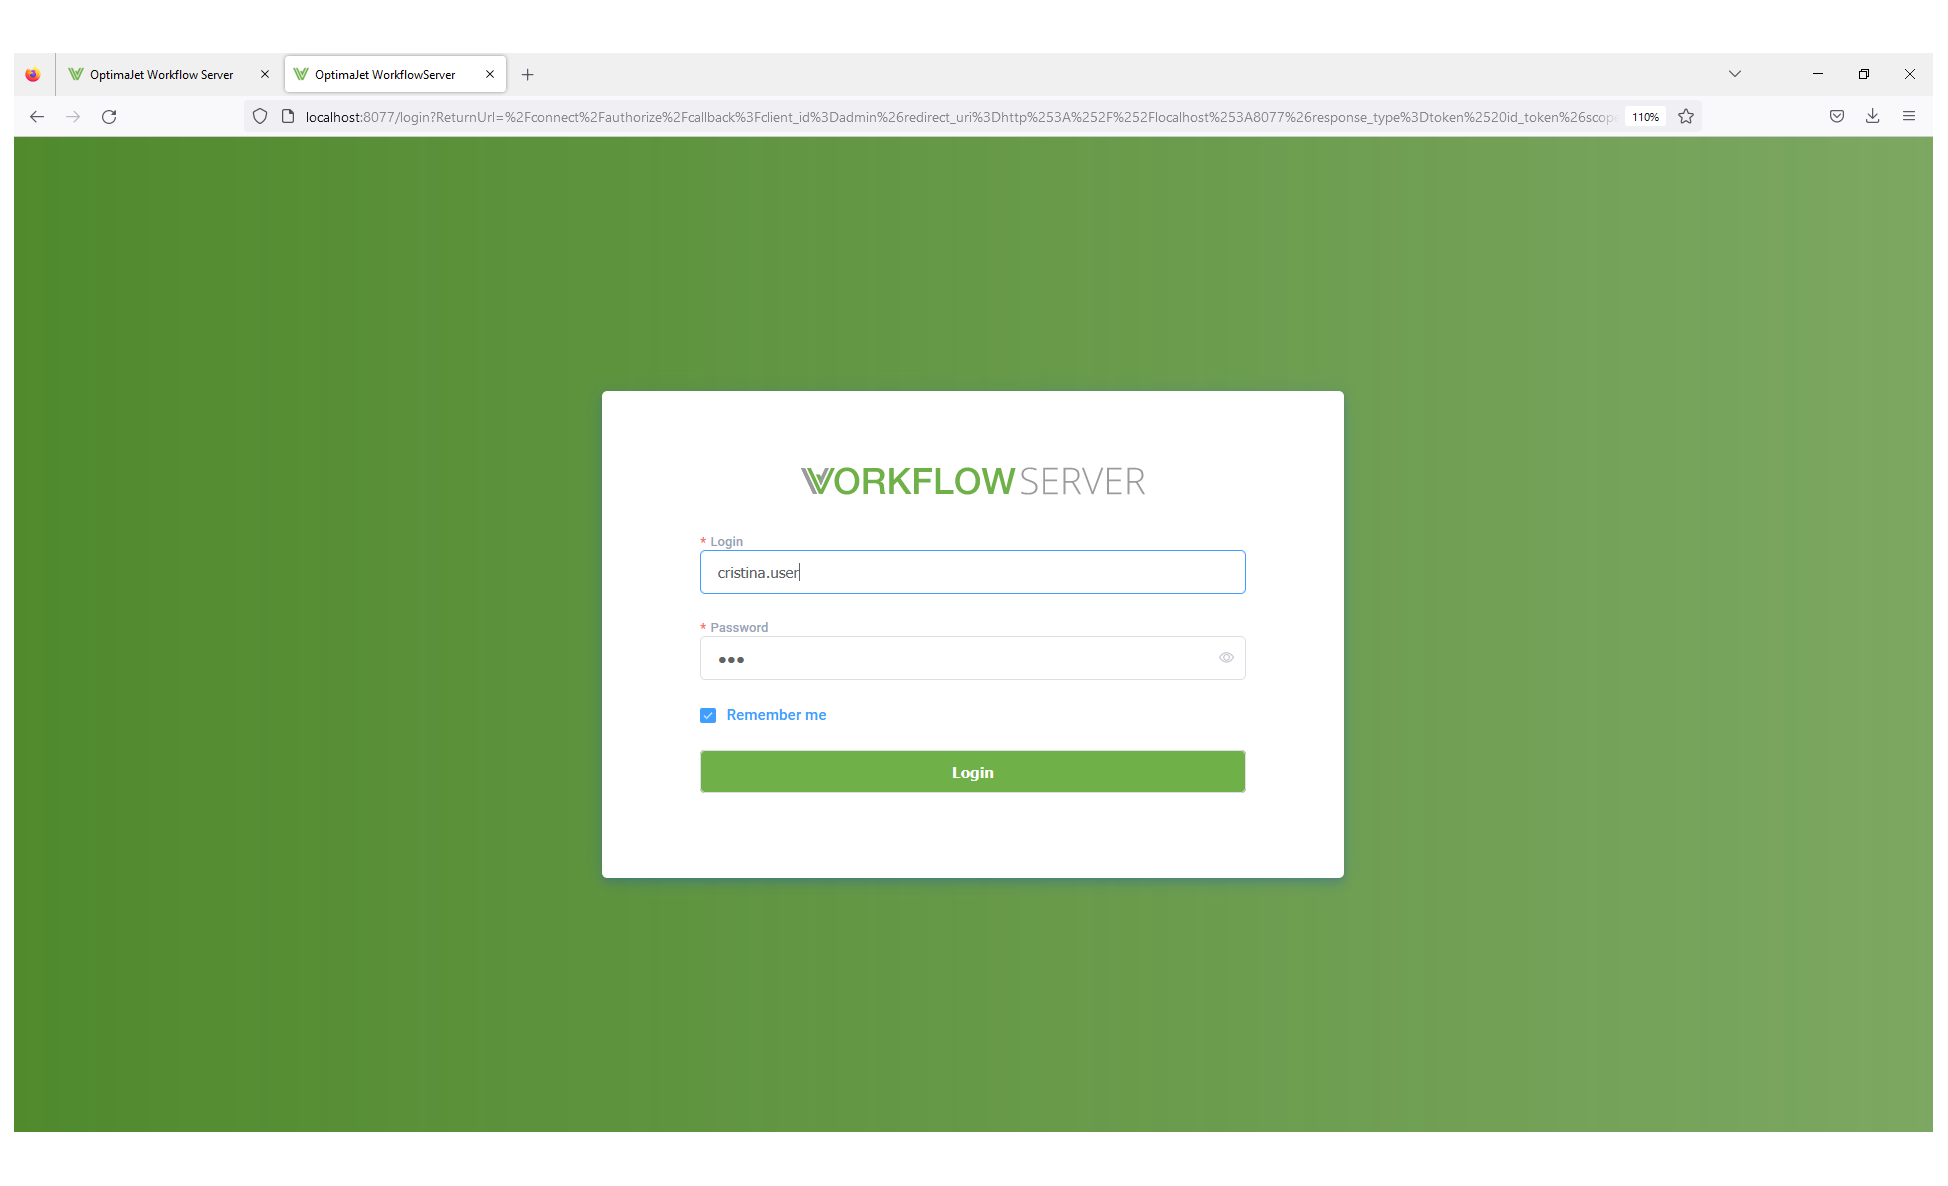
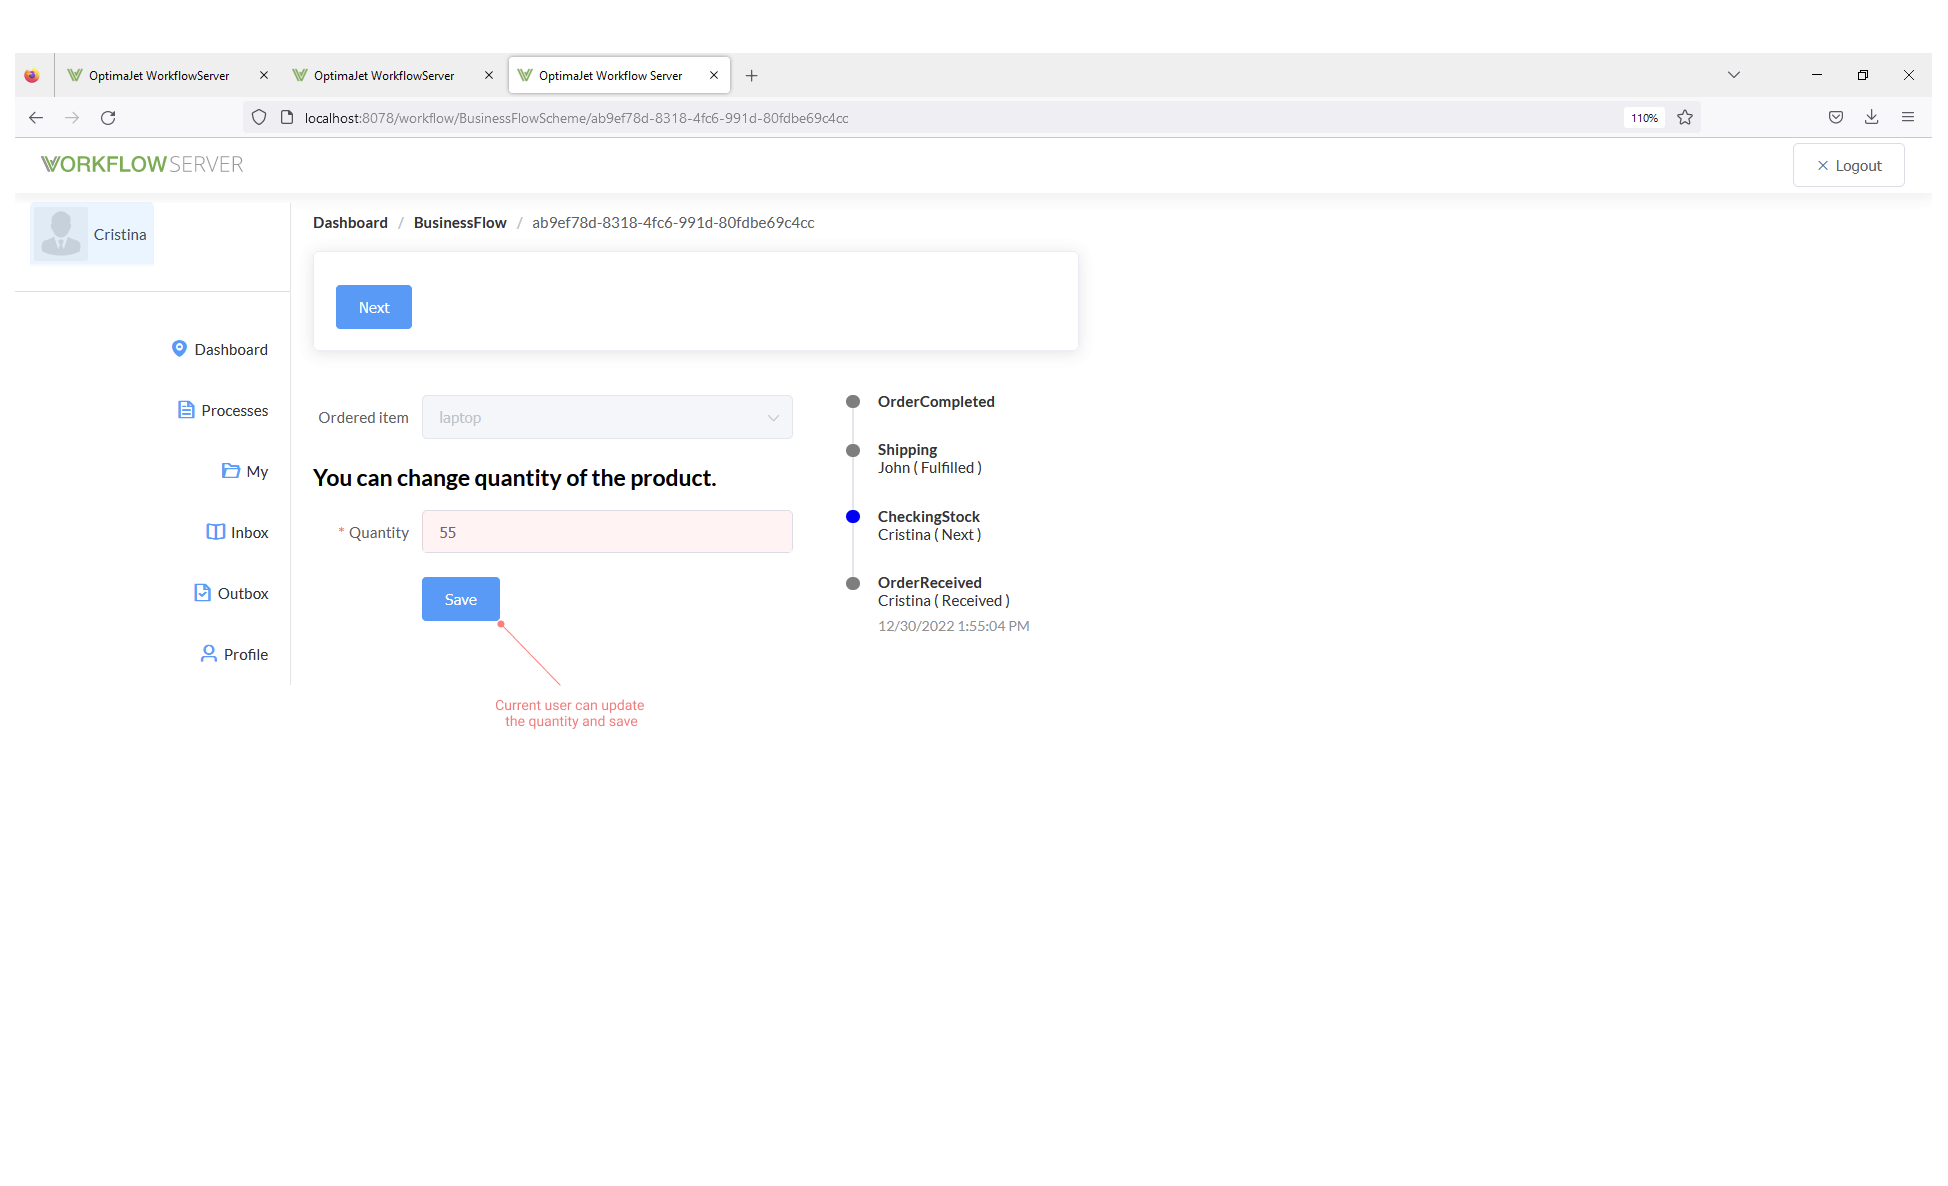
Afterward, the Next command will be shown in this stage by using the current user. The form CheckingStock defined for the user
account cristina.user with Manager role is displayed.
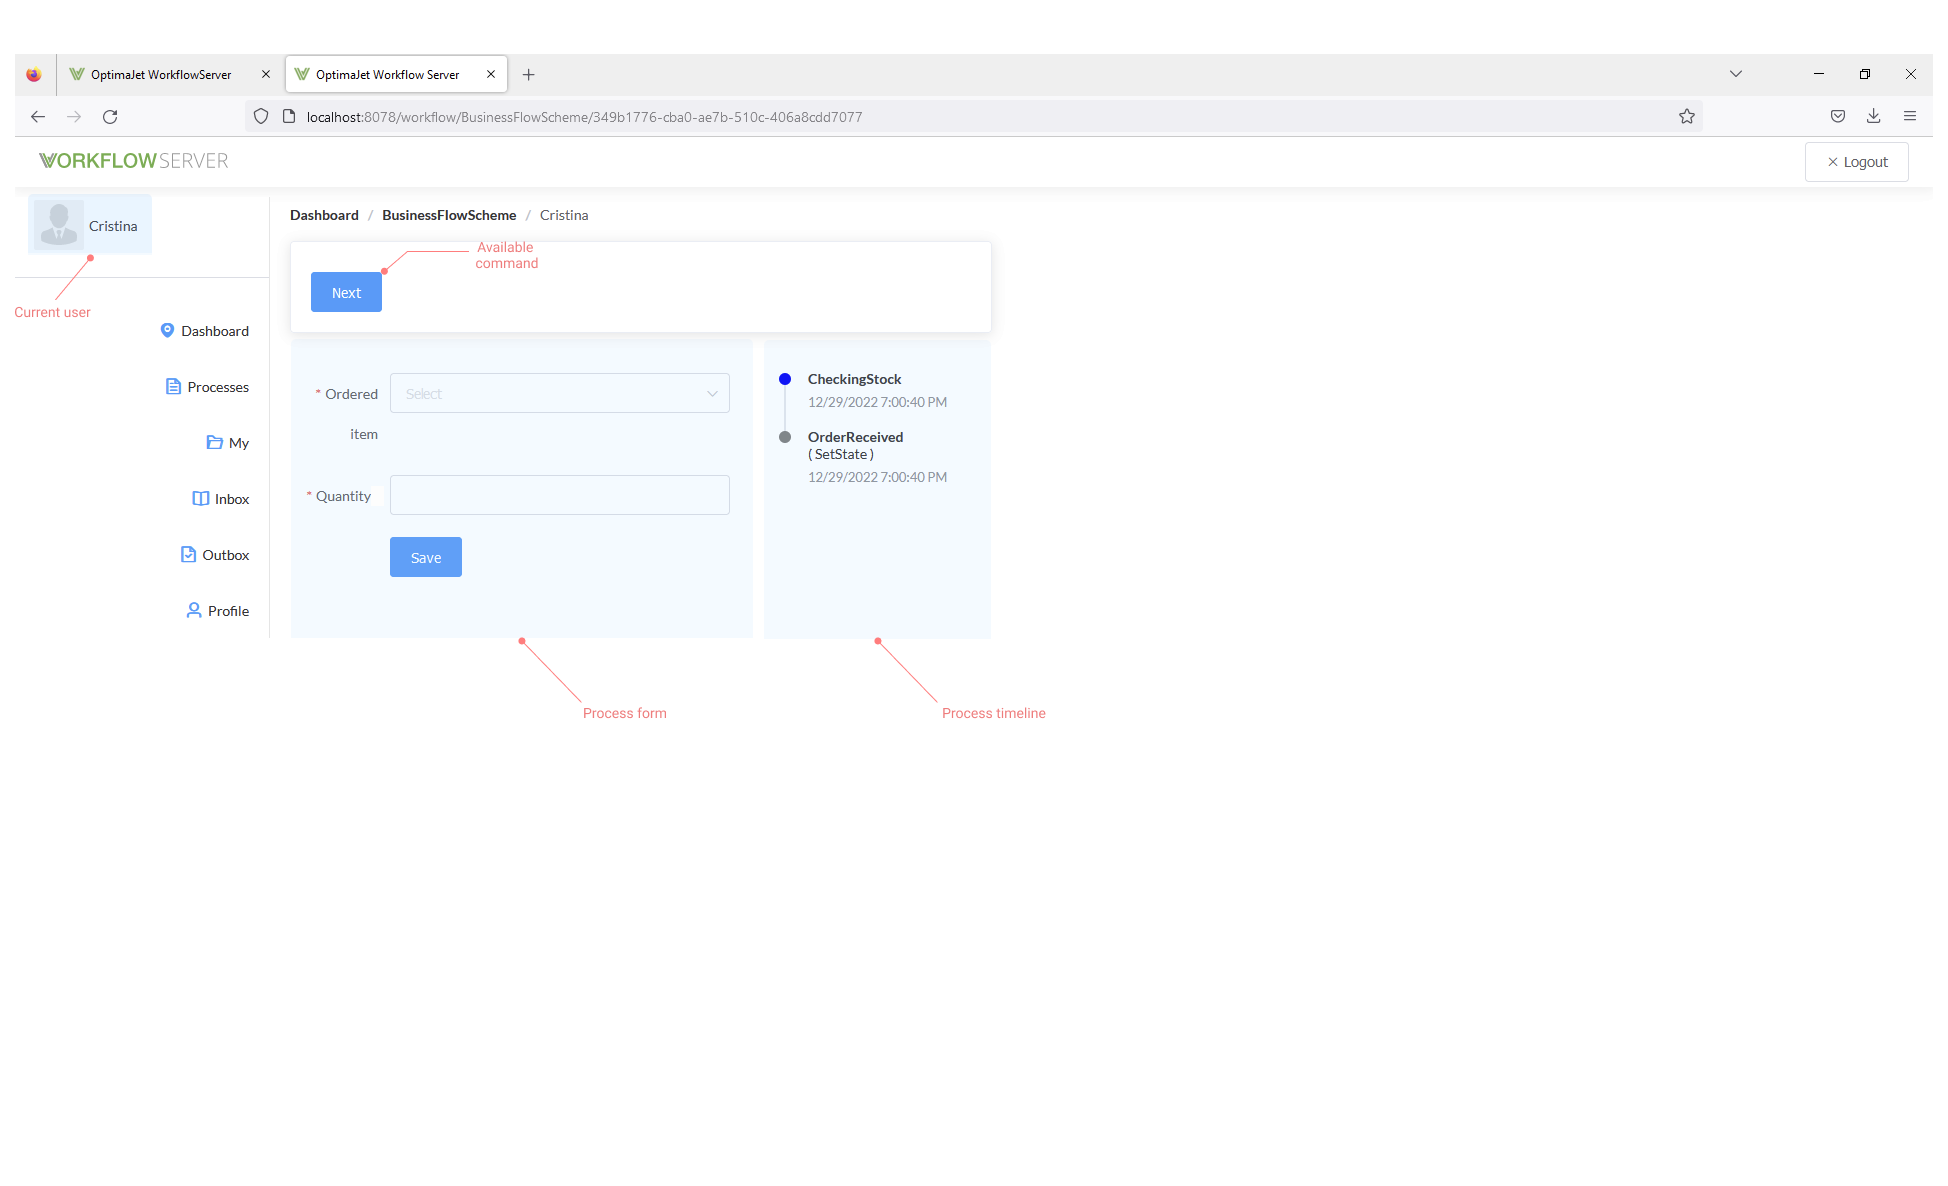
This is the form CheckingStock which becomes available in the state CheckingStock through user account with Manager role.
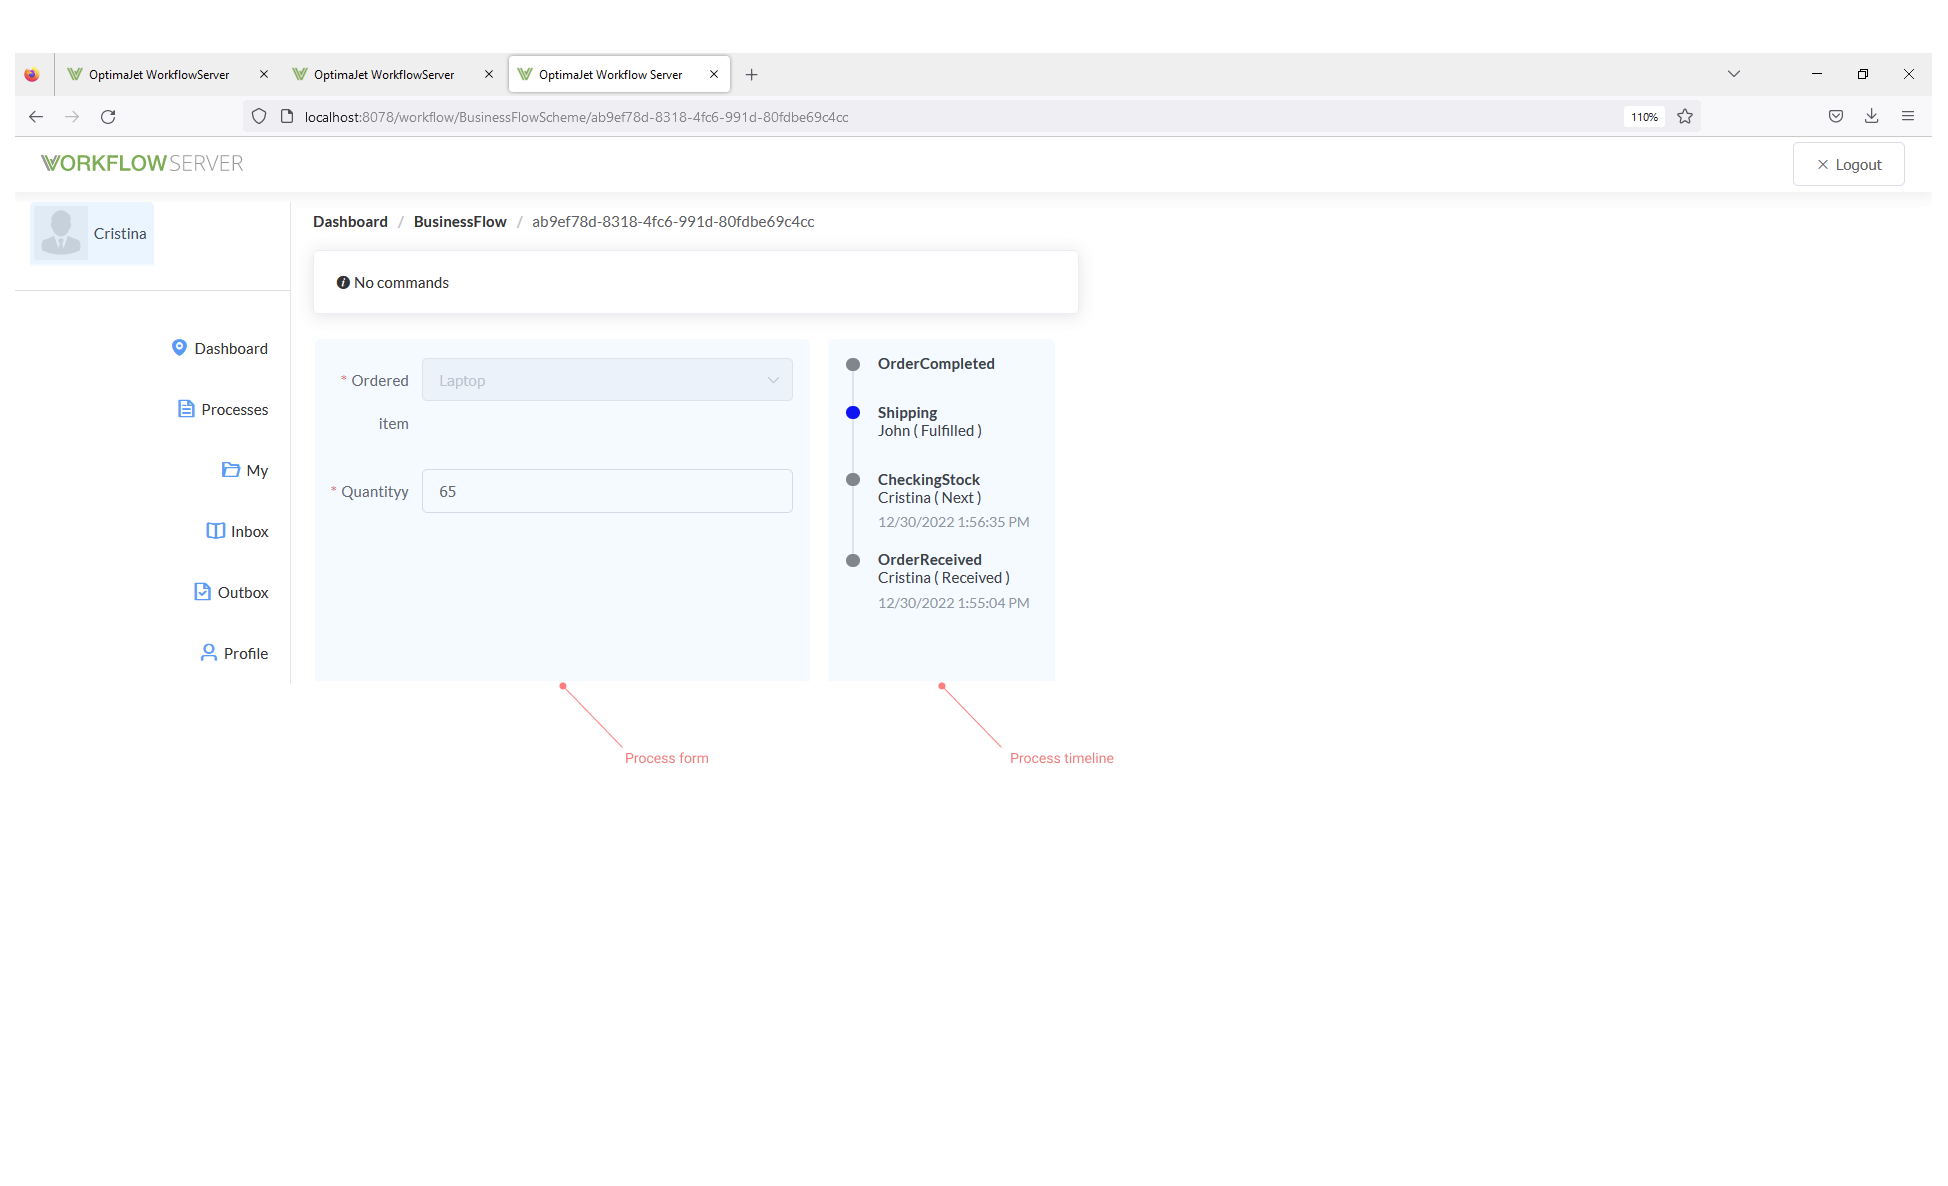
After clicking on command Next, the process workflow moves forward to the state Shipping. The user with manager role can't change the
form in this stage.
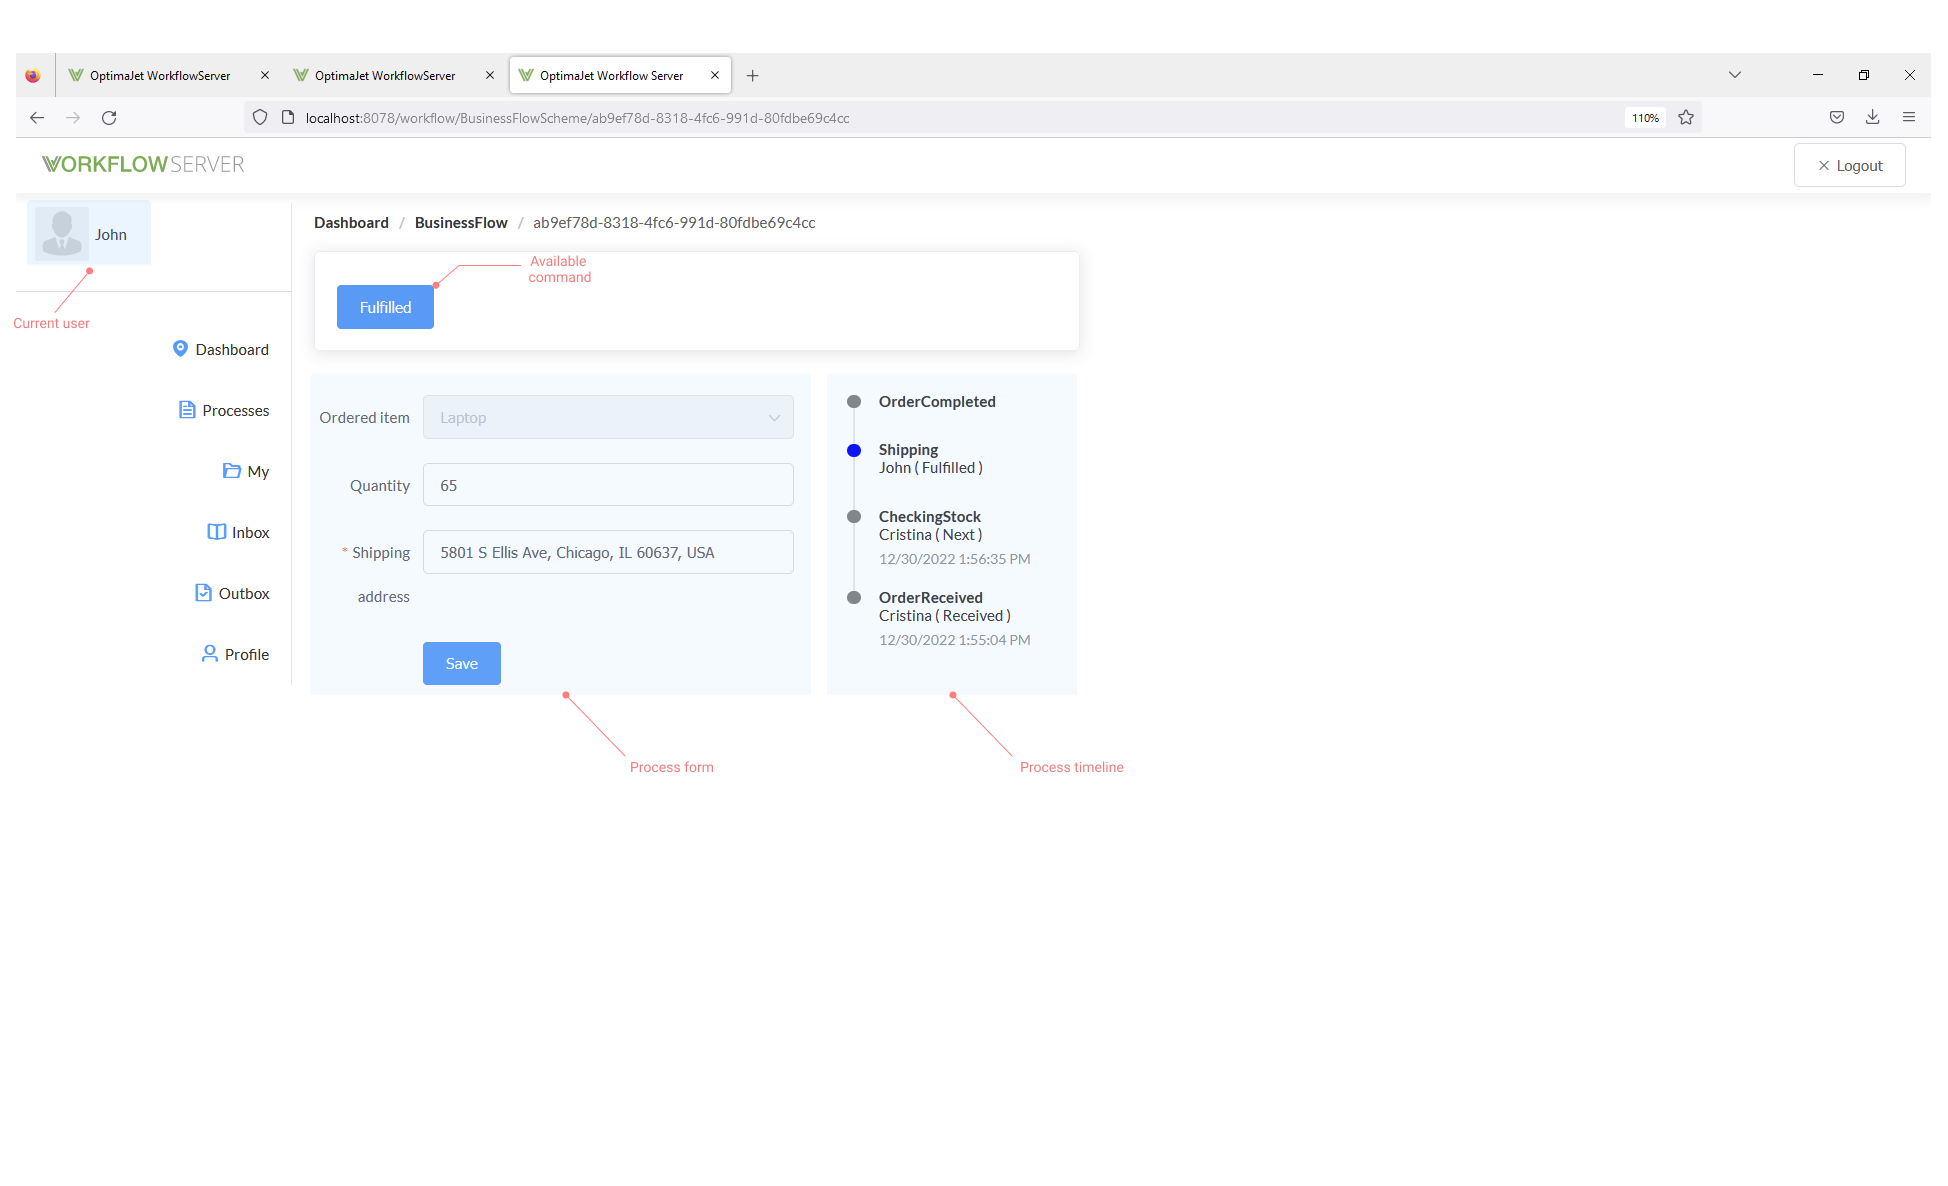
When the user account john.user with Operator role is logged in, the assigned form Shipping is shown is this state. Then it can be
filled out by the current user, and also the command Fulfilled comes out to be executed.
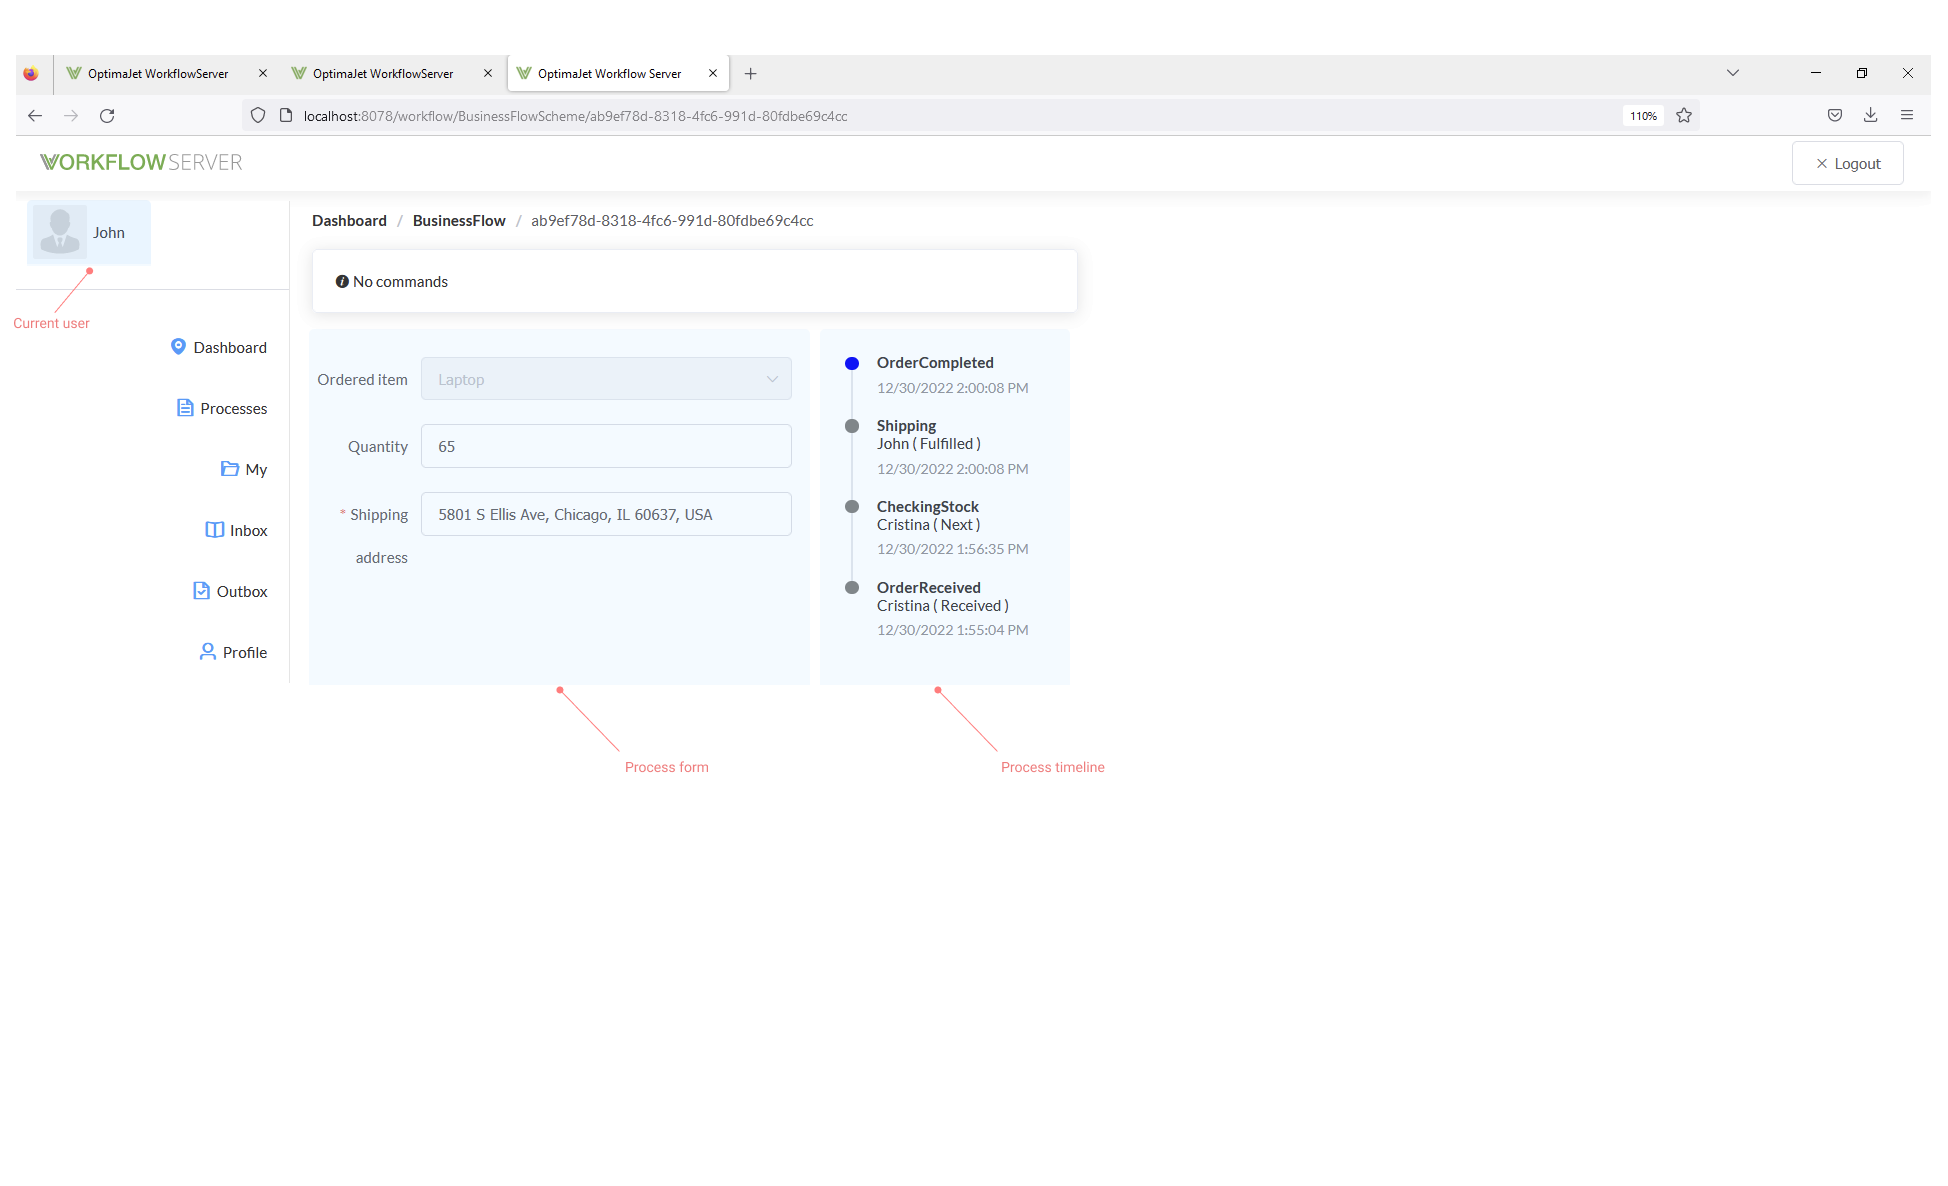
Finally, the form that can be accessed for any role in the last stage OrderCompleted, it becomes available.
Calling the API methods for working with a Business Flow, it is possible also. You can try here