Workflow Server Forms
General information
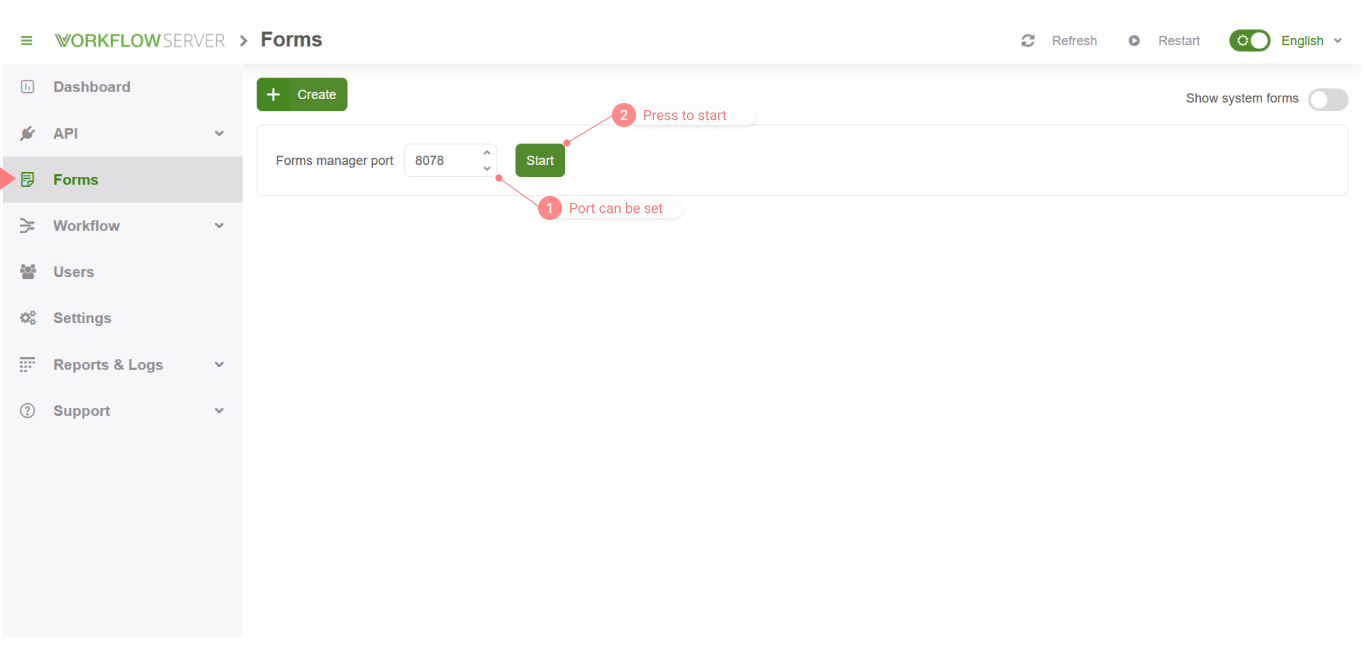
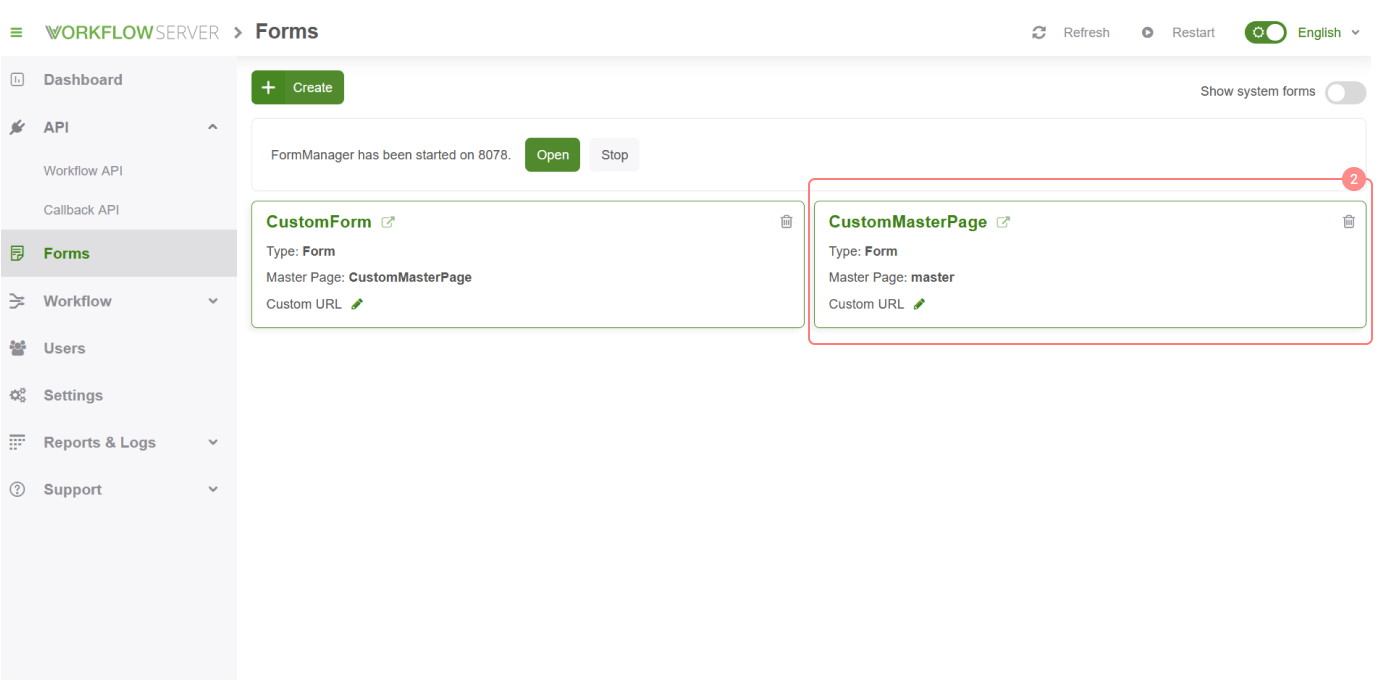
Workflow Server provides an end-user interface to manage process business flows. It is off by default. You should click the 'Start' button
in the Forms tab to enable. The service starts at port 8078. The default port is specified in the: DefaultFrontendPort parameter of the *
config.json* file.
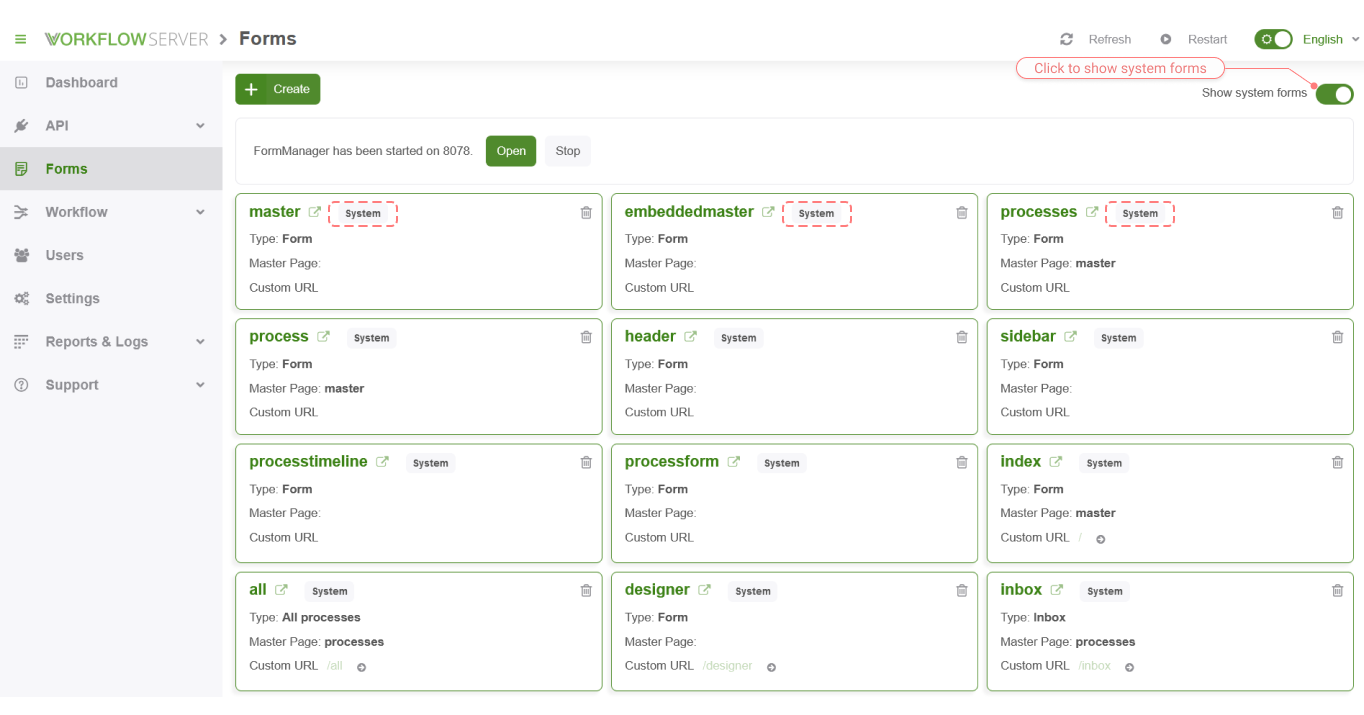
WFS Forms implement Vue.js and Element UI. WFS Forms are available for two types of forms: user and system forms. Only user forms are shown in the admin panel by default. You should switch the slider to display the system forms.
Form building
Workflow Server Forms use the concept of master page and placeholders to inherit and build forms. Master page is specified in the form settings.
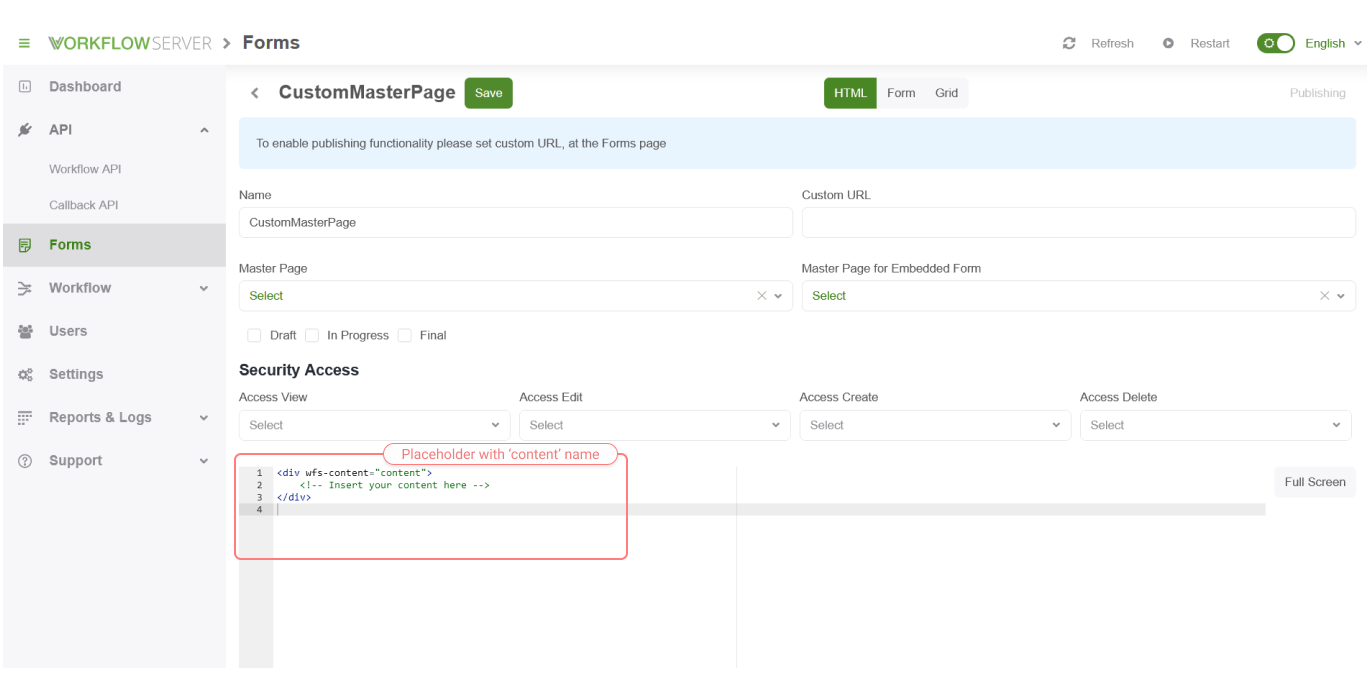
You should use the following in order to declare a placeholder on the master page:
<div wfs-content="content"></div>
Where 'content' is the placeholder's name.
Then, the object content with the attribute: wfs-content="content" will be inserted into this placeholder.
<div wfs-content="content">
  <!-- Your content -->
</div>
In addition, the tag: wfs-forms can be used to insert the content of another form:
<div wfs-form="header"></div>
Form settings
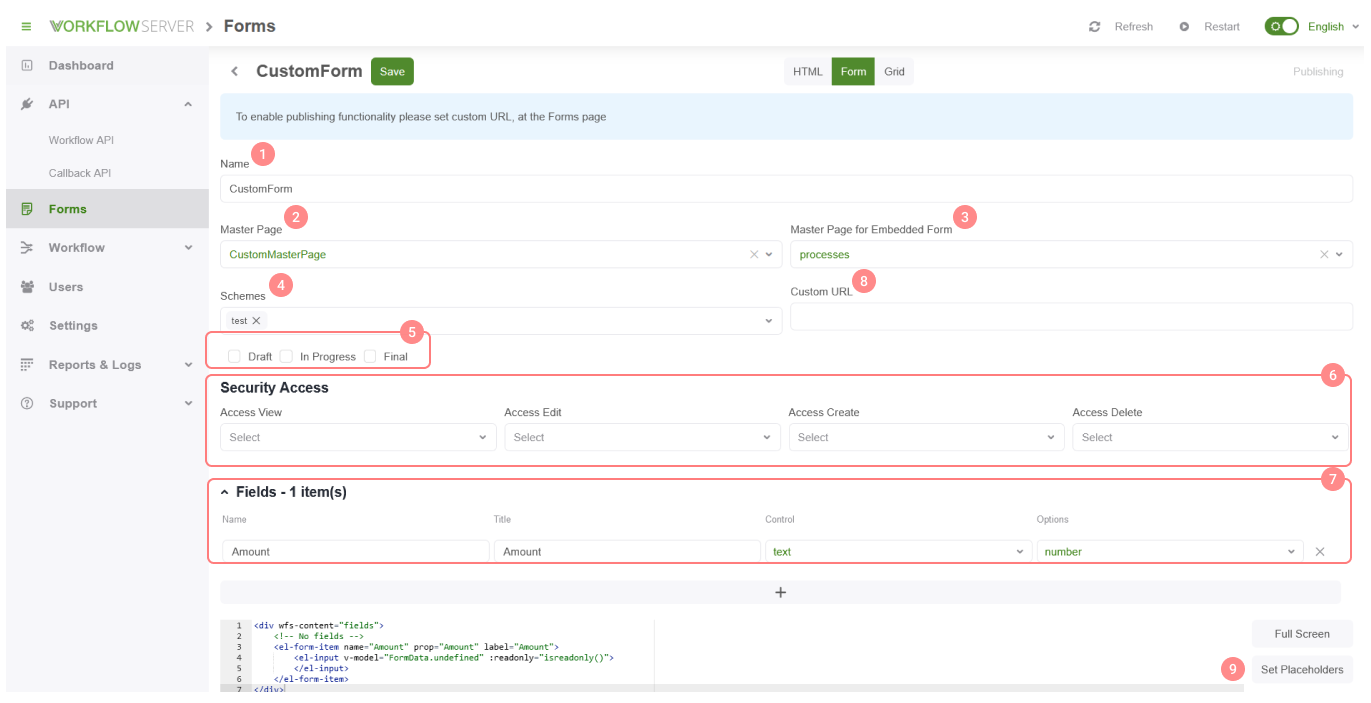
Each form has the following settings:
-
Name - the form name.
-
Master Page - the master page.
-
Master Page for Embedded Form (All, Processes, Header, Sidebar, Inbox, Outbox) - the page type to determine the data loaded into the form; used to display the list of processes.
-
Schemes - the list of schemes available in the form. This option works only for multiple processes form.
-
Draft, InProgress, Final - additional options for filtering.
-
Security Access - CRUD access setting in accordance with the role (available after the authorization is done).
-
Fields - columns / controls block to be displayed on the form or in the list of processes.
-
Custom URL - the page url; when opening the url, the corresponding form is opened.
-
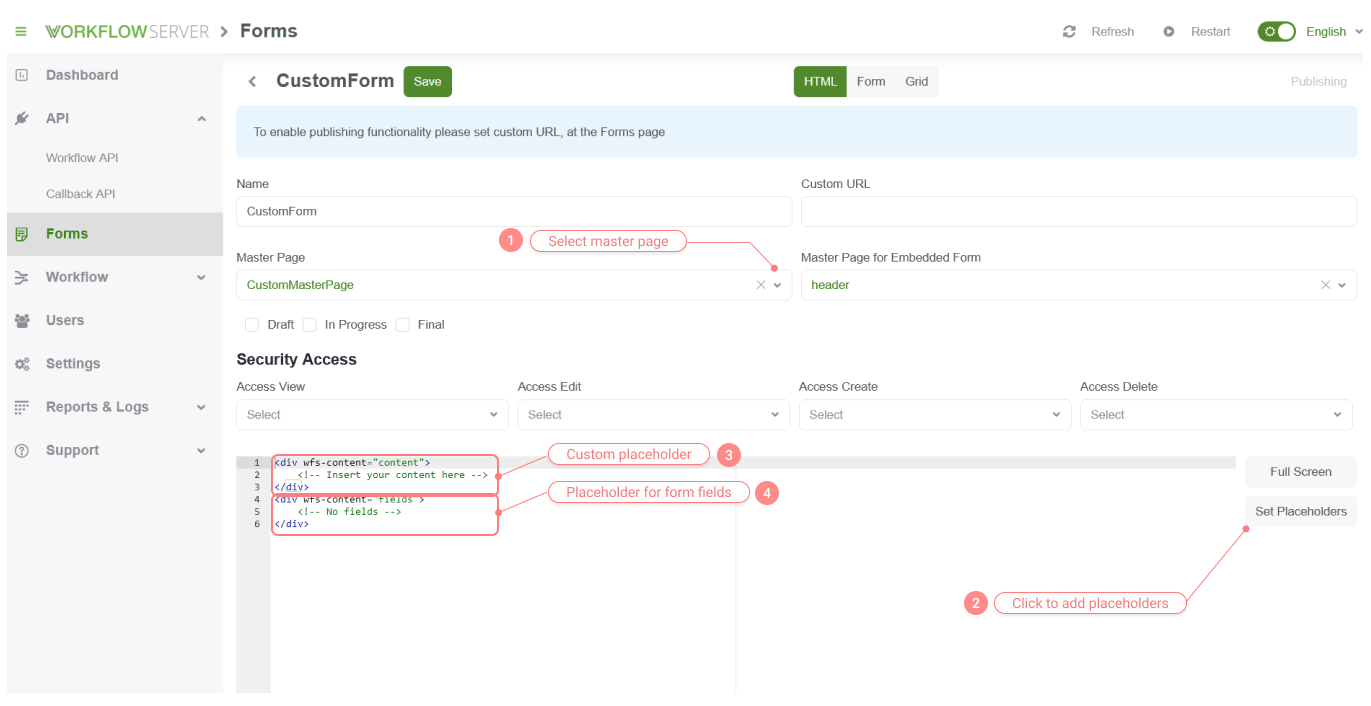
Click Set Placeholders for pasting the list of placeholders from the master page into the form source code.
The format to add a placeholder:
<div wfs-content="placeholdername">
    <!-- Insert your content here -->
</div>
Where 'placeholdername' is the placeholder name from the master page.
System forms
The systemforms.json file contains the default settings for the system forms. This file is stored in the frontend folder. The code of all system forms and the static resources for the user interface are stored in this folder.
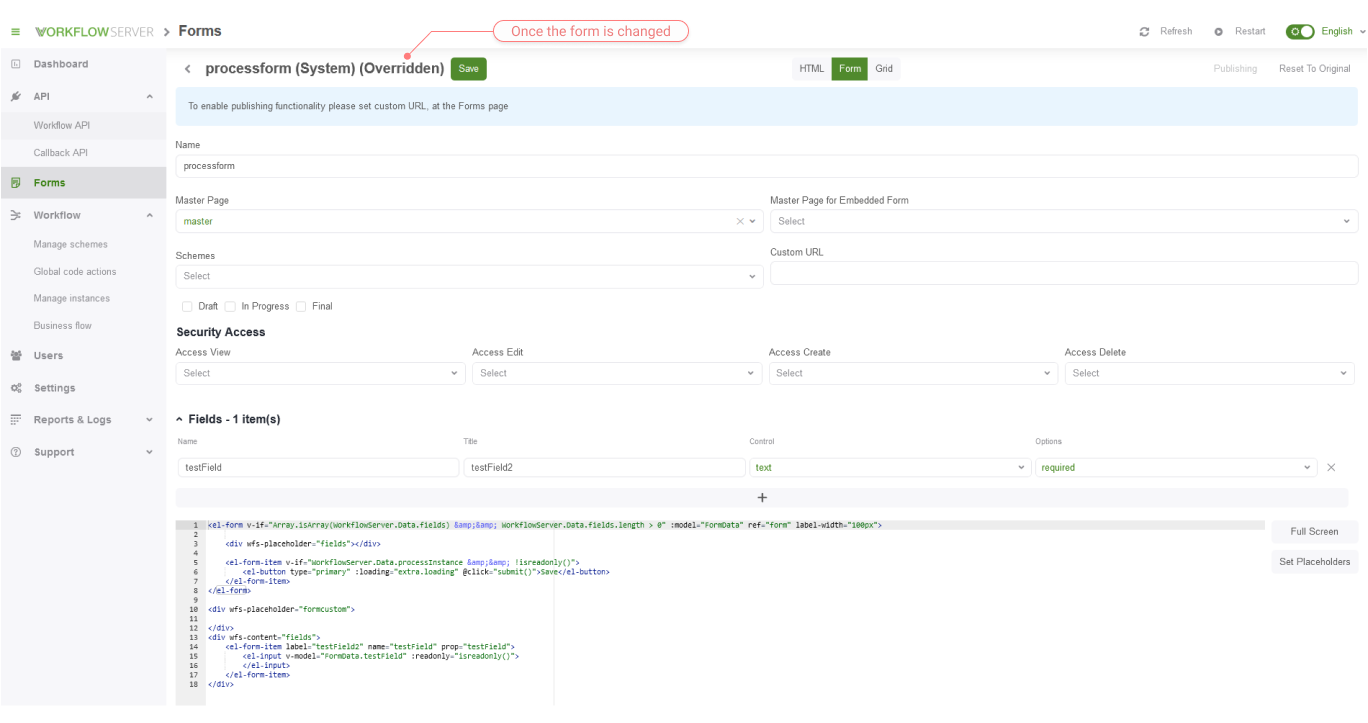
Is possible to change the settings and body of the system forms in the admin panel; on changing, the Overridden flag gets enabled.
The basic forms are:
- master - the master page for all forms.
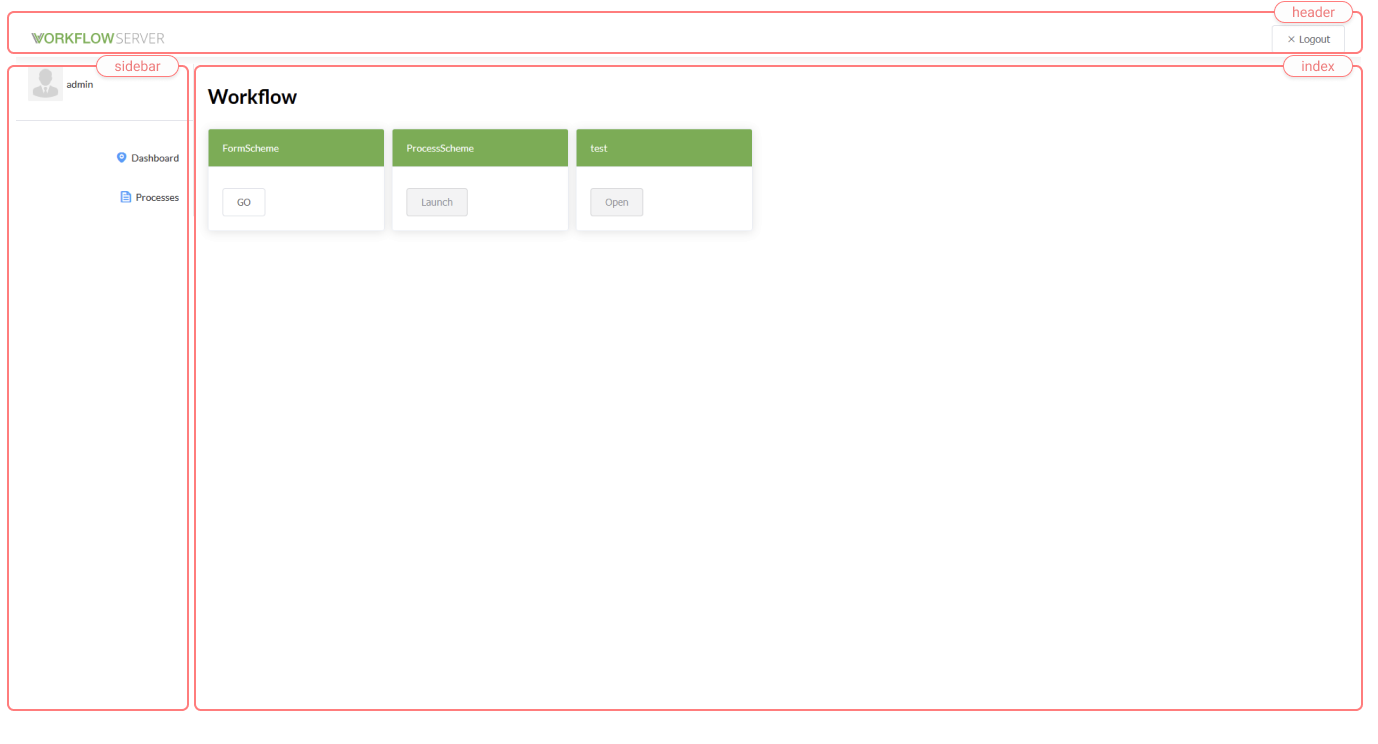
- index - the first page, displays the list of all schemes.
- all - the page with the list of processes.
- my - processes of the current user (available after the authorization is done).
- inbox - processes of the current user (available after the authorization is done).
- outbox - processes approved by the current user (available after the authorization is done).
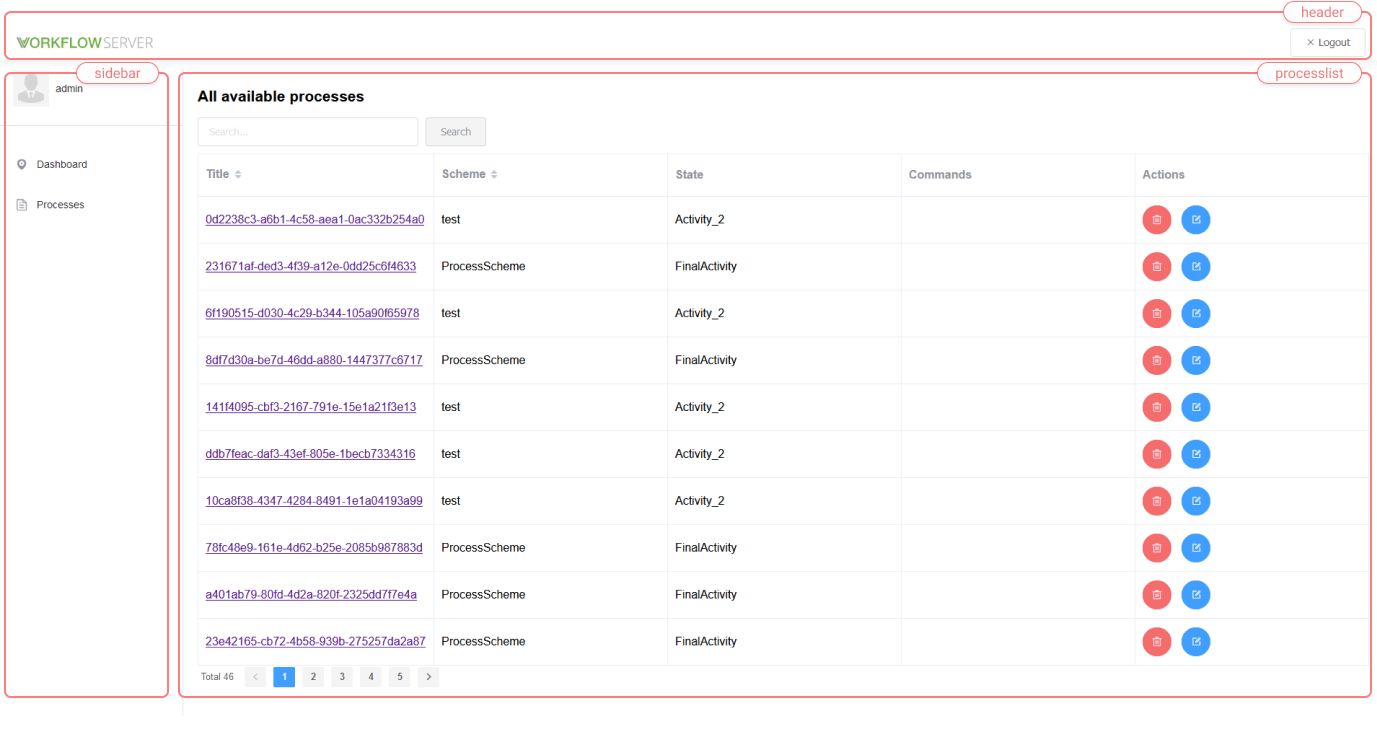
- processeslist - the base page for the list of all processes.
- header - the page header.
- sidebar - the left panel.
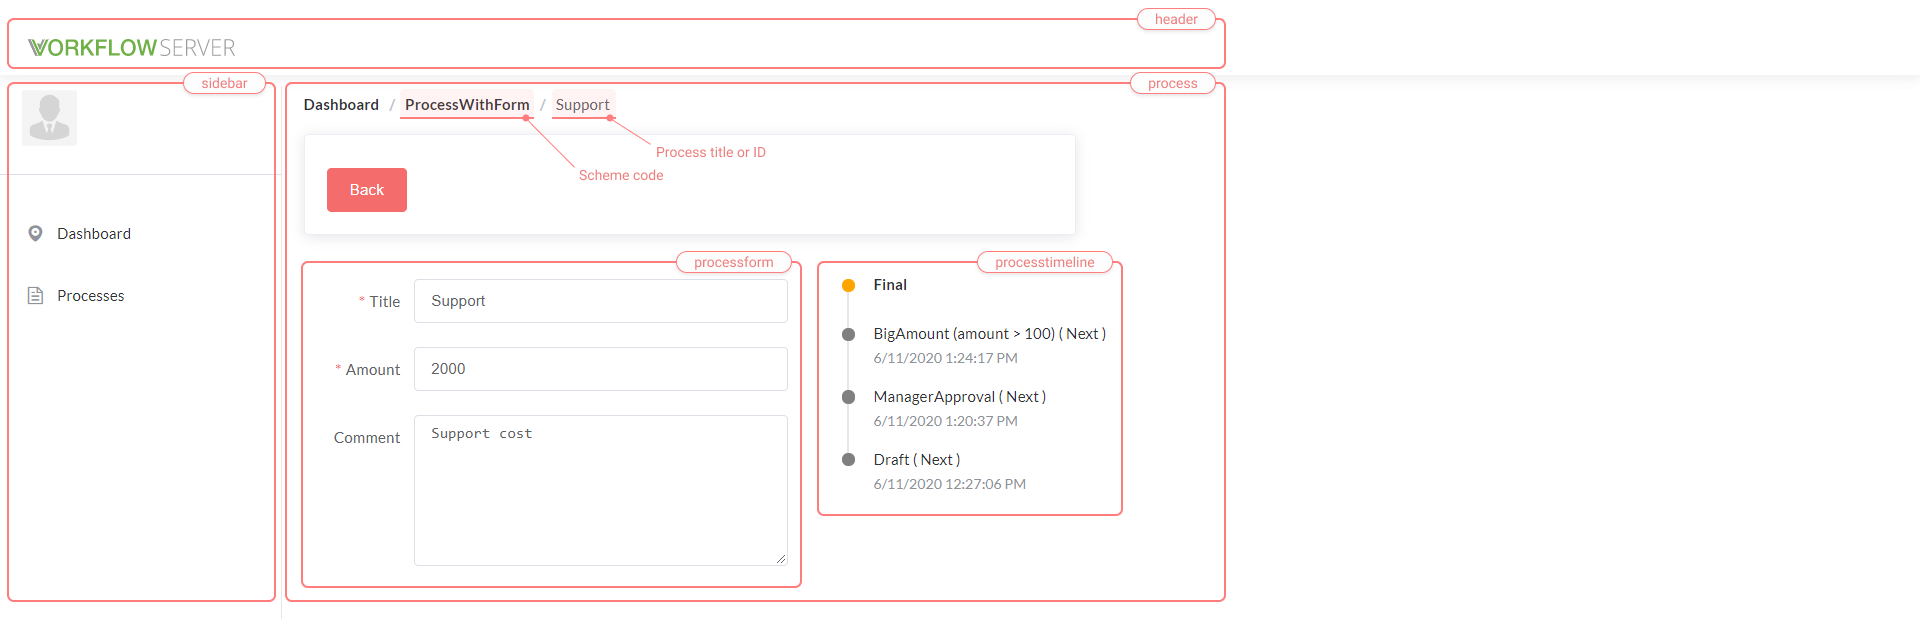
- process - the base page for process, contains commands, process fields and timeline.
- processtimeline - the control with the process timeline (approval history).
- processform - the form fields related to the process.
Process startup options
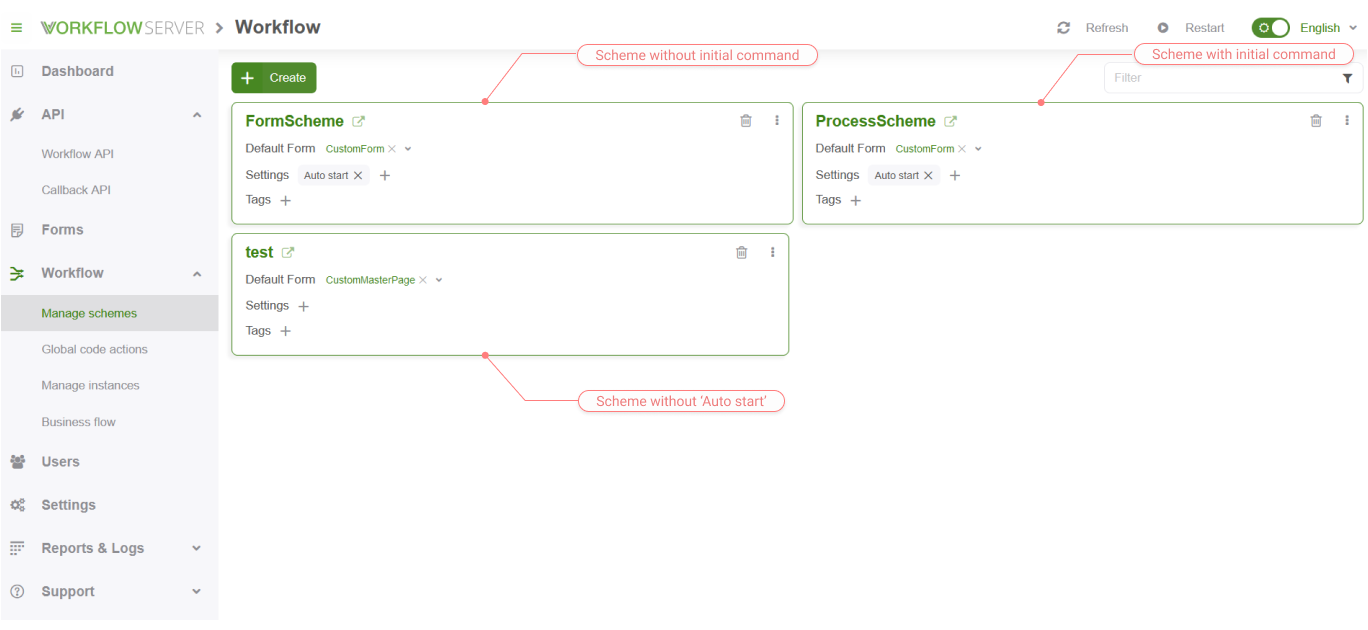
The process scheme has the Auto Start flag that defines the principles of the process creation. If the flag is not set, then you will see the process form with the inscription: "The process is not started. Click on a button for starting the workflow". You should click on the button in this window to start the process. If the AutoStart flag is set, the process will be automatically created.
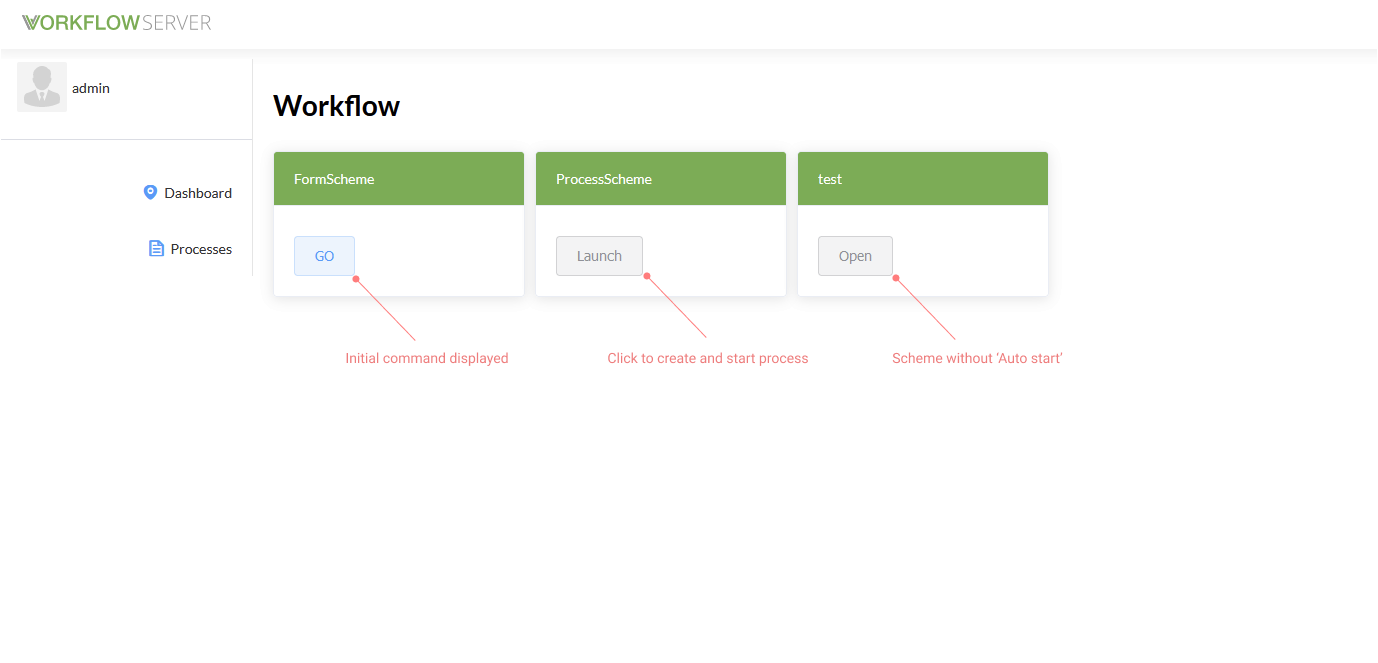

The index page displays the list of processes. Each process has one or more commands:
- If Auto Start is unchecked, Open is displayed. After clicking this button you will see the process form with inscription: "The process is not started. Click on a button for starting the workflow". You need to click any initial process commands button to start the process.
- If the scheme is without initial commands but with Auto Start checked, then Launch is displayed, the process automatically starts after clicking this button.
- If the scheme has both initial commands and Auto Start checked, then initial commands are displayed, the process automatically starts after clicking any command button.
Timeline a Process History
Process timeline displays simplified data about transitions between the process states.
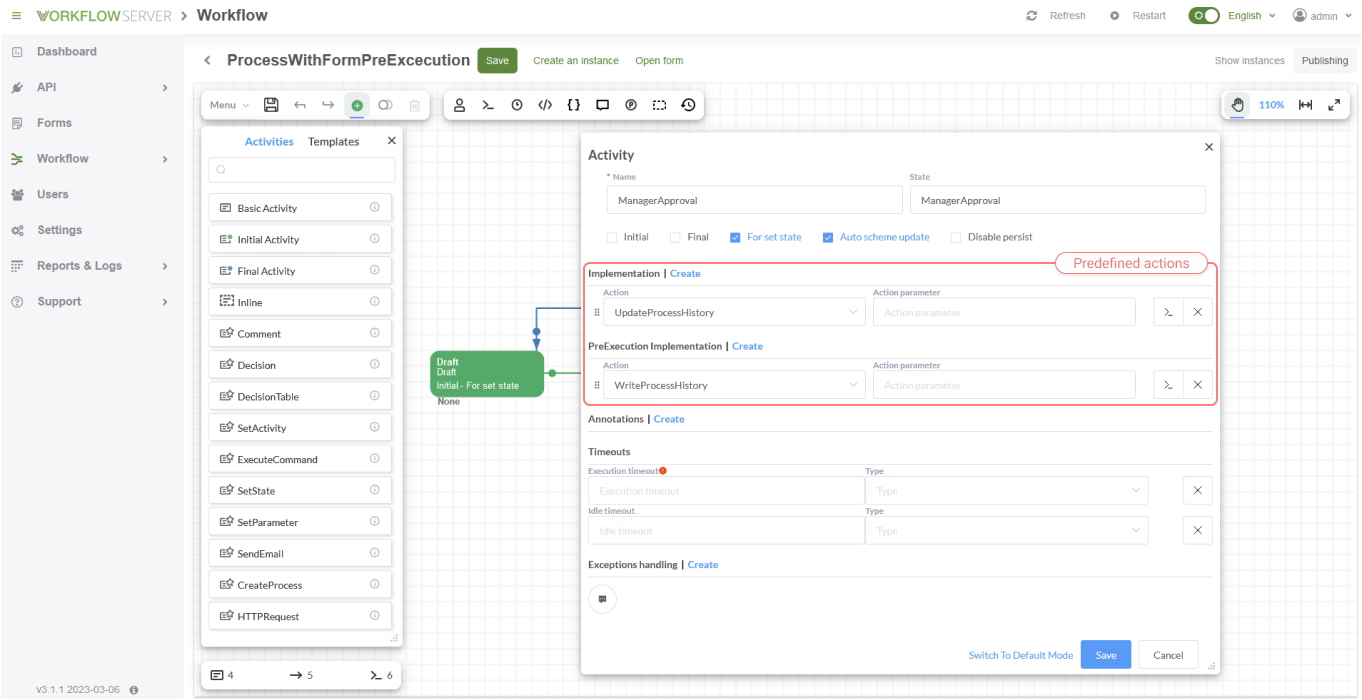
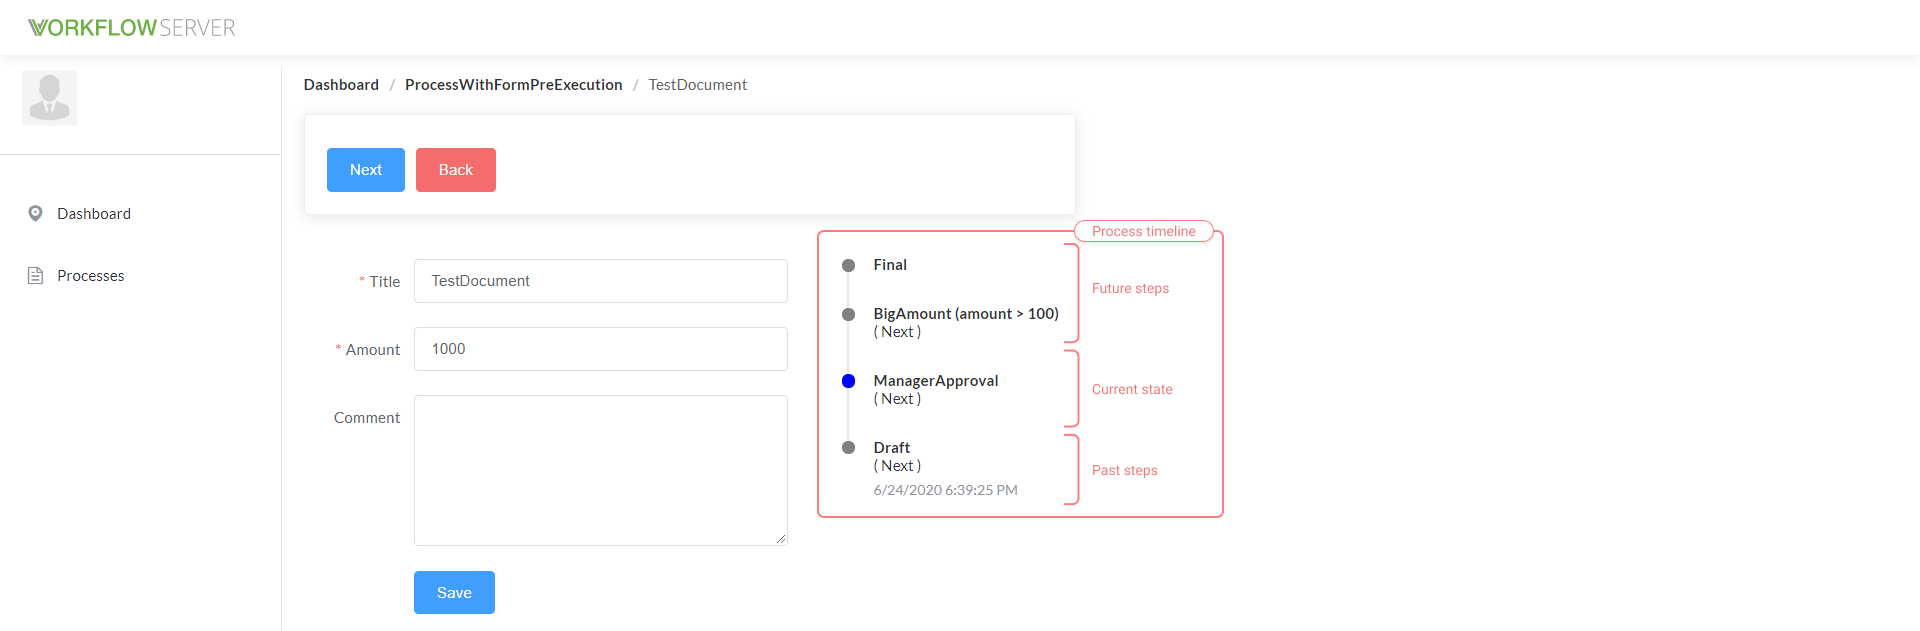
If you use WriteProcessHistory and UpdateProcessHistory predefined actions, then the history of approvals with future steps is displayed.
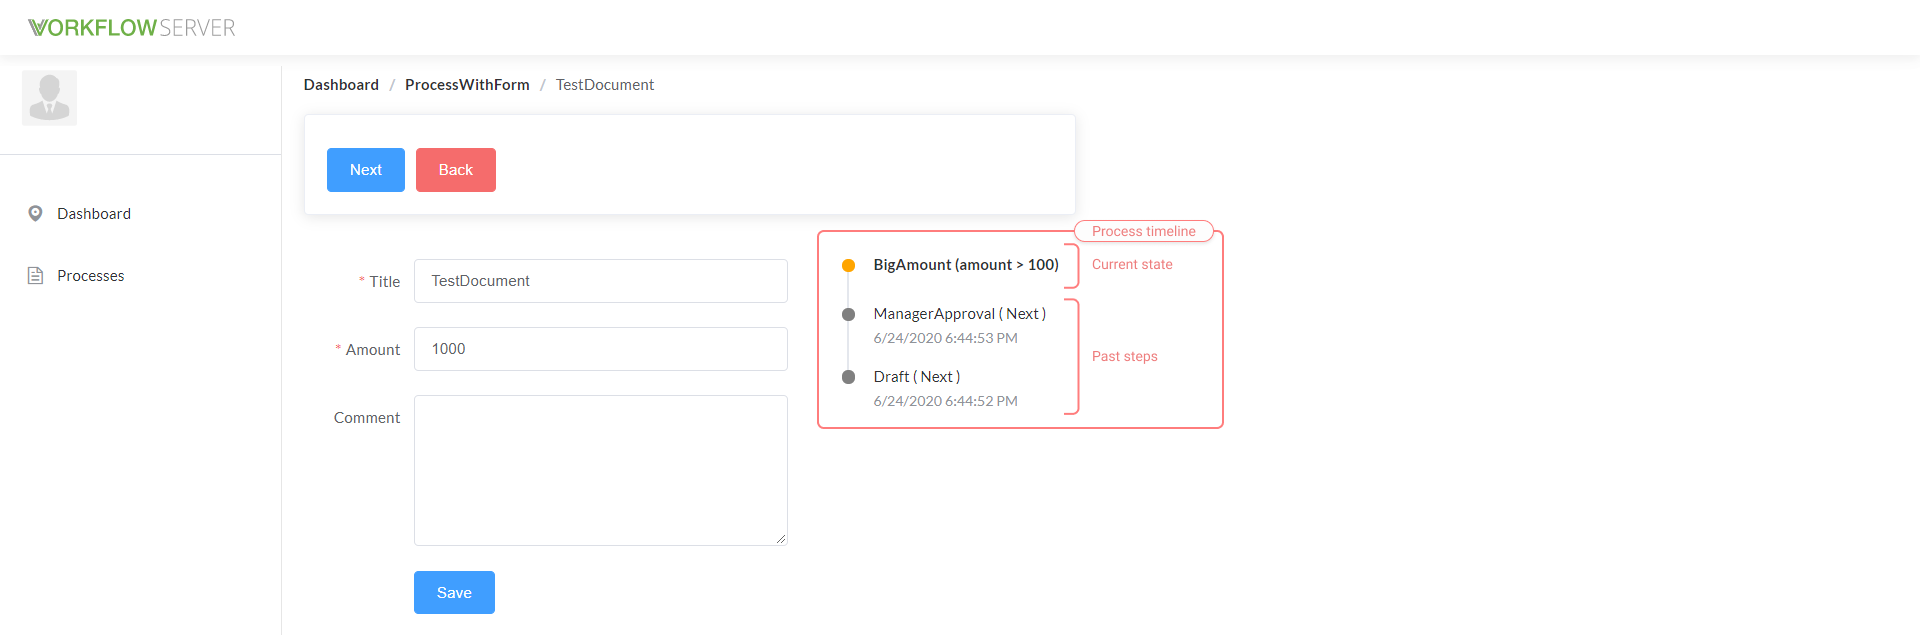
If it is not used, a simple transition history is displayed.
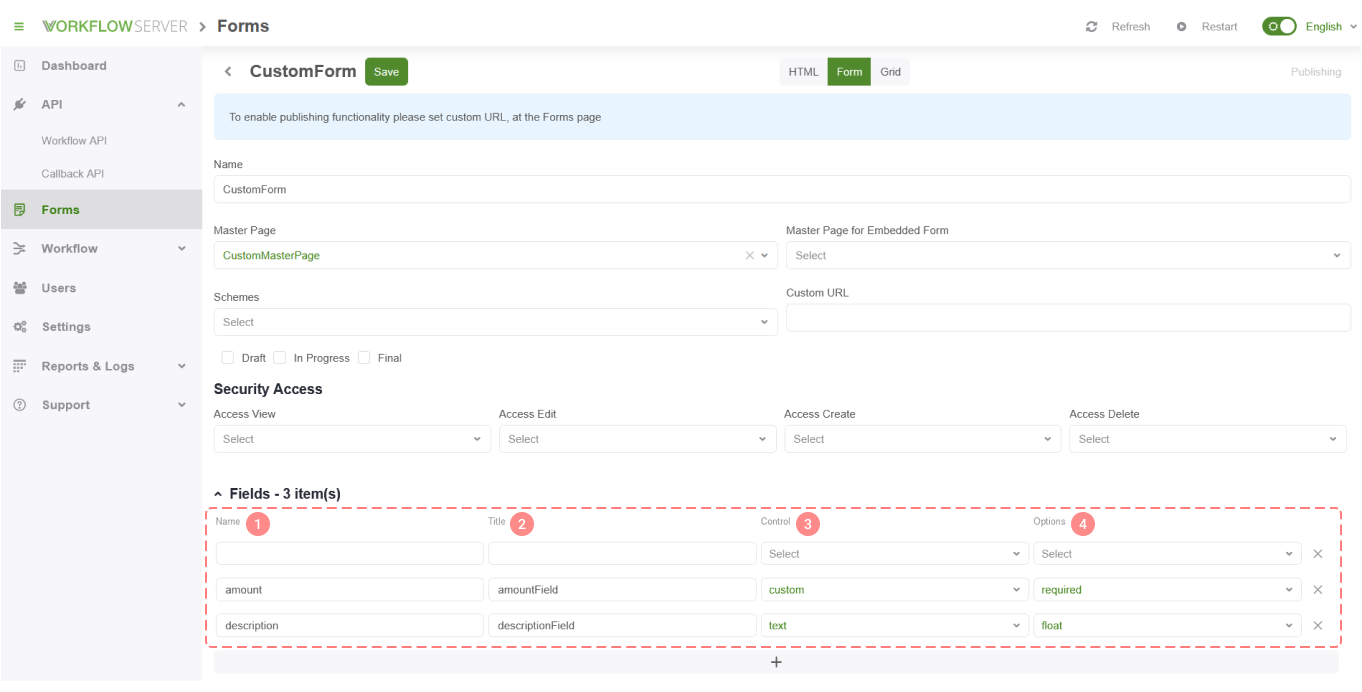
How to work with fields
The list of fields is used for the list of columns in the tables and the inputs of the process forms. You can specify the list of fields in the form editing interface.
-
Name - the process parameter name.
-
Title - to be displayed in a form or table.
-
Control - a display control. The following controls are available: text, checkbox, select, select-multiple, textarea, custom. Used in the process forms (when Type = Form) only.
-
Options - the options of the controls. Basically they specify the validation of values. The following options are available:
- required - to make the field required.
- email - the field must be a valid email.
- number - the field must be a valid integer value.
- url - the field must be a valid url.
- float - the field must be a valid float value.
Several options can be specified.
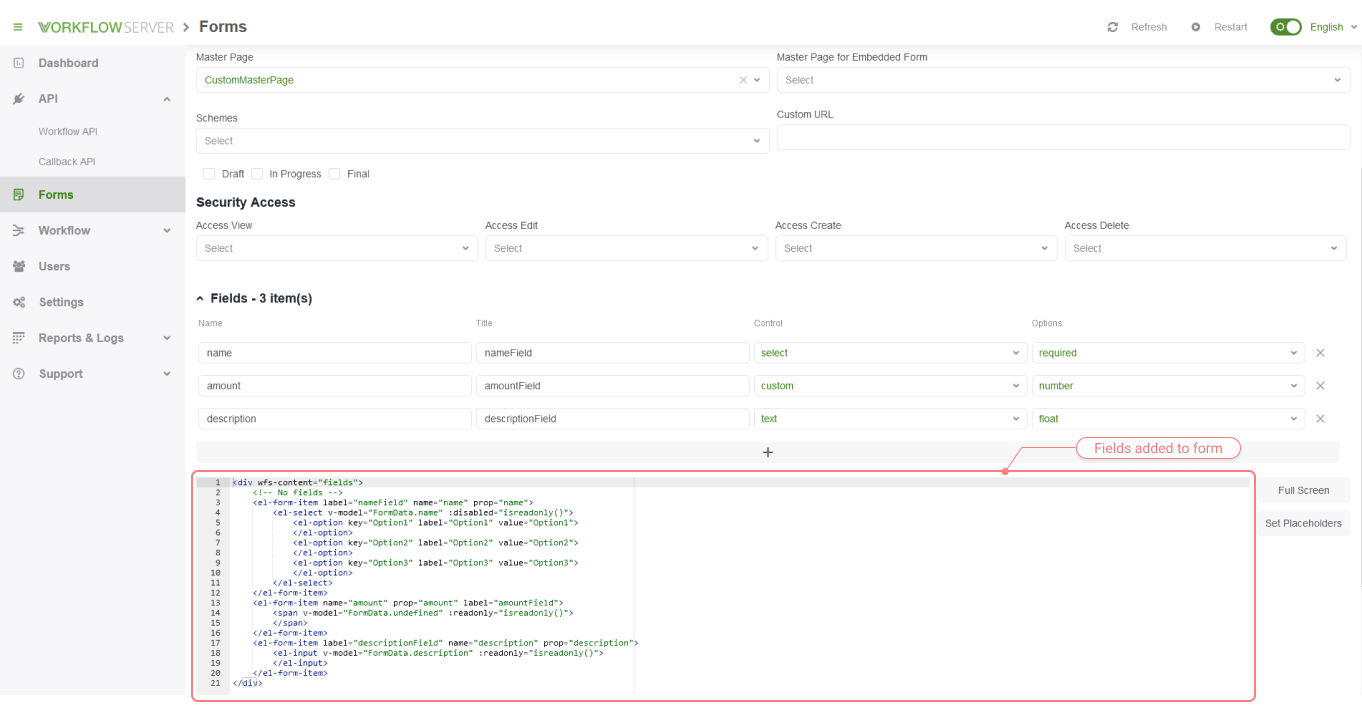
After selecting, the list of controls is added to the page source.
For example, the following set:
| Name | Title | Control | Options |
|---|---|---|---|
| name | nameField | select | required |
| amount | amountField | custom | number |
| description | descriptionField | text | float |
Turns into the following code:
<div wfs-content="fields">
    <!-- No fields -->
    <el-form-item label="nameField" name="name" prop="name">
        <el-select v-model="FormData.name" :disabled="isreadonly()">
            <el-option key="Option1" label="Option1" value="Option1">
            </el-option>
            <el-option key="Option2" label="Option2" value="Option2">
            </el-option>
            <el-option key="Option3" label="Option3" value="Option3">
            </el-option>
        </el-select>
    </el-form-item>
    <el-form-item name="amount" prop="amount" label="amountField">
		<span v-model="FormData.undefined" :readonly="isreadonly()">
		</span>
    </el-form-item>
    <el-form-item label="descriptionField" name="description" prop="description">
        <el-input v-model="FormData.description" :readonly="isreadonly()">
        </el-input>
    </el-form-item>
</div>
The following types of controls are available:
- text
- checkbox
- select
- select-multiple
- textarea
- custom
For the "custom" type, an element with the div tag is added; for an unknown type, the span tag is used. If you plan to use a control of yours, set custom, and then replace it with any tag you need. These are the controls available for use at Element UI by default.
Fields are saved in the process parameters and are accessible by * SetParameter* and GetParameter operations of WorkflowAPI.
The following parameter names are reserved, you can set these parameters in the Actions as usual process parameters. This way you can display forms from your processes code.
- For the process editing form:
- readonly - set the form to the read-only mode.
- For the process lists:
- title - the process name, formed by calling the
WorkflowServer.getTitlefunction. This function is located in * /frontend/scripts/workflowserver.js* so you can customize it. By default, the first non-empty parameter value is taken: title, * name*, Id, ProcessId. - commands - the lists of available commands. Filled automatically.
- actions - available additional process actions (e.g. deletion).
- localizedstate - the localized state name.
- title - the process name, formed by calling the
How to bind the form and the process?
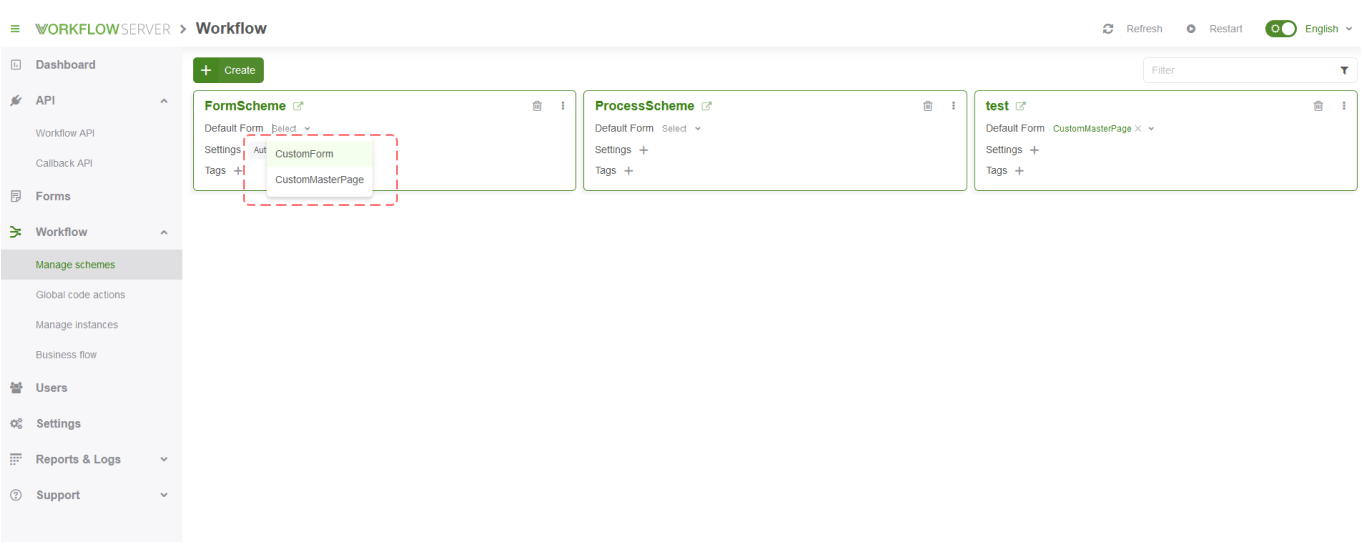
If the Default Form parameter is set in the list of process schemes, this form is displayed when viewing the process.

In Activity, you can call ShowForm predefined action and specify the form to be displayed at the current and subsequent stages of the process. Call ShowForm with an empty form name to reset the form.
How to create a static form?
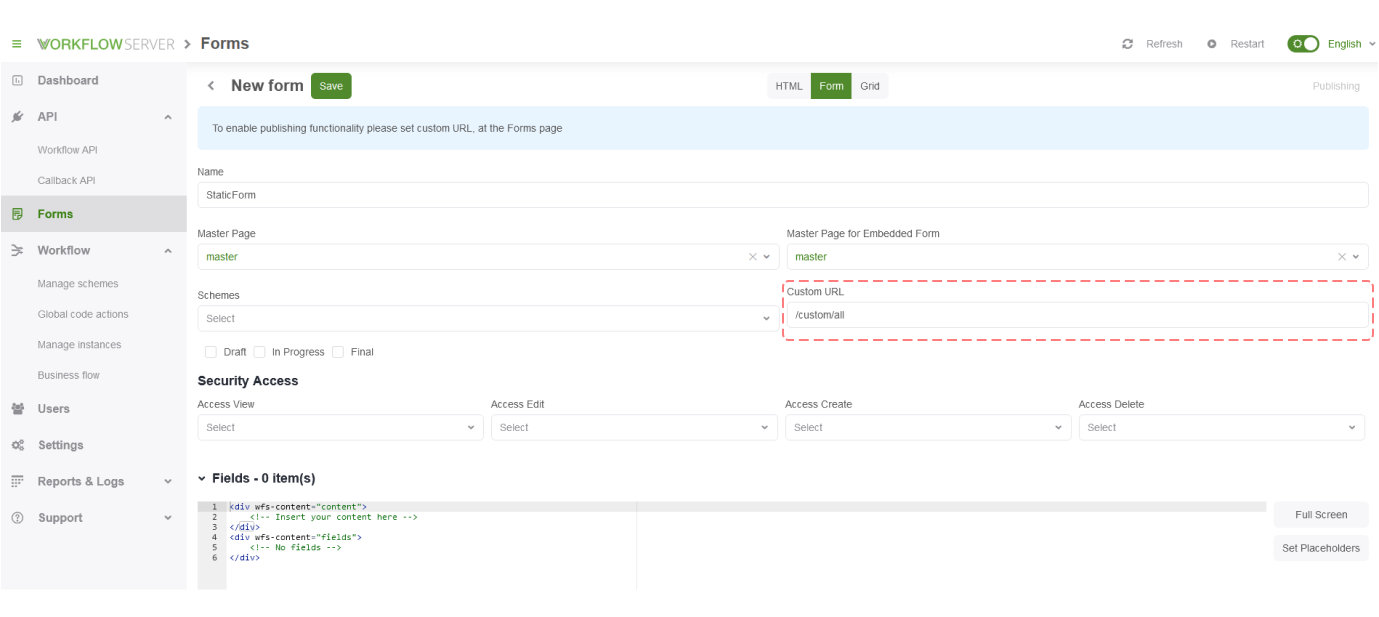
You can create a form and specify Custom Url. When opening this url, the Workflow Server displays your form.
Global WorkflowServer javascript object
The WorkflowServer object is globally accessible on the page and contains the page data. This object is located on the directory: *
/frontend/scripts/workflowserver.js* file. The basic properties and functions are the following:
VueConfig- the parameters to initialize a Vue object.Data- the form/object data.Rules- the validation rules.loadInstances- load the instances for the current page (works if Type is set for the form, i.e. it is multi process form).executeCommand- execute a command.deleteInstance- delete an instance.loadSchemes- load the schemes.loadFlows- load BusinessFlow.fetchJson- JSON server request.fetch- server request.DataExtend- extension for WorkflowServer.Data.saveForm- save the form data in the process.getTitle- returns the title of the process. The first non-empty field value is taken: title, name, Id, ProcessId.formatDate- set the Date value.reload- reload the page.showError- show an error.showConfirm- ask for confirmation.
Instances filtering
WorkflowServer.loadInstances can use additional filters in the format:
var param = {};
...
params.filter = [
  { column: "title", value: "Test", term: "=" }
];

WorkflowServer.loadInstances(params).then(function (response) {
  WorkflowServer.Data.items = response.items;
  WorkflowServer.Data.itemsCount = response.count;
});
Custom validation
The following script can be used to add custom validation:
WorkflowServer.Rules.customRule = {
  validator: function (rule, value, callback) {
    var regex = /^\d+$/;
    if (!value || (value.match(regex) && !isNaN(value))) {
      callback();
      return;
    }
    callback(new Error(rule.message));
  },
  message: 'Error'
}
More details regarding how to write validators can be found here.
Process parameters loading
When loading the form, the Workflow Server finds the script tag for workflowserver.js.
<script src="/scripts/workflowserver.js" type="text/javascript"></script>
It moreover inserts the form data, for example:
<script>
  WorkflowServer.DataExtend({...});
</script>
When loading the page, you immediately get full access to the form data through WorkflowServer.Data.
The system process parameters are loaded into WorkflowServer.Data,
the user-defined process parameters are loaded into
WorkflowServer.Data.Form. Only user-defined process parameters are available for change.
The data is loaded by using the WorkflowServer.loadInstances method for the processes list pages.
Vue Initialization
It is a part of the master form:
<script>
  WorkflowServer.VueConfig.el = '#app';
  WorkflowServer.VueConfig.data = WorkflowServer.Data;
  WorkflowServer.App = new Vue(WorkflowServer.VueConfig);
</script>