How to connect a custom OpenID provider to Workflow Server
When working on localhost, you must use an HTTPS protocol with a trusted certificate. This requirement comes from the cookie policy applied to localhost.
Overview
Workflow Server supports external authentication through OpenID together with the built-in OpenIddict provider.
OpenID enables secure authentication by using an existing account to sign in to multiple applications without needing
to create new passwords. When implementing OpenID, the user credentials are only provided to the identity provider,
which then confirms the user's identity to the applications being accessed.
The OpenID Connect (OIDC) authentication protocol which extends OAuth 2.0 to add an identity layer, allows clients to confirm an end user's identity using authentication by an authorization server. It enables several clients, including web-based, mobile, and JavaScript clients, to request and receive information related to authenticated sessions and end-users. The specification is extensible, so it is possible to use optional features such as encryption of identity data, discovery of OpenID Providers, session management and so on.
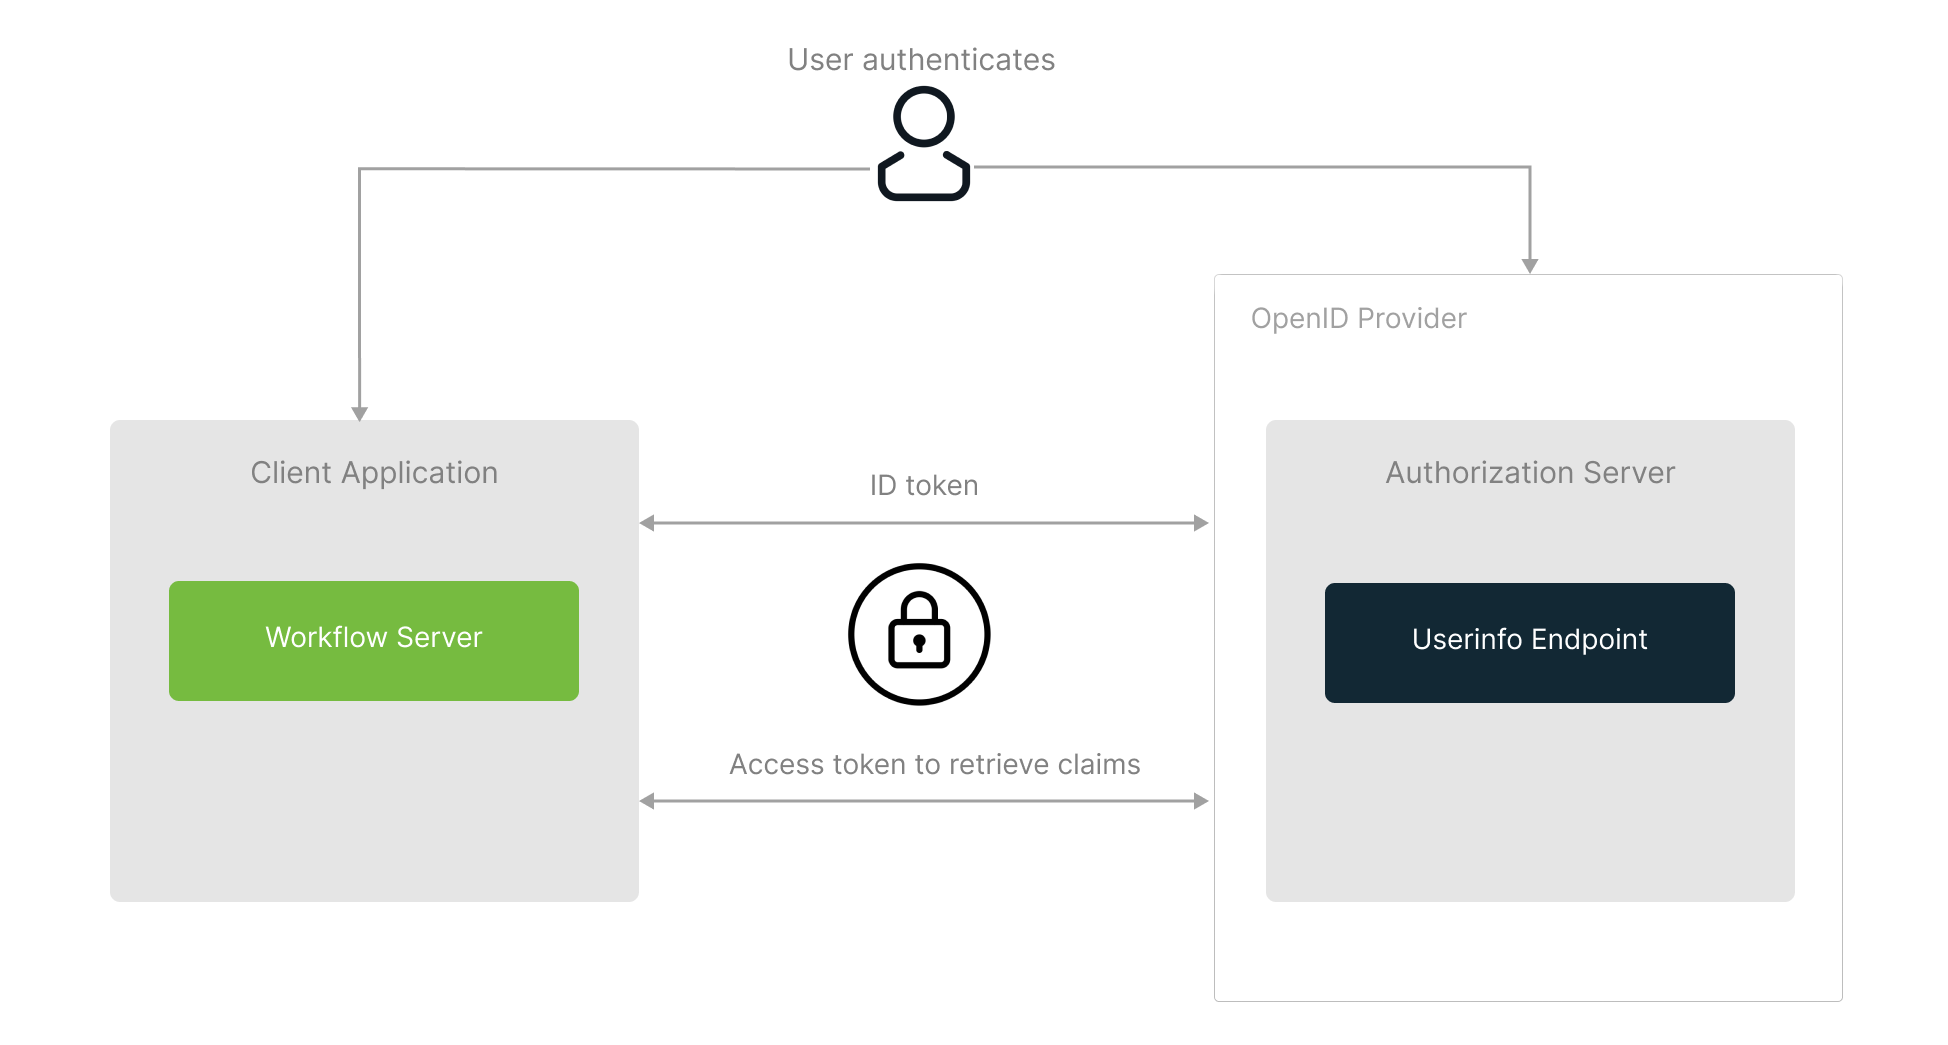
Once the request is processed, the client will receive an access token and an ID token issued by the authorization server that contains claims that carry information about the user. Then, the client can contact a special endpoint on the authorization server known as the UserInfo endpoint to receive the remaining claims about the user.
In this article, the OpenIddict server implementation will be used as the OpenID provider.
As an example, we will rely on the official OpenIddict samples.
Our OpenIddict server instance will be available at https://localhost:5000.
OpenIddict settings
OpenIddict is an open-source library for ASP.NET Core that provides an implementation of OpenID Connect and OAuth 2.0.
It allows you to integrate token-based authentication, Single-Sign-On, and API access control into applications.
OpenIddict does not have a built-in administration panel, so as an external server we will use the Contruum sample.
This sample is built with Razor Pages and contains 2 hardcoded user identities.
There are some options that should be defined for settings Workflow Server as a client application. The steps are described below:
- Clone the
OpenIddictsamples repositorygit clone https://github.com/openiddict/openiddict-samples.git - Edit the
openiddict-samples/samples/Contruum/Contruum.Server/appsettings.jsonfile, and add a new entry to the clients section:{
"ClientId": "wfs-client",
"ClientSecret": "DF77F57E-3BD4-4E06-B464-FC4B497D0B20",
"RedirectUris": [ "https://localhost:8077/account/callback", "https://localhost:8077/account/callback/openiddict" ],
"PostLogoutRedirectUris": [ "https://localhost:8077" ],
"Type": "confidential",
"Permissions": [
"ept:authorization",
"ept:token",
"ept:logout",
"gt:authorization_code",
"gt:implicit",
"gt:refresh_token",
"rst:code",
"rst:code id_token",
"rst:code id_token token",
"rst:code token",
"rst:id_token",
"rst:id_token token",
"rst:token",
"scp:address",
"scp:email",
"scp:phone",
"scp:profile"
]
} - Start the server by running the following command:
dotnet run --project ./openiddict-samples/samples/Contruum/Contruum.Server/Contruum.Server.csproj
OpenID configuration in Workflow Server
The main steps that should be considered to set this service in Workflow Server are described as follows:
-
First, clone the Workflow Server GitHub repository in this link.
-
Create a database. Detailed instructions regarding this topic can be read here.
-
Next, you need to add a custom provider by modifying the
Program.csfile in the Workflow Server project. A sample code for adding a custom OpenId provider is included below:workflowServer.RegisterOpenIdConnectProviders(authBuilder =>
{
authBuilder.AddRegistration(new OpenIddictClientRegistration
{
Issuer = new Uri("https://localhost:44323"),
ClientId = "wfs-client",
ClientSecret = "DF77F57E-3BD4-4E06-B464-FC4B497D0B20",
ProviderDisplayName = "OpenIddict server",
ProviderName = "OpenIddict",
RedirectUri = new Uri("https://localhost:8077/account/callback"),
ResponseTypes = { "code" },
Scopes =
{
OpenIddictConstants.Scopes.OpenId,
OpenIddictConstants.Scopes.Profile,
OpenIddictConstants.Scopes.Email
}
});
}); -
Update the following settings in
config.json:- Set
httpsfor the url:"url": "https://*:8077/"; - Specify the path to the certificate and make it trusted:
"CertificateFile": "../../../localhost.pfx"; - Set the certificate password if needed:
"CertificatePassword": "password"; - Enable OpenIddict server settings:
"DisableOpenIddictServer": false,; - Assign the certificate for
OpenIddictServerSettings;
- Set
-
Update
launchsettings.jsonand configureapplicationUrlto use https. -
Then, the project can be launched by running
WorkflowServer.sln. -
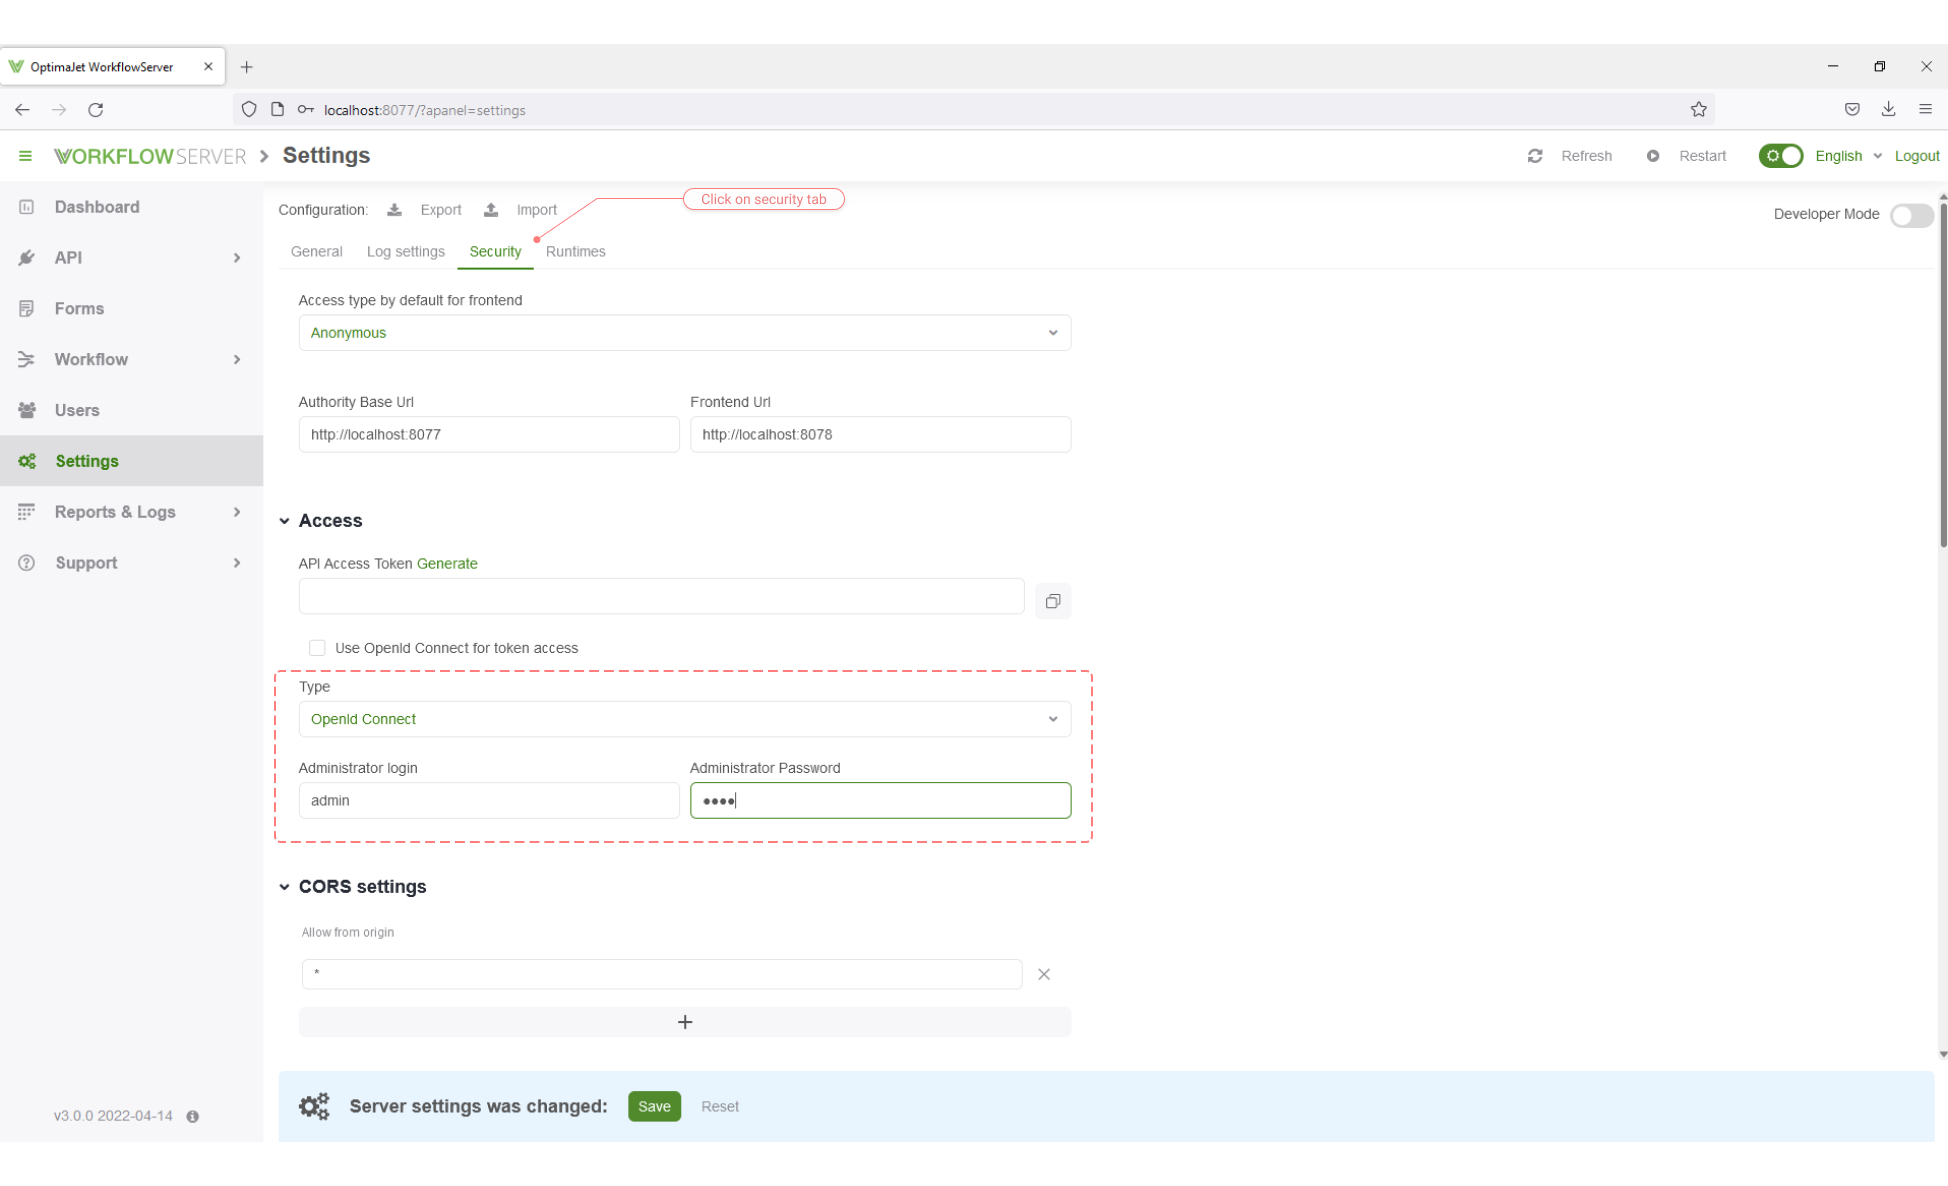
Restrict the access in Workflow Server Admin panel to use OpenID Connect. Go to the section: 'Settings', on the Tab: 'Security', in 'Access' choose: 'Type' -> 'OpenId Connect', and set Administrator login and Administrator Password. Click 'Save' button.
-
After saving, you will be redirected to the login page where you can sign in through your external auth server.
-
On the first sign-in, Workflow Server will create a user based on the external account. By default, this user will not have the admin role, so you must log in as an administrator and assign it manually.
Keep in mind that an access profile can be assigned in Workflow Server in the section 'Users'. Besides, an internal login information might be added for a user.