Forms Publishing
General information
Once a workflow has been created, you can deploy it to users (instead of requiring them to log in and access it from their Dashboard).
Then is possible:
- Provide the form URL within an e-mail or browser window.
- Link to the form from a Web page so the new form instance is displayed in a pop-up window.
- Embed and fully display the form within a Web page.

Click the Publishing button in the scheme or process page to see how the scheme is published. You should simply copy the code and embed it into your page.
Adding Embedded Form with Workflow Server Authorization
If you want to use an emmbedded scheme on the site, proceed as follows:
- Copy the code of the Embed section of the necessary scheme.
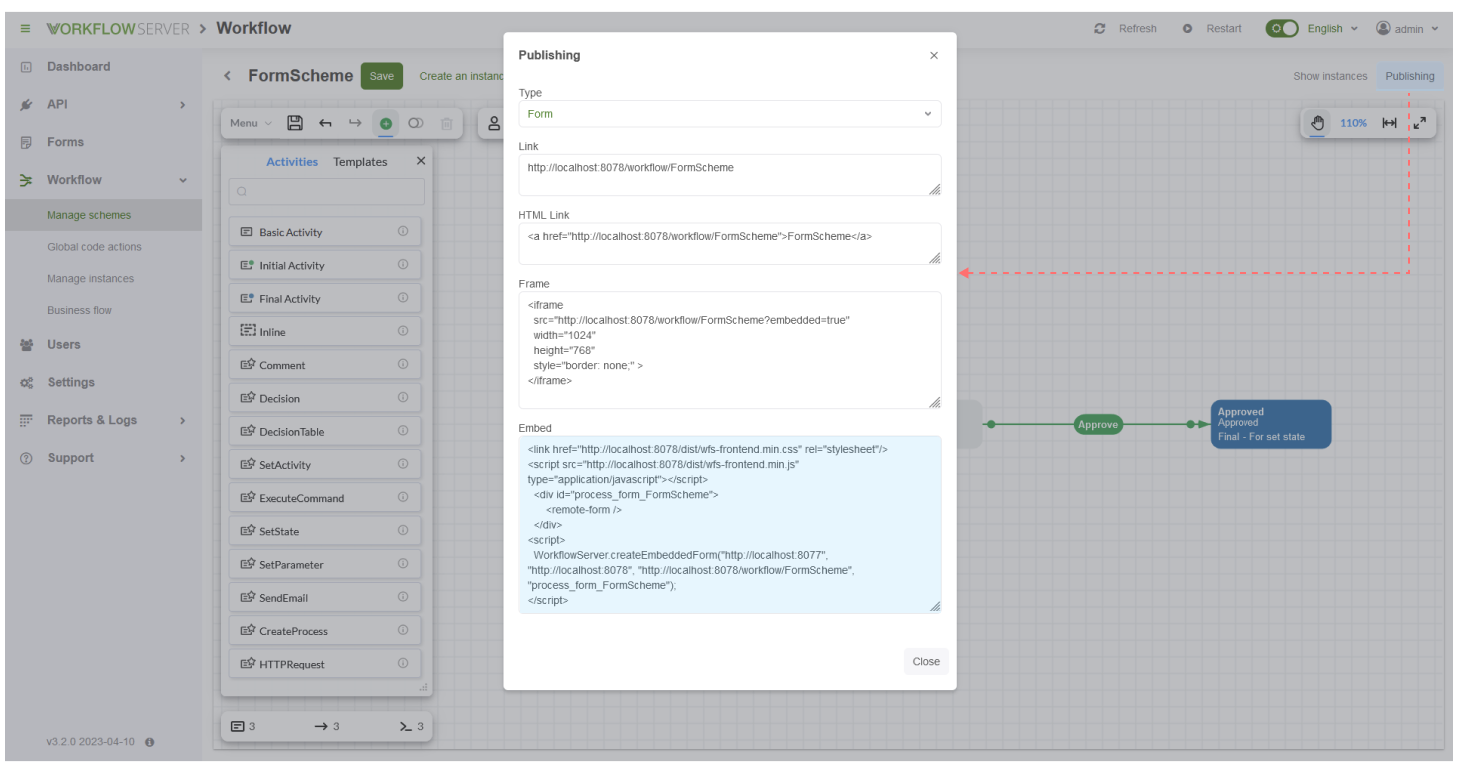
- Paste the code in your web application, for example, in a html file or a cshtml template.
<link href="http://localhost:8078/dist/wfs-frontend.min.css" rel="stylesheet"/>
<script src="http://localhost:8078/dist/wfs-frontend.min.js" type="application/javascript"></script>
<div id="process_form_FormScheme">
    <remote-form />
</div>
<script>
    WorkflowServer.createEmbeddedForm("http://localhost:8077", "http://localhost:8078", "http://localhost:8078/workflow/FormScheme", "process_form_FormScheme");
</script>
- Copy the page address where the embedded scheme will be located. In the given example, it is: http://localhost:81

- In main Workflow Server GUI, through: Settings -> Security tab-> Identity Server Settings, add the url to the Redirect Urls.
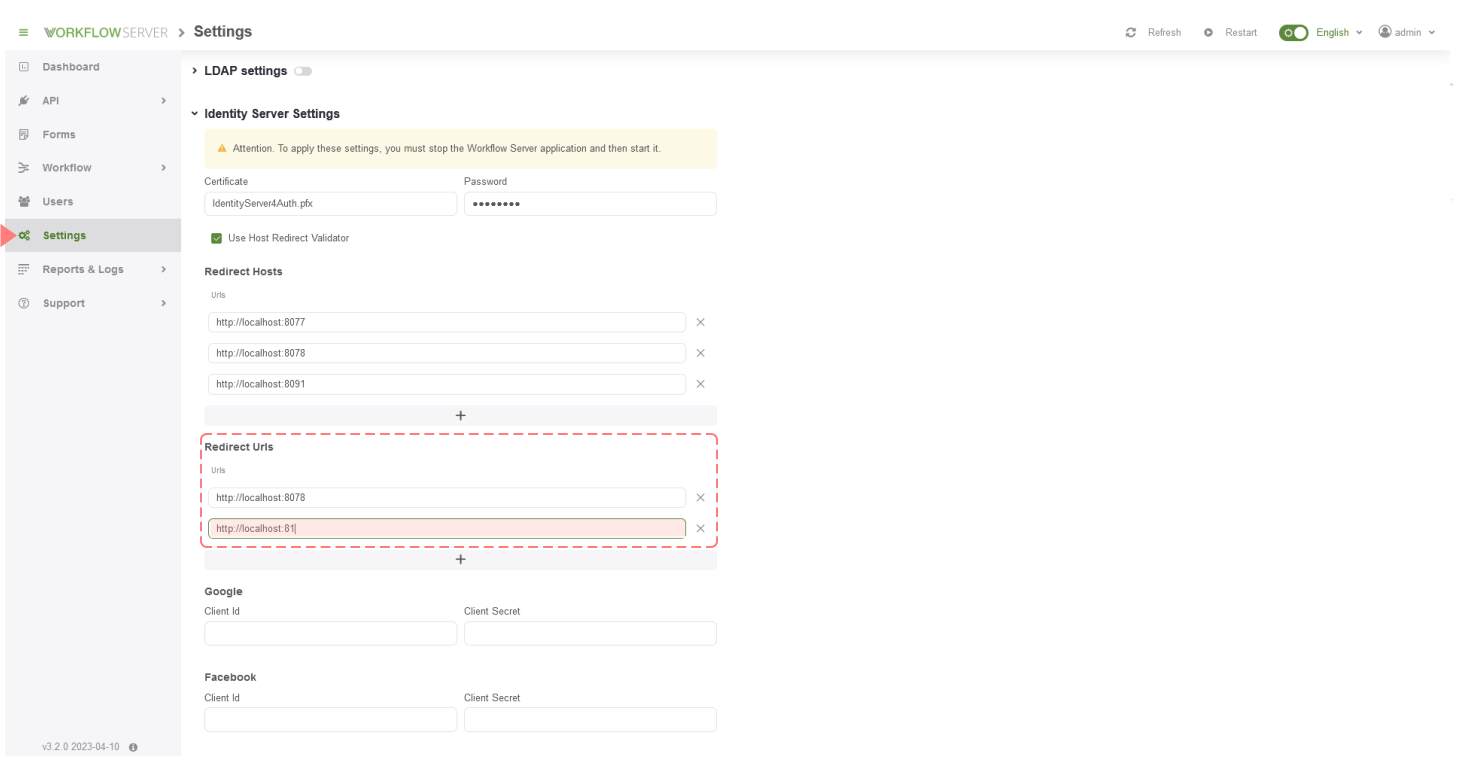
- Now, in the embedded form, login / logout will work through the Workflow Server.
Master Page for Embedded Forms
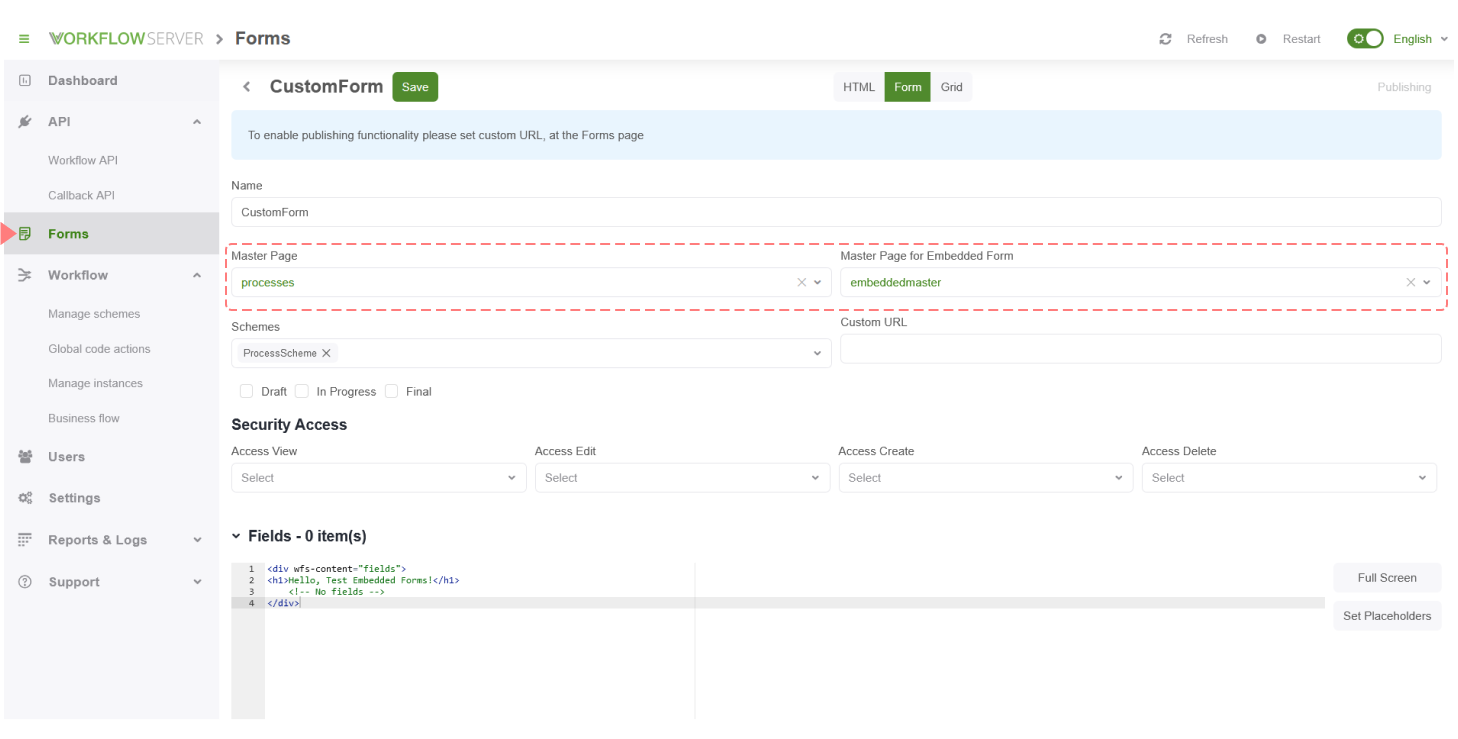
Forms have a new property - EmbeddedMasterPage (Master Page for Embedded Form) in the admin panel which allows selecting the master page used for this form when is displayed in the embedded view. If the EmbeddedMasterPage is not set for a form, the default implementation is embeddedmaster.html; then the MasterPage of this form will be used for the embedded page.
Security Settings for Embedded Forms
The following should be enabled to work with embedded forms:
- CORS for the site where the form is embedded.
- Login and logout redirects from embedded forms lead either to the address passed as a parameter to the method
that creates the form (see below), or to the page where the form is located, if no address is passed. The following new properties have
been added to: Settings -> Security -> Identity Server Settings in order to enable redirects:
- RedirectUrls - you can set an array of addresses which redirects can come to.
- UseHostRedirectValidator - if
true, then the scheme, host and port of the addresses specified in the Redirect Hosts array are used instead of the whole addresses.
API for Embedding Forms
In the previous example, we created an embedded form simply copying the required code. Let us consider API for creating forms in more detail. The methods for creating embedded forms are the following:
Form Embedding API:
WorkflowServer.createEmbeddedForm(
  "http://localhost:8077", // authorityUrl - URL of Identity Server
  "http://localhost:8078",  // formsServerUrl - URL of Forms servers
  "http://localhost:8078/workflow/FlowTestScheme", // URL of the embedded form
  "process-form-FlowTestScheme", // Container ID for the form display
  window.location.href, // URL for redirect after login, the default value - window.location.href
  null, // URL for redirect after logout, if not specified, then the address of signin used
  ELEMENT.lang.en // locale, the default value - ELEMENT.lang.en
);
API for Embedding Scheme Designer:
WorkflowServer.createEmbeddedDesigner(
  "http://localhost:8077",  // authorityUrl - URL of Identity Server
  "http://localhost:8078",  // formsServerUrl - URL of Forms servers
  "/designerapi", // relative URL for Designer API on authorityUrl
  "process-form-FlowTestScheme",  // Container ID for the designer display
  "scheme", // type of the displayed scheme - "scheme" or "process"
  "FlowTestScheme", // Scheme Code or Process ID
  0, // deltaWidth
  0, // deltaHeight
  window.location.href, // URL for redirect after login, the default value - window.location.href
  null, // URL for redirect after logout, if not specified, then the address of signin used
  ELEMENT.lang.en // locale, the default value - ELEMENT.lang.en
);
If redirectUrl for login/logout is not the current page, calling a redirect login/logout save in the User state the following object:
{
  callerUrl: window.location.href
}
It can be used on the page with a redirect to return to the page where the login/logout procedure was performed. This is an example of redirect after user is signed in:
var mgr = new Oidc.UserManager();

mgr.signinRedirectCallback().then(function (user) {
  // get the logged in user by calling signinRedirectCallback
  if (user && !user.expired) {
    // use of the callerUrl value from his session
    location.href = user.state.callerUrl;
  }
});
The session object will be available only if the page from which the login/logout procedure was executed and the page to which the redirect after login/logout was performed, they are both in the same domain.