How to add a custom field to a form
Overview
In addition to the standard form fields, you can create your own custom fields using controls from the Element UI library. Here's an example of how to create a field with DatePicker control and age validation.
In this guide, we will be working with a clone of our public GitHub repository. We strongly recommend that you read the guide on how to build Workflow Server from this repository.
Adding custom control
-
Open or create the Form.
-
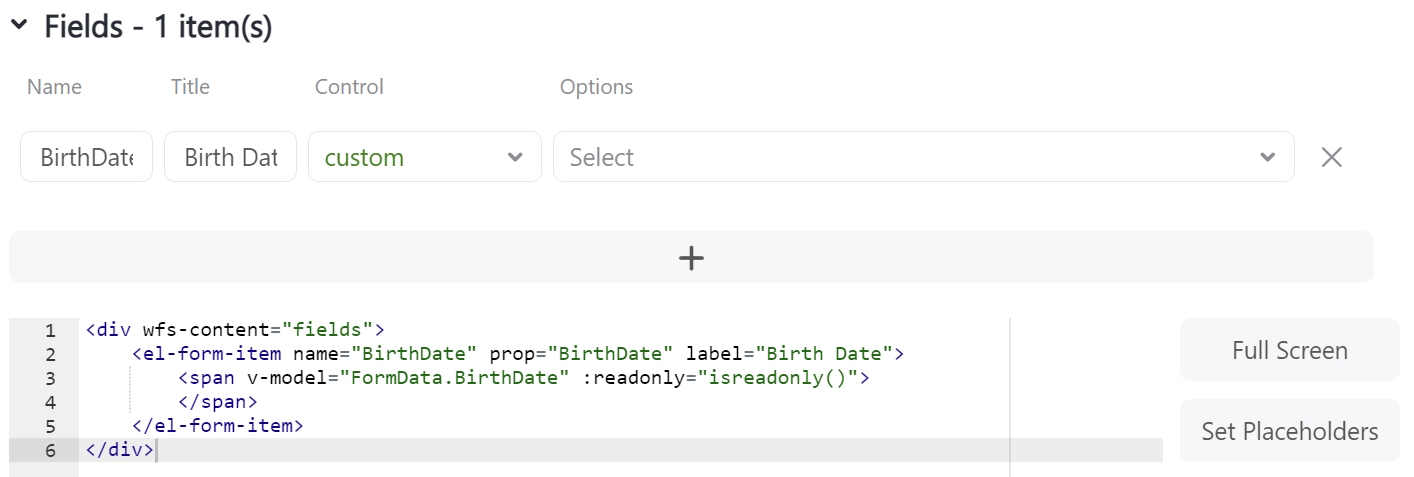
In the Fields section, add a new field with the following parameters: Name: "BirthDate", Title: "Birth date", Control: "custom".
-
Replace the
spantag with el-date-picker.
-
Add the attribute
:rules="[WorkflowServer.Rules.age]"to theel-form-item, it will ensure that custom validation is called.
Here is an example of code:
<div wfs-content="fields"><el-form-item name="BirthDate" prop="BirthDate" label="Birth Date":rules="[WorkflowServer.Rules.age]"><el-date-picker v-model="FormData.BirthDate" :readonly="isreadonly()"></el-date-picker></el-form-item></div> -
To add the validation function, open the WorkflowServer.js file.
-
In the Rules field of the WorkflowServer object, create a new validator:
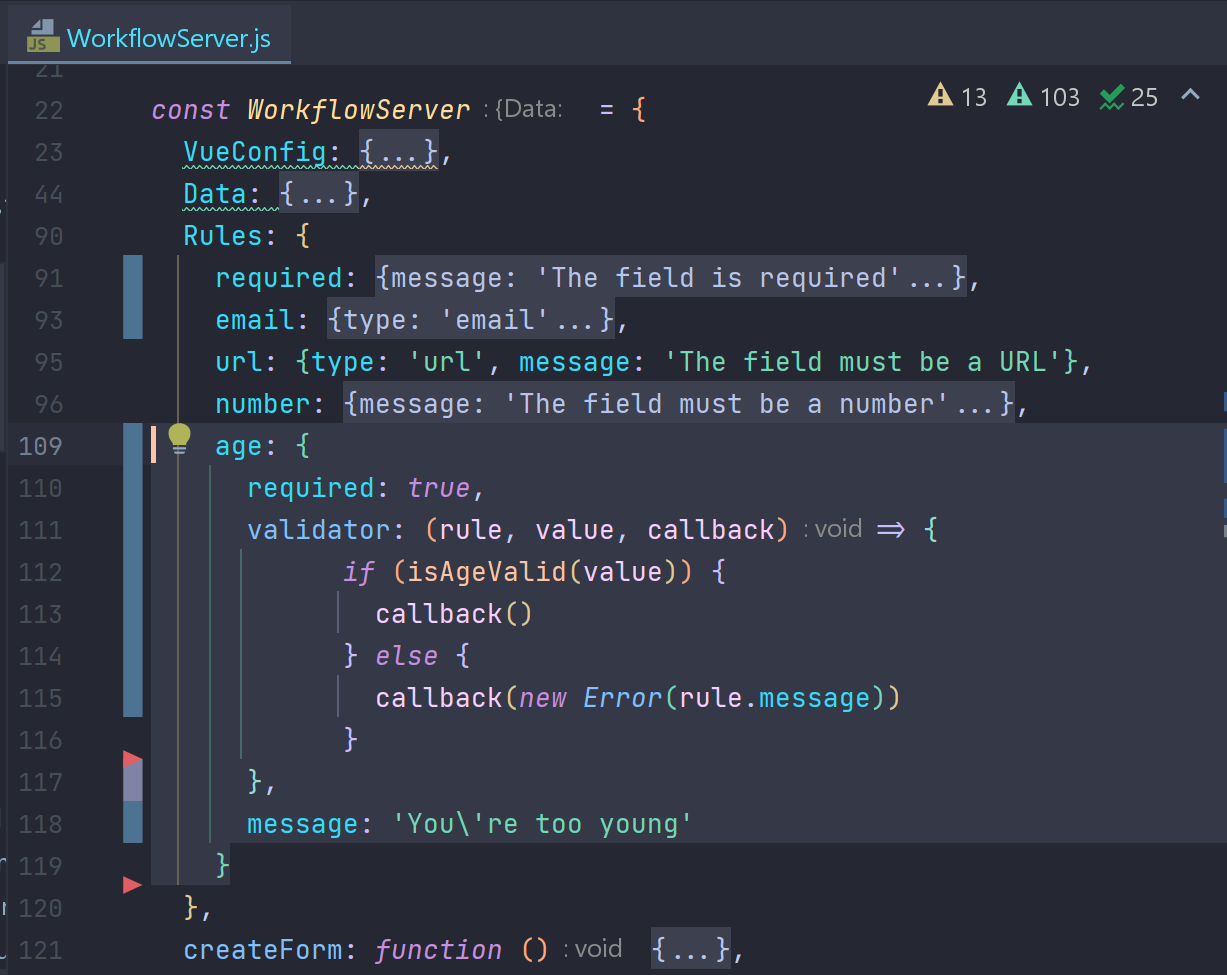
Here is an example of code:
Before the WorkflowServer objectfunction isAgeValid(value) {if (!value) return true;const date = new Date(value);const now = new Date();if (now < date) return false;const age = new Date(now - date);return Math.abs(age.getUTCFullYear() - 1970);}Inside the WorkflowServer objectage: {required: true,validator: (rule, value, callback) => {if (isAgeValid(value)) {callback()} else {callback(new Error(rule.message))}},message: 'You\'re too young'} -
Rebuild the frontend. See this guide for more information.
-
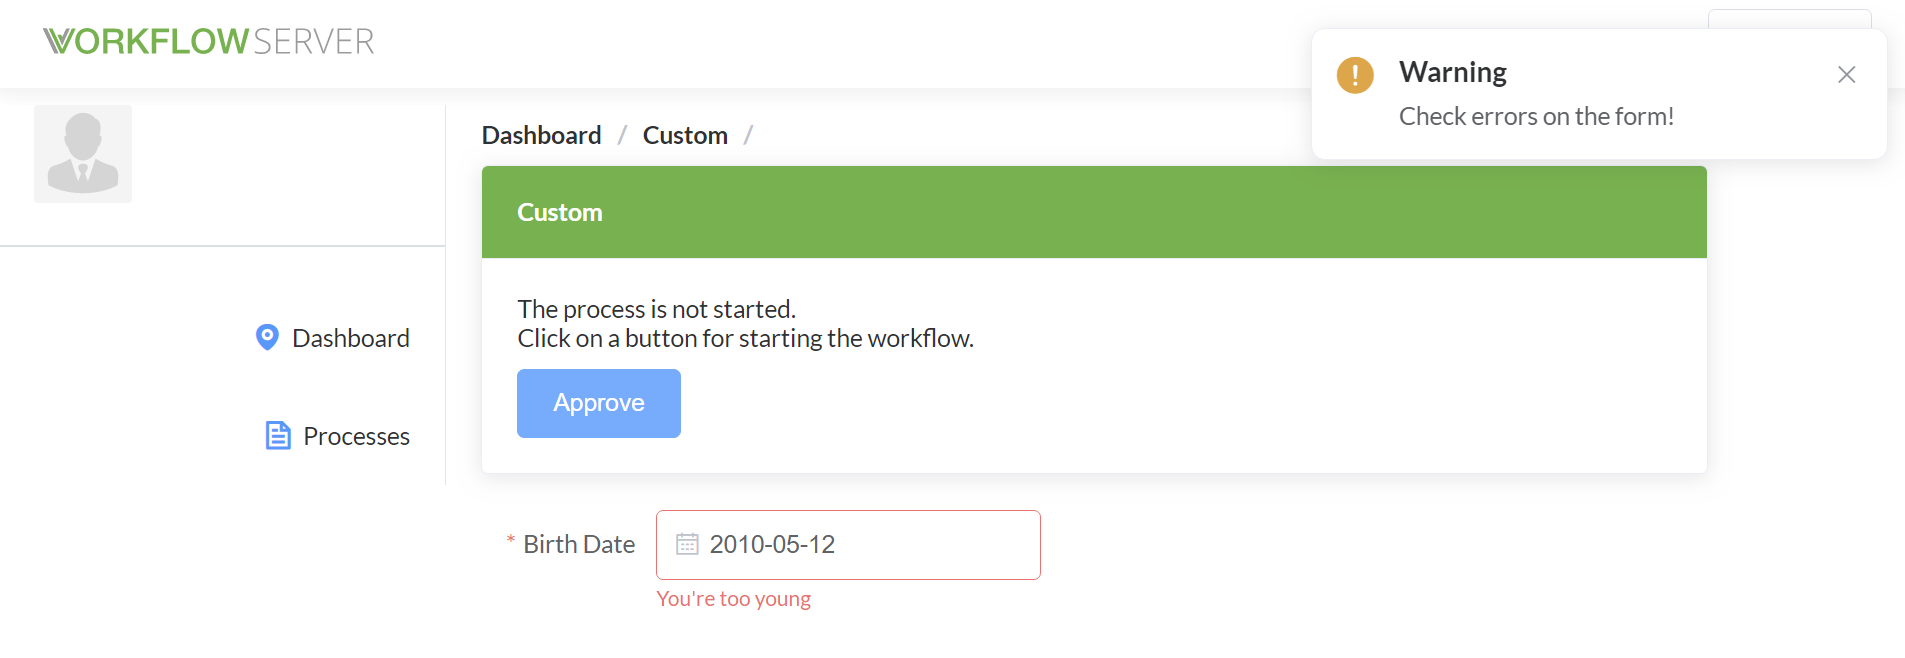
After attaching the form to the process, you can see the result: